To install a coolant temperature sensor, work only on a completely cool engine, disconnect the sensor connector, remove the old sensor, install the correct replacement with the specified seal or O-ring, tighten it to the vehicle manufacturer’s specification, reconnect the wiring, refill and bleed the cooling system as required, and check for leaks and proper temperature readings.
For drivers and DIY mechanics in the United States, replacing an engine coolant temperature sensor is often a manageable repair, but the exact procedure varies by vehicle. Cars, trucks, and SUVs sold in the U.S. can use threaded sensors, push-in sensors retained by clips, or sensors mounted in different parts of the cooling system. The correct service procedure therefore depends on the year, make, model, engine, and sensor design.
The most important safety rule is to let the engine and cooling system cool completely before opening the system or removing the sensor. A pressurized cooling system can release hot coolant or steam and cause severe burns. Manufacturer service procedures also differ on whether the coolant must be drained completely, partially drained, or simply captured as the sensor is removed. Always use the specified sensor, sealing method, and tightening torque for the vehicle being repaired.
Source: i.ytimg.com
What Does a Coolant Temperature Sensor Do?
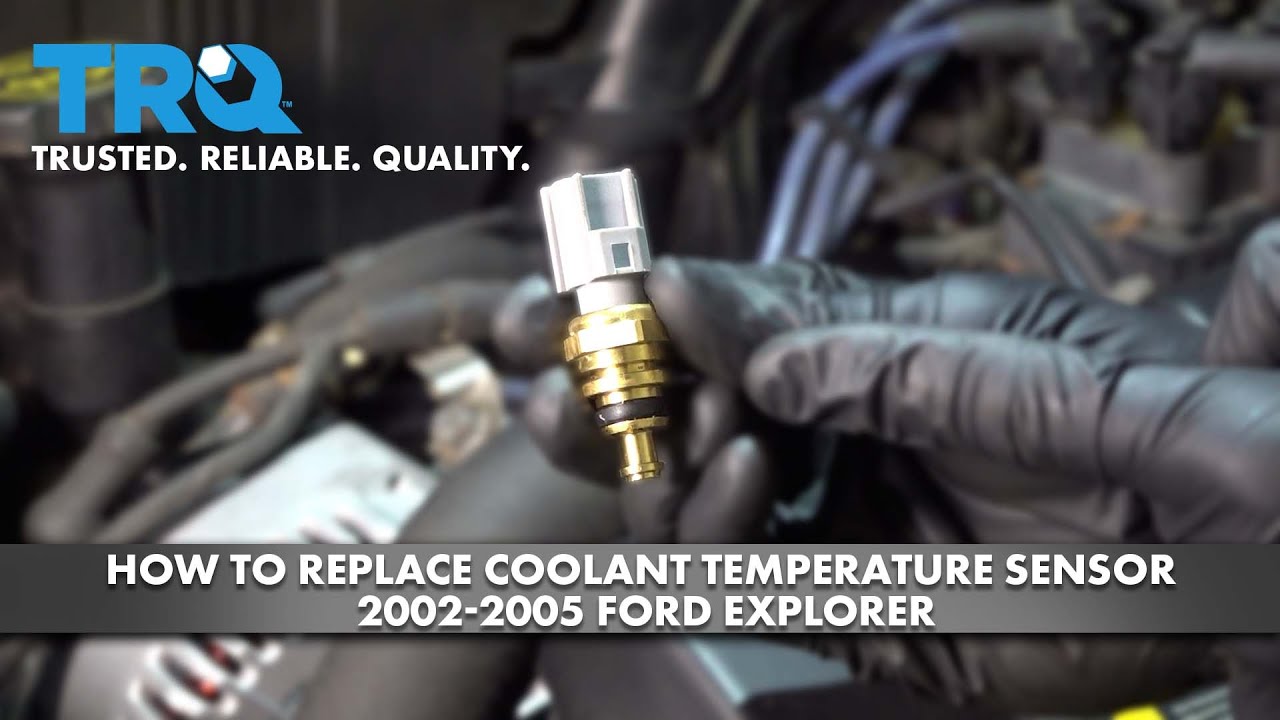
The engine coolant temperature sensor, commonly called the ECT sensor, measures coolant temperature and sends an electrical signal to the engine control module. The computer uses that information for functions such as fuel control, ignition strategy, emissions management, cooling-fan operation, and temperature-related diagnostics. Depending on the vehicle, another temperature sensor or switch may serve the dashboard gauge or warning system.
Because sensor locations and designs vary, do not assume that every temperature sensor under the hood is the ECT sensor used by the engine computer. Confirm the component location and replacement part using the vehicle identification number, engine specification, and service information.
Source: i.ytimg.com
Threaded sensor
The sensor screws into a coolant passage, thermostat housing, cylinder head, engine block, or another coolant outlet. It normally requires the correct socket or wrench and a specified sealing method.
Push-in sensor
Some sensors fit into a housing and are retained by a clip. These commonly use an O-ring rather than thread sealant.
Multiple temperature sensors
Some vehicles have more than one coolant-temperature-related sensor. Confirm which component you are replacing before disconnecting or removing anything.
Why a Bad ECT Sensor Can Cause Problems
A faulty coolant temperature sensor or its circuit can contribute to symptoms such as hard starting, poor fuel economy, unstable engine operation, an illuminated check-engine light, incorrect temperature information, or cooling-fan behavior that does not match engine temperature. These symptoms are not unique to the sensor, so diagnosis should precede replacement when the cause is uncertain.
Check-engine light
An ECT circuit fault can trigger a diagnostic trouble code, but the code should be interpreted together with wiring, connector, and live-data checks.
Incorrect temperature reading
An implausible temperature signal can indicate a sensor problem, a connector fault, damaged wiring, an air pocket, or another cooling-system issue.
What You Need Before Installing a Coolant Temperature Sensor
Gather the replacement sensor and the tools required for your specific vehicle before removing the old part. The exact tool size and access procedure vary considerably between engines. Having the correct coolant, drain container, replacement seal, and torque information ready reduces the chance of leaving the cooling system open while searching for parts or specifications.
Source: i.ytimg.com
Correct replacement sensor
Match the sensor to the exact vehicle, engine, model year, and application. Compare the new part with the old sensor before installation.
Required seal
Use the correct new O-ring, gasket, crush washer, or approved thread sealant when the vehicle requires one. Do not automatically add sealant to an O-ring-style sensor.
Basic hand tools
Depending on the vehicle, you may need a socket set, deep socket, wrench, screwdriver, pick or trim tool, extension, and drain pan.
Torque wrench
Use a torque wrench when the manufacturer specifies a tightening torque. Sensor torque specifications are not universal.
Coolant and refill equipment
Use the coolant type and mixture specified for the vehicle. Some systems require a special bleeding or vacuum-filling procedure.
Safety equipment
Wear safety glasses and chemical-resistant gloves, work on a stable level surface, and use properly rated jack stands if vehicle access underneath is necessary.
Check the Service Information First
Before turning a wrench, verify the sensor location, coolant-draining requirement, connector-release method, sealing method, tightening torque, and cooling-system refill procedure. Published service procedures show why this matters: one vehicle may use a threaded sensor and require partial coolant draining, while another may use an O-ring and retaining clip or require a different torque specification.
Do not copy another vehicle’s torque specification
Torque values can differ even between engines from the same manufacturer. Use the specification for the exact engine being repaired.
Confirm the refill procedure
Some modern cooling systems can trap air if they are not filled or bled correctly. Follow the vehicle-specific cooling-system procedure.
How to Install a Coolant Temperature Sensor
The general installation process is straightforward, but the details must be adapted to the vehicle. The sequence below covers the common procedure for a serviceable ECT sensor while leaving vehicle-specific requirements to the manufacturer’s instructions.
Source: i.ytimg.com
1. Park the Vehicle Safely and Let the Engine Cool
Park the vehicle on a stable, level surface, set the parking brake, and switch the ignition off. Allow the engine and cooling system to cool completely before opening the cooling system. Never remove a radiator or pressure cap from a hot, pressurized system.
If the sensor is difficult to reach and the vehicle must be raised, use a suitable floor jack and properly rated jack stands on the manufacturer’s recommended lift points. Never rely on a jack alone to support a vehicle while working underneath it.
Cooling-system pressure
Hot coolant can be under pressure. Wait until the engine is cool before removing a pressure cap or opening a coolant passage.
Coolant exposure
Collect coolant in a suitable container and prevent spills. Keep coolant away from children and animals because many automotive coolants are toxic.
2. Locate the Correct Coolant Temperature Sensor
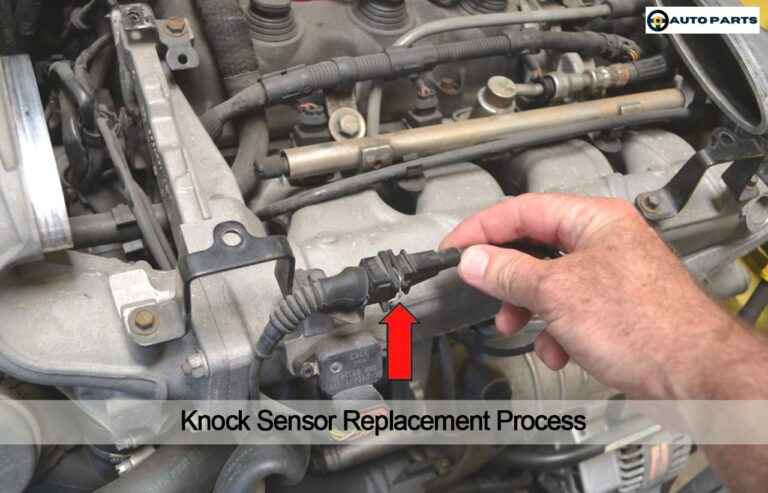
Use the vehicle’s service information to identify the correct ECT sensor. Common locations include the thermostat housing, coolant outlet, cylinder head, intake-area coolant passage, or engine block. Access may require removal of an intake duct, engine cover, electrical component, or other obstruction.
Do not disconnect a sensor simply because it looks similar to the replacement. Some engines have multiple temperature-related sensors with different functions.
Inspect before removal
Look for coolant staining, damaged wiring, corrosion, broken connector locks, or oil and dirt around the sensor.
3. Drain Coolant if the Procedure Requires It
Determine whether the coolant level must be lowered below the sensor. Some procedures call for draining part of the cooling system; others require a full drain. If the sensor is located high enough in the system, only a small amount of coolant may escape, but this should not be assumed.
Close or reinstall the drain plug before refilling later. If the existing coolant is contaminated, incorrect for the vehicle, or due for replacement, follow the manufacturer’s coolant service procedure rather than simply returning the old fluid to the system.
Prevent contamination
Use a clean drain container and keep dirt out of the open coolant system.
Do not mix coolant blindly
Coolant color alone does not reliably identify chemistry or compatibility. Use the specification listed for the vehicle.
4. Disconnect the Electrical Connector
Release the connector using its locking tab or retaining mechanism and pull it straight from the sensor. Do not pull on the wires. If the connector is difficult to release, inspect the locking mechanism rather than forcing it.
Examine the terminals for corrosion, bent pins, looseness, or coolant contamination. A damaged connector or harness can create the same electrical symptoms as a failed sensor.
Connector condition
A clean, fully seated connector is essential for a reliable temperature signal.
5. Remove the Old Sensor
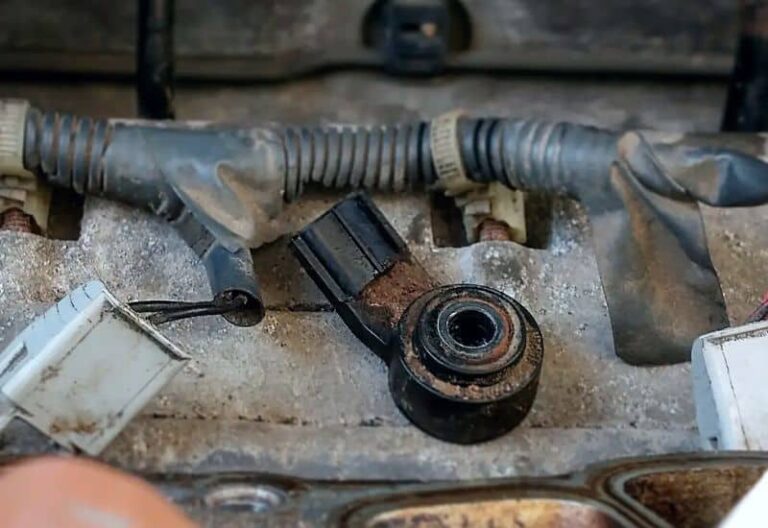
Remove the sensor using the correct socket, wrench, or retaining-clip procedure for the vehicle. Threaded sensors should be loosened carefully to avoid damaging the housing or surrounding components. Push-in sensors should be removed according to their clip or retainer design.
Expect some coolant to escape if the sensor opens a coolant passage. Keep the work area clean and prevent coolant from entering electrical connectors or other sensitive components.
Avoid excessive force
If a threaded sensor is seized, forcing it can damage an engine or housing. Stop and follow the manufacturer’s removal procedure if normal tool pressure does not release it.
6. Prepare the New Sensor and Sealing Surface
Compare the replacement sensor with the old part before installation. Confirm the connector, probe, threads or mounting design, and sealing arrangement match. Clean the mounting surface without allowing debris to fall into the coolant passage.
Install a new O-ring, gasket, or washer when specified. Some threaded sensors come with factory-applied sealant, while other applications specify a particular sealant. Do not substitute an unrelated sealant or add thread sealant to a sensor that seals with an O-ring unless the service information specifically calls for it.
O-ring sensors
Inspect the O-ring for damage and use the specified lubricant or installation method. An O-ring should not be pinched or twisted.
Threaded sensors
Use only the specified thread-sealing method and keep sealant away from the sensing element and electrical connector.
7. Install and Tighten the New Sensor
Start a threaded sensor by hand to reduce the risk of cross-threading. Once it is correctly seated, tighten it with a torque wrench to the manufacturer’s specified value. For a push-in sensor, seat it fully and install the retaining clip or other locking device exactly as specified.
Do not use a generic torque value. Published service information shows that coolant temperature sensor specifications can vary substantially between engines. Overtightening can damage threads, crack a housing, distort a seal, or damage the sensor.
Correct torque
The vehicle-specific service specification is the controlling value. Examples from different service procedures range from approximately 10 N·m to substantially higher values, demonstrating why guessing is inappropriate.
Correct seating
The sensor should sit in its designed position without forcing it beyond the specified stop or retaining mechanism.
8. Reconnect the Sensor Wiring
Push the electrical connector onto the new sensor until the locking mechanism is fully engaged. Give the connector a gentle visual and physical check to confirm that it is secured without pulling on the wiring.
If the connector does not lock correctly, inspect the connector and sensor for damage rather than assuming it will stay connected.
Final connector check
Make sure the connector is fully seated and the wiring is routed away from hot exhaust components, moving parts, and sharp edges.
9. Refill and Bleed the Cooling System
Close the drain valve or reinstall the drain plug, then refill the cooling system with the correct coolant according to the manufacturer’s procedure. Some vehicles require a specific coolant mixture, filling sequence, bleed screw, special funnel, or vacuum filling equipment.
Air trapped in the cooling system can interfere with coolant circulation and temperature readings and may contribute to overheating. Do not assume that simply filling the radiator or expansion tank completes the job.
Use the specified coolant
Follow the vehicle manufacturer’s coolant specification and mixture requirements.
Follow the bleeding procedure
Use the exact bleeding or air-removal procedure for the vehicle, particularly when the cooling system has been substantially drained.
10. Start the Engine and Check for Leaks
Start the engine and allow it to warm according to the vehicle’s service procedure. Watch the sensor area, hoses, thermostat housing, drain points, and other disturbed connections for leaks. Never place your hands near a hot or pressurized coolant leak.
Monitor the coolant level and temperature information as appropriate for the vehicle. After the engine cools again, recheck the coolant level and inspect the repair area for signs of leakage.
Signs of a successful installation
The sensor remains dry at its mounting point, the connector stays secure, coolant level is correct after the specified bleeding process, and the temperature signal behaves plausibly as the engine warms.
Stop if overheating occurs
If the engine temperature rises abnormally, the warning indicator appears, coolant leaks heavily, or the cooling fan behaves unexpectedly, shut the engine down safely and diagnose the problem before continuing.
How Tight Should a Coolant Temperature Sensor Be?
A coolant temperature sensor should be tightened to the exact torque specified for the vehicle and engine. There is no universal torque value for all ECT sensors. Service procedures reviewed for different vehicles demonstrate meaningful differences, including specifications around 10 to 18 N·m for some applications and substantially higher values for certain heavy-duty sensors.
The sealing design also affects installation. A threaded sensor may seal through specified thread sealant, a coated thread, a sealing washer, or another arrangement. An O-ring-style sensor normally relies on the O-ring rather than thread sealant. Follow the specific service information instead of using a generic automotive rule.
Source: d10lvax23vl53t.cloudfront.net
Too loose
Insufficient tightening can allow coolant leakage, movement, or an unreliable seal.
Too tight
Excessive torque can damage threads, distort sealing surfaces, crack housings, or damage the sensor.
No specification available
Do not guess when the correct torque is unknown. Obtain reliable service information for the exact vehicle and engine before installation.
Should You Use Thread Sealant?
Only use thread sealant when the vehicle’s service procedure or sensor manufacturer specifies it. Some sensors already have a pre-applied sealant, while others seal with an O-ring or washer. Adding an incompatible sealant can interfere with sealing or electrical characteristics on applications where the sensor design depends on the threaded interface.
What to Do After Installing the Sensor
After installation, the repair is not complete until the cooling system is properly filled and the sensor circuit is verified. A new sensor cannot compensate for low coolant, trapped air, a damaged connector, or a wiring fault.
If a scan tool is available, compare the coolant temperature data with the engine’s actual condition during a cold start and warm-up. A temperature reading that is implausible before the engine has warmed can point toward an electrical or sensor problem.
Source: i.ytimg.com
Check for leaks
Inspect the sensor mounting area and all disturbed coolant connections during and after warm-up.
Verify coolant level
After the vehicle cools, check the level according to the manufacturer’s procedure rather than relying only on a visual check immediately after running the engine.
Check diagnostic codes
If the check-engine light remains on, retrieve diagnostic trouble codes and diagnose the circuit instead of automatically replacing another component.
Confirm normal temperature behavior
The temperature signal should change plausibly as the engine warms. Abnormal readings require further diagnosis.
If the New Sensor Still Shows the Wrong Temperature
Do not assume the replacement sensor is defective. Recheck the electrical connector, terminals, wiring, coolant level, air bleeding procedure, sensor part number, and installation. A poor electrical connection can alter the sensor signal, while trapped air or insufficient coolant can prevent the sensor from accurately reflecting coolant temperature.
If the vehicle uses a scan tool, compare the reported ECT value with other available temperature information and the actual cold-engine condition. If the signal remains implausible, use the manufacturer’s diagnostic procedure to test the circuit and sensor.
Connector problem
Look for corrosion, loose terminals, broken locks, or incomplete connector engagement.
Wiring problem
Inspect for damaged, stretched, burned, or shorted wires between the sensor and engine-control system.
Air in the cooling system
Repeat the manufacturer-specified bleeding procedure if air may have remained after coolant service.
Incorrect replacement part
Verify the sensor part number and application against the exact engine and model year.
Common Mistakes When Installing a Coolant Temperature Sensor
Most installation problems come from using the wrong part or procedure rather than from the basic act of removing and installing the sensor. Avoiding a few common errors can prevent coolant leaks, damaged threads, electrical faults, and overheating.
Source: i.ytimg.com
Opening the cooling system while hot
This can expose you to pressurized hot coolant or steam. Always wait for the system to cool.
Using the wrong sensor
Similar-looking sensors can have different electrical characteristics, connectors, or applications.
Reusing a damaged seal
A flattened, cut, hardened, or otherwise damaged O-ring or gasket can leak after installation.
Guessing the torque
Sensor torque is vehicle-specific. Over-tightening can cause expensive damage.
Applying sealant where it is not required
An O-ring sensor normally does not need thread sealant, and an incorrect sealant can interfere with the intended sealing system.
Skipping coolant bleeding
Air trapped in the cooling system can cause poor circulation, abnormal temperature behavior, or overheating.
Ignoring connector damage
A faulty connector or wiring harness can make a good replacement sensor appear defective.
Failing to inspect for leaks
A small leak can become a larger cooling-system problem. Inspect the repair area after installation and again after the engine has cooled.
When Should You Have a Professional Install the Sensor?
A coolant temperature sensor replacement may be suitable for an experienced DIY mechanic, but professional service is appropriate when access is difficult, the sensor is seized, the cooling system requires specialized filling equipment, coolant leaks persist, or the engine overheats after the repair.
Professional diagnosis is also advisable when the original problem is uncertain. Temperature-related symptoms can result from the sensor, wiring, thermostat, cooling fan, coolant level, water pump, air in the system, engine-control faults, or other cooling-system problems. Replacing the sensor without confirming the cause can leave the underlying problem unresolved.
Source: i.ytimg.com
Stop and seek help for persistent overheating
Do not continue driving an overheating vehicle simply because the temperature sensor has been replaced.
Seek help for seized components
If removing the sensor risks breaking a housing or damaging engine threads, use the manufacturer’s removal procedure or a qualified technician.
Seek help for repeated coolant loss
A recurring loss of coolant indicates a leak or another cooling-system problem that should be diagnosed.
Frequently Asked Questions
Q
Can I replace a coolant temperature sensor without draining the coolant?
Sometimes, but it depends on the sensor’s location and the vehicle’s service procedure. If the sensor is positioned below the coolant level, coolant will escape when it is removed and the system normally needs to be drained to an appropriate level first. A sensor located high in the cooling system may lose less coolant, but you should still follow the manufacturer’s instructions.
Q
Do I need to disconnect the battery when replacing an ECT sensor?
Many service procedures specify disconnecting the negative battery cable, while the exact requirement varies by vehicle. Follow the procedure for the specific vehicle, especially if removing nearby electrical components or working around wiring.
Q
How do I know if the coolant temperature sensor was installed correctly?
The sensor should be the correct part, fully seated with the specified seal, tightened to the correct torque when applicable, and connected securely. After the cooling system is refilled and properly bled, there should be no coolant leak and the temperature signal should behave plausibly as the engine warms.
Q
Why is my car still overheating after replacing the coolant temperature sensor?
Replacing the sensor does not repair other cooling-system faults. Possible causes include low coolant, trapped air, a thermostat problem, radiator restriction, cooling-fan failure, water-pump problems, a coolant leak, or an incorrect installation. Stop driving if the engine overheats and diagnose the cooling system before continuing.
Q
Should I clear the check-engine light after installing the sensor?
If a diagnostic trouble code was stored, it is generally better to diagnose and verify the repair before clearing it. A scan tool can be used to clear codes after the fault has been corrected, but the vehicle may also turn the warning light off after the relevant fault no longer occurs and the required monitoring conditions are met.
✦ Wrapping Up
Conclusion
Installing a coolant temperature sensor is usually a manageable repair when the correct sensor and vehicle-specific procedure are used. The essential sequence is to cool the engine completely, identify the correct sensor, lower the coolant level if required, disconnect the connector, remove the old sensor, install the correct seal or sealing method, tighten the replacement to specification, reconnect the wiring, refill and bleed the cooling system, and check the finished repair for leaks and proper operation.
The most important variables are vehicle-specific: sensor design, location, sealing method, torque specification, coolant type, and air-bleeding procedure. Treat those details as mandatory rather than interchangeable. If the engine continues to overheat, the temperature reading remains implausible, or coolant leaks after installation, stop and diagnose the underlying problem instead of repeatedly replacing parts.
💡 Key Takeaway
Before installing the new coolant temperature sensor, obtain the service procedure for the exact year, make, model, and engine. Verify the sensor part number, sealing method, torque specification, coolant requirement, and bleeding procedure, then perform the repair only with the engine fully cool.
Ethan Brooks is an automotive writer at Auto News 7, covering car news, vehicle maintenance, new model updates, recalls, and practical buying guides. He focuses on clear, useful information that helps drivers understand their vehicles and make better ownership decisions.
Learn how to replace knock sensor components safely with this step-by-step guide. Discover required tools, replacement procedures, common mistakes, troubleshooting tips, and signs of a successful repair.
Learn what happens when a knock sensor goes bad, including common symptoms, engine performance issues, diagnostic trouble codes, and whether it is safe to keep driving.
Learn how to fix a camshaft position sensor with step-by-step troubleshooting, testing, replacement instructions, common symptoms, costs, and repair tips.
Learn whether a car can run without a knock sensor, what symptoms to expect, potential engine risks, diagnostic trouble codes, and when replacement is necessary.
Learn what a knock sensor detects, how it works, why engine knock matters, common symptoms of failure, and how the sensor helps protect engine performance.