To remove a coolant temperature sensor, let the engine and cooling system cool completely, locate the correct sensor, reduce the coolant level below the sensor when required, disconnect its electrical connector, and remove the sensor using the correct wrench or socket. The exact removal method varies by vehicle, so use the vehicle-specific service information for the sensor location, access procedure, seal type, and tightening specification.
For vehicles sold and serviced in the United States, an engine coolant temperature sensor, commonly called an ECT sensor, is typically installed in a coolant passage in the cylinder head, engine block, thermostat housing, water outlet, or another cooling-system component. Removing it is often a straightforward mechanical job, but coolant can escape as soon as the sensor is removed, and hot pressurized coolant can cause severe burns.
The safest approach is to work only on a completely cold engine, identify the correct sensor before disconnecting anything, and determine whether the vehicle requires a partial or complete coolant drain. Some sensors are threaded and unscrew with a wrench or deep socket, while others are retained by a clip and pull out of a housing with an O-ring. Do not assume that every coolant temperature sensor uses the same removal method.
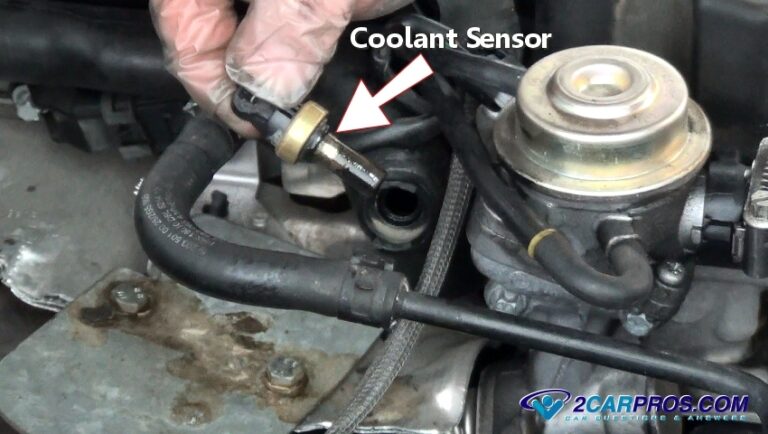
Source: fcpeuro.com
What Is a Coolant Temperature Sensor?
A coolant temperature sensor measures engine coolant temperature and provides an electrical signal to an engine control module or another vehicle control system. The module can use that information for functions such as fuel control, ignition management, cooling-fan operation, emissions control, and cold-start strategy. Some vehicles also use a separate temperature sender for the dashboard gauge.
The sensor may look similar across many vehicles, but its mounting method and electrical connector can differ significantly. Before removing anything, verify that you have identified the correct component for the specific year, make, model, engine, and market configuration.
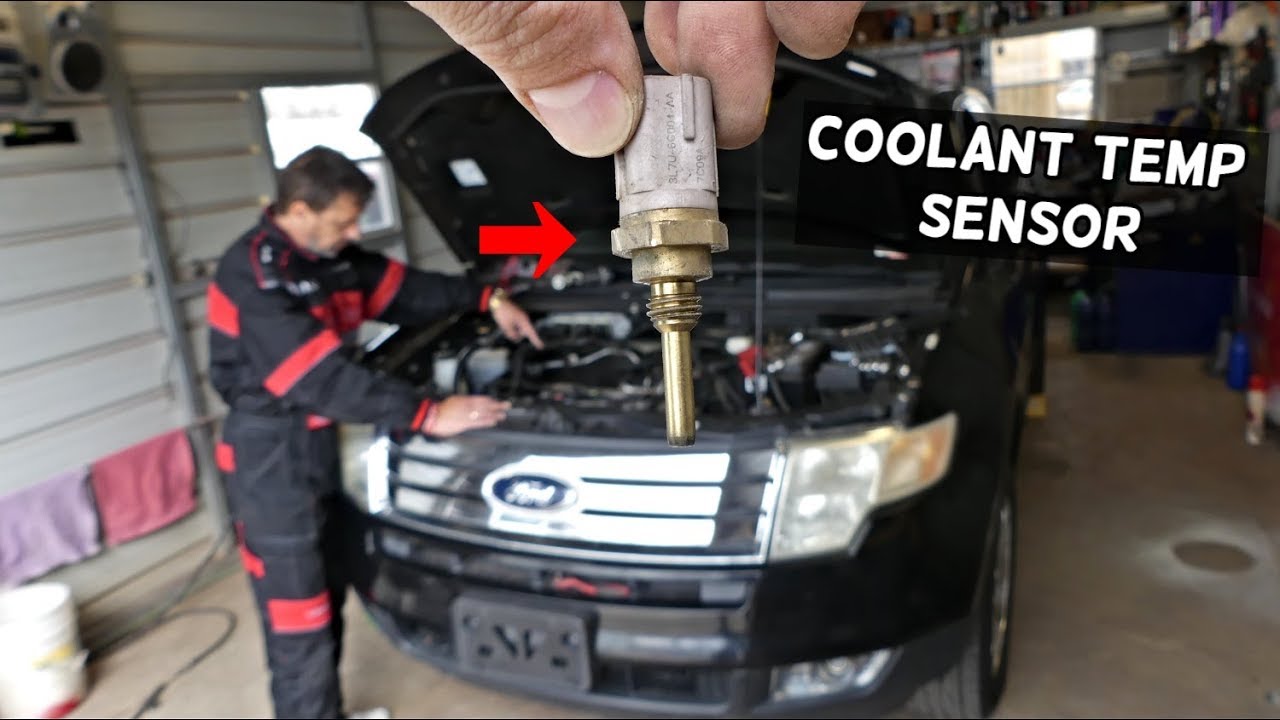
Source: www.youtube.com
Threaded ECT sensor
The sensor screws into a threaded coolant passage and is removed with a suitable wrench or socket. A sealing washer, tapered thread, or other sealing arrangement may be used depending on the design.
O-ring and retaining-clip sensor
The sensor fits into a coolant housing and is held by a spring or retaining clip. Removing the clip allows the sensor to be pulled from the housing, usually with an O-ring providing the seal.
Multiple temperature sensors
Some vehicles use more than one coolant temperature sensor or temperature-related sender. Confirm the component against the service information before removal.
Where Is the Coolant Temperature Sensor Located?
The location varies by vehicle. Common locations include the thermostat housing, cylinder head, engine block, coolant outlet, water pump assembly, or another coolant passage. The most reliable way to identify the location is the service or repair information for the exact vehicle and engine.
Look for the electrical connector
The ECT sensor normally has an electrical connector attached to it, which helps distinguish it from nearby coolant fittings and plugs.
Check the thermostat area
Many engines position the sensor near the thermostat housing or coolant outlet, although this is not universal.
Tools and Supplies Needed Before Removal
Gather the required tools before opening the cooling system. The exact tool size depends on the vehicle, and access may require removing an engine cover, air intake component, bracket, or other parts. Do not force a socket that does not fit the sensor hex correctly because the sensor can be damaged or rounded.
Have a suitable drain pan available even if the service procedure calls for only a partial coolant drain. A small amount of coolant may remain in the passage and escape when the sensor is removed.
Source: 2CarPros
Basic hand tools
Use the appropriate ratchet, extension, wrench, deep socket, or specialty tool specified for the vehicle.
Coolant drain pan
Place a clean drain pan beneath the sensor area to collect coolant that escapes during removal.
Safety equipment
Wear safety glasses and suitable gloves, and keep coolant away from hot surfaces, electrical connectors, belts, and rotating components.
Replacement sealing parts
If the sensor will be replaced, obtain the correct O-ring, gasket, or sealing washer specified for the sensor design. Do not automatically reuse an old seal.
Should You Drain the Coolant First?
Often, yes. The required amount depends on the sensor’s location. A sensor positioned high in the engine may allow only a small amount of coolant to escape after the coolant level is lowered below it. A sensor positioned lower in the cooling system may require substantially more coolant to be drained.
Vehicle-specific service information should determine the drain procedure. Do not open a hot radiator cap or coolant reservoir on a pressurized system. If the engine has recently been operating, wait until it is completely cool before beginning.
Partial drain
Used on some vehicles when the sensor is above a suitably lowered coolant level.
Complete drain
Required on some designs or recommended by some manufacturers before removing the sensor.
Minimal coolant loss
Possible on certain high-mounted sensors, but you should still have a drain pan ready and follow the manufacturer’s procedure.
How to Remove a Coolant Temperature Sensor
The general removal sequence is cold engine, identify the sensor, lower the coolant level as required, disconnect the electrical connector, remove any retaining hardware, and then remove the sensor itself. The exact sequence can change when access components or a special retaining system are involved.
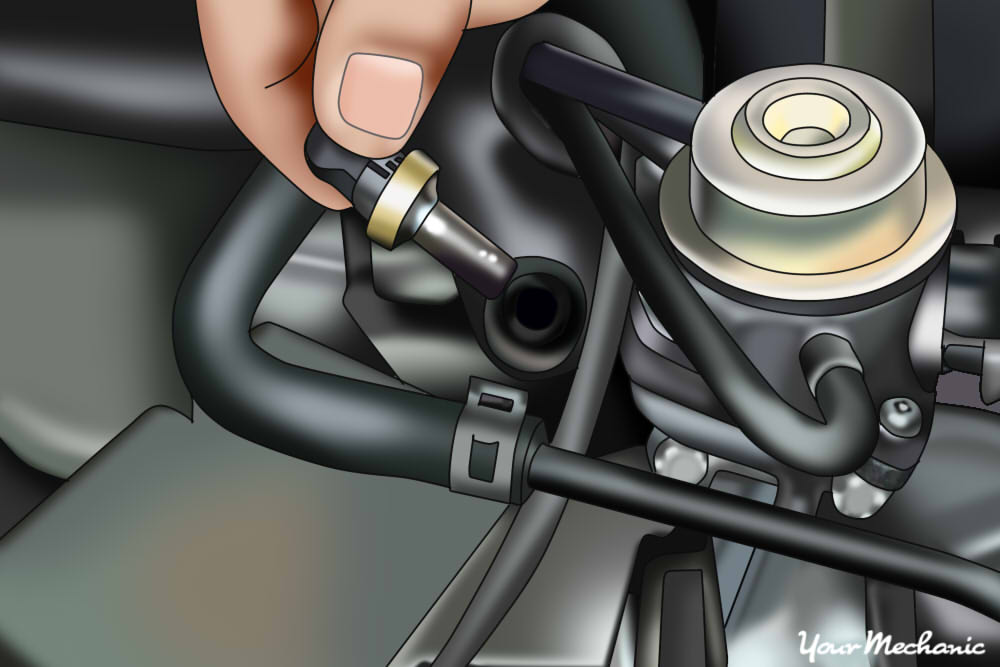
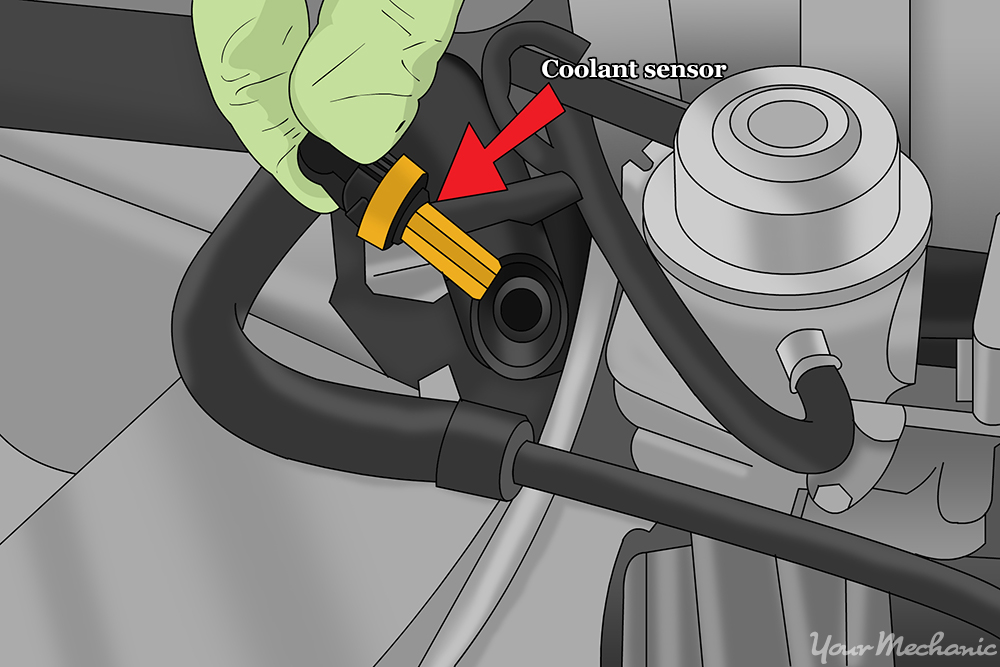
Source: YourMechanic
Step 1: Let the engine cool completely
Park the vehicle on a stable surface, shut the engine off, and wait until the engine and cooling system are completely cool. Never remove the sensor from a hot pressurized cooling system.
Step 2: Identify the correct sensor
Use the vehicle-specific service information to locate the ECT sensor and confirm that you are working on the correct component.
Step 3: Disconnect the battery if specified
If the vehicle’s service procedure calls for battery disconnection, disconnect the negative battery cable using the prescribed procedure. Be aware that disconnecting the battery can affect stored settings on some vehicles.
Step 4: Lower the coolant level
Drain enough coolant to bring the coolant level below the sensor when required. Capture the coolant in a suitable container and follow applicable local requirements for handling and disposal.
Step 5: Gain access to the sensor
Remove only the covers, intake components, brackets, or other parts necessary to reach the sensor. Keep track of fasteners and avoid disconnecting unrelated systems.
Step 6: Disconnect the electrical connector
Release the connector lock or retaining clip and pull the connector from the sensor body. Support the connector rather than pulling on the wires.
Step 7: Remove any retaining clip
If the sensor uses a spring clip or retaining bracket, remove or release it according to the vehicle’s procedure. Keep the clip secure because it may be reused if the service information permits.
Step 8: Remove the sensor
For a threaded sensor, place the correct wrench or socket squarely on the sensor and turn it counterclockwise. For an O-ring-mounted sensor, pull it straight out after the retaining clip has been released. Be prepared for coolant to escape.
Step 9: Remove the old seal
Recover the old O-ring, washer, or gasket if it remains in the housing. Do not leave an old O-ring in the bore when installing another one.
Step 10: Inspect the mounting area
Check the threads or sensor bore for corrosion, debris, damaged sealing surfaces, or pieces of the old seal. Clean the area without allowing debris to fall into the coolant passage.
Removing a Threaded Coolant Temperature Sensor
A threaded ECT sensor is removed by turning the sensor out of its coolant passage with the correct tool. Use steady force and keep the tool aligned with the sensor. If the sensor is seized, stop rather than applying excessive force that could damage the housing or break the sensor.
Some threaded sensors use a sealing washer, while others rely on a specified thread-sealing arrangement. The replacement procedure must follow the vehicle manufacturer’s specification rather than assuming a generic sealant or torque value.
Use the correct socket
A properly fitting deep socket or wrench reduces the chance of rounding the sensor.
Expect coolant
Even after draining the system, residual coolant can remain around the sensor and escape when it is removed.
Do not guess torque
Sensor tightening torque varies by vehicle and sensor design. Use the manufacturer’s specification during installation.
Removing an O-Ring and Retaining-Clip Sensor
Some ECT sensors are not threaded into the engine. Instead, the sensor slides into a coolant housing and is secured by a retaining clip. After disconnecting the electrical connector, remove or release the clip and pull the sensor from the housing.
The O-ring is critical to sealing the coolant passage. If it remains in the housing after the sensor is removed, remove it carefully and verify that no portion of the old seal remains in the groove or bore.
Release the clip first
Do not force the sensor out while the retaining clip is still engaged.
Inspect the O-ring
Look for flattening, cracking, cuts, swelling, or other damage and replace it according to the service procedure.
What to Do After Removing the Sensor
If you are replacing the sensor, install the correct replacement using the specified sealing method and tightening procedure. If the job is only for inspection or diagnosis, protect the exposed opening from contamination and reinstall the original component according to the service instructions.
After installation, restore the coolant level with the correct coolant specified for the vehicle. The cooling system may require a specific bleeding or air-removal procedure. Air trapped in the cooling system can interfere with temperature control and may cause overheating on some vehicles.
Source: storage.googleapis.com
Use the correct replacement seal
Install the specified new O-ring, gasket, or washer when the service procedure calls for replacement.
Follow the specified torque
Use the vehicle-specific tightening specification instead of a generic torque value.
Refill correctly
Use the correct coolant type and concentration and follow the manufacturer’s refill and bleeding procedure.
Check for leaks
Inspect the sensor and surrounding housing after the system has been refilled and pressurized.
Verify operation
Confirm that the temperature reading behaves normally and check for warning lights or diagnostic trouble codes when applicable.
Signs the Sensor Removal and Reinstallation Was Successful
A successful repair leaves the sensor securely mounted, the electrical connector fully locked, and the cooling system at the specified level without leaks. Once the engine reaches operating temperature, the temperature reading should behave consistently with the vehicle’s normal operation.
If the temperature rises abnormally, coolant leaks, the cooling fan behaves unexpectedly, or a warning light appears, shut the engine down when appropriate and investigate before continuing to drive.
No coolant leakage
The sensor and its sealing surface remain dry after the system reaches operating temperature and pressure.
Secure connector
The electrical connector is fully seated and its locking mechanism is engaged.
Normal temperature behavior
The gauge or scan-tool temperature data behaves consistently with normal engine operation.
Common Problems When Removing a Coolant Temperature Sensor
Most difficulties occur because the sensor is difficult to access, the electrical connector is brittle, the sensor is seized, or the cooling system was not prepared correctly. Older vehicles can have hardened plastic connectors and corrosion around the sensor or housing, so forcing components can turn a simple repair into a larger one.
Source: detroitchinatown.org
The connector will not release
Inspect the locking tab or retaining clip carefully. Do not pull on the wires. If the plastic is brittle, use the appropriate small pick or connector-release technique described by the vehicle service information.
The sensor is stuck
Verify that the tool fits correctly and that the sensor is actually threaded. Excessive force can damage an aluminum housing, break the sensor, or strip its hex.
Coolant keeps leaking
Stop and confirm that the coolant level has been lowered sufficiently and that the system is completely cool. Some locations naturally retain coolant even after a partial drain.
The old O-ring is missing
Check the sensor bore and housing before installing the replacement. An old O-ring left behind can prevent the new sensor from seating correctly.
The sensor breaks during removal
Do not continue driving with a damaged sensor or exposed coolant passage. If part of a threaded sensor remains in the engine or housing, extraction may require specialized tools or professional repair.
When You Should Stop and Get Professional Help
Professional assistance is appropriate when access requires disturbing air-conditioning components, fuel-system components, major engine components, or other systems outside the sensor repair. It is also wise to stop if the sensor breaks, the housing cracks, the connector is damaged, or you cannot identify the correct component or sealing procedure.
A cooling-system repair should not be treated as complete if the system cannot be refilled and properly bled. Overheating caused by trapped air or insufficient coolant can result in serious engine damage.
Damaged housing
Stop if the coolant housing or engine mounting area cracks, strips, or becomes damaged.
Broken sensor
Use the appropriate extraction procedure rather than forcing the remaining threaded section.
Uncertain bleeding procedure
Consult the vehicle-specific service information or a qualified technician if you cannot determine how the cooling system must be purged of air.
Common Mistakes to Avoid
Removing the sensor is mechanically simple on many vehicles, but several shortcuts can create unnecessary damage or safety risks. The most serious mistake is opening a hot cooling system. Other common errors include removing the wrong sensor, pulling on the wiring, reusing a damaged seal, and guessing the installation torque.
Source: detroitchinatown.org
Opening the cooling system while hot
Hot coolant and steam can escape under pressure and cause severe burns. Wait until the system is completely cool.
Pulling the wiring harness
Release the connector lock and pull on the connector body instead of the wires.
Skipping coolant management
Have a drain pan ready and lower the coolant level as required by the vehicle procedure.
Using the wrong tool
An incorrectly sized socket can round the sensor and make removal substantially harder.
Reusing a damaged seal
A flattened, cracked, cut, or otherwise compromised O-ring or washer can cause a coolant leak.
Guessing specifications
Location, torque, sealant requirements, coolant type, and bleeding procedures are vehicle-specific.
Is It Safe to Remove the Sensor Without Draining All the Coolant?
Not every vehicle requires a complete coolant drain. Some service procedures call for lowering the coolant below the sensor, while others specify draining the cooling system before sensor removal. The deciding factors are the sensor location, coolant passage design, and manufacturer’s procedure.
Do not rely on the assumption that a small sensor means only a small amount of coolant will escape. Prepare for coolant loss and follow the procedure for the exact vehicle.
High-mounted sensor
A partial drain may be sufficient when the sensor is positioned above the reduced coolant level.
Low-mounted sensor
A greater coolant drain may be necessary because coolant can remain above the sensor opening.
How to Decide Whether the Sensor Actually Needs Replacement
Removing the coolant temperature sensor should not automatically be the first diagnostic step just because the temperature gauge or engine behavior is abnormal. A faulty connector, damaged wiring, coolant problem, thermostat issue, cooling-fan fault, or another engine-management problem can produce similar symptoms.
Where diagnostic equipment is available, compare coolant temperature data with other relevant information and inspect the connector and wiring before condemning the sensor. If resistance testing is specified, use the temperature-versus-resistance values for the exact sensor rather than a generic range.
Source: hitchesguide.com
Erratic temperature reading
Can result from the sensor, connector, wiring, instrument system, or an actual cooling-system problem.
Check-engine light
A diagnostic trouble code can help identify a circuit or temperature-related fault, but the code does not automatically prove that the sensor itself has failed.
Poor engine operation
Incorrect coolant temperature information can affect engine management, but other faults can produce similar symptoms.
Why the Connector Matters
A sensor can be electrically sound while its connector or wiring has corrosion, loose terminals, broken conductors, or poor contact. Inspect the connector before replacing an otherwise serviceable sensor.
Inspect terminals
Look for corrosion, contamination, bent terminals, or signs of poor contact.
Inspect wiring
Check for broken insulation, stretched wires, chafing, or damage near the connector.
Frequently Asked Questions
Q
Can I remove a coolant temperature sensor while the engine is warm?
No. The cooling system can remain pressurized after the engine is shut off, and hot coolant or steam can cause serious burns. Wait until the engine and cooling system are completely cool before opening the system or removing the sensor.
Q
Do I have to drain all the coolant to remove the ECT sensor?
Not always. Some vehicles require only enough coolant to be drained to lower the level below the sensor, while others specify a complete drain. Follow the procedure for the exact vehicle and sensor location.
Q
What tool do I need to remove a coolant temperature sensor?
The required tool depends on the sensor design. Threaded sensors commonly use an appropriately sized wrench or deep socket, while some sensors use a retaining clip and pull out of a coolant housing. Check the vehicle-specific service information before selecting the tool.
Q
Why is my coolant temperature sensor difficult to remove?
Corrosion, restricted access, an incorrectly sized tool, or a sensor that has seized in its mounting can make removal difficult. Verify that the component is threaded if you are trying to unscrew it and use the correct tool. Avoid excessive force that could damage the sensor housing or engine.
Q
Should I replace the O-ring when removing the coolant temperature sensor?
If the sensor uses an O-ring and the service procedure specifies replacement, install a new one. Even when an old O-ring looks usable, it can be flattened, hardened, cut, or otherwise unsuitable for reuse. Follow the replacement sensor and vehicle manufacturer’s sealing requirements.
✦ Wrapping Up
Conclusion
Removing a coolant temperature sensor is usually manageable with basic mechanical tools, but the cooling system must be treated as a pressurized system until it is completely cold. The essential sequence is to identify the correct sensor, prepare the coolant system, disconnect the electrical connector without damaging the wiring, and remove the sensor using the correct method for its mounting design.
Because sensor locations, retaining systems, sealing methods, coolant requirements, and torque specifications vary between vehicles, the vehicle-specific service information should control the procedure whenever it differs from this general guide. After installation, restore the coolant level, bleed the system as required, inspect for leaks, and verify normal engine temperature behavior.
💡 Key Takeaway
Before removing the sensor, confirm three things in the vehicle-specific service information: the exact sensor location, whether the coolant must be partially or completely drained, and the correct removal and installation procedure. Never open a hot cooling system.
Ethan Brooks is an automotive writer at Auto News 7, covering car news, vehicle maintenance, new model updates, recalls, and practical buying guides. He focuses on clear, useful information that helps drivers understand their vehicles and make better ownership decisions.
Learn whether a bad knock sensor can cause stalling, how it affects engine performance, common symptoms, diagnostic steps, and when replacement may be necessary.
Learn how to replace a coolant temperature sensor safely, including tools, sensor removal, installation, coolant refill, bleeding, testing, and common mistakes.
Learn when to replace a camshaft position sensor, the warning signs of failure, diagnostic tips, replacement timing, costs, and whether it is safe to keep driving.
Learn whether a camshaft sensor needs to be programmed after replacement, when relearn procedures are required, common symptoms, troubleshooting steps, and what to expect during installation.
Learn whether a car can run without a knock sensor, what symptoms to expect, potential engine risks, diagnostic trouble codes, and when replacement is necessary.