To fix an oil pressure sensor problem, verify engine oil pressure first, inspect the wiring, then replace the faulty sensor if pressure is normal.
For drivers in the United States, an oil pressure warning deserves immediate attention because a faulty sensor and genuinely low engine oil pressure can produce similar symptoms. The sensor may be defective, but low oil level, damaged wiring, a clogged filter, an oil pump problem, or internal engine wear can also cause an oil pressure warning.
The safest way to determine how to fix an oil pressure sensor problem is to diagnose the cause before installing a replacement. Start by checking the oil level and condition, inspect the sensor connector and wiring, and use a mechanical oil pressure gauge when the diagnosis is uncertain. If actual oil pressure is within the vehicle manufacturer’s specification and the circuit is sound, replacing the sensor or switch is often the appropriate repair.
Source: i.ytimg.com
What Does an Oil Pressure Sensor Do?
An oil pressure sensor measures engine oil pressure and sends a signal to the vehicle’s gauge, warning system, engine computer, or a combination of these systems. Some vehicles instead use a simple oil pressure switch that turns a warning circuit on or off when pressure crosses a specified threshold.
The exact component and signal type depend on the vehicle. That distinction matters because a sensor, switch, and sending unit may require different testing procedures. The vehicle’s service information should be used for the exact electrical specifications, connector configuration, thread size, and installation procedure.
A sensor problem can produce a warning light, an inaccurate gauge, an erratic pressure reading, or a diagnostic trouble code. However, the same warning can occur when the engine really has inadequate oil pressure, so replacing the sensor without testing can miss a serious mechanical fault.
Source: i.ytimg.com
Oil pressure sensor
A variable-output device that reports pressure information to vehicle electronics or the instrument cluster.
Oil pressure switch
A threshold device that typically opens or closes an electrical circuit when oil pressure reaches a specified level.
Sending unit
A common automotive term that may refer to an oil pressure sensor or switch, depending on the vehicle.
Why an Oil Pressure Sensor Can Seem Broken
A sensor cannot determine whether the engine’s oil pressure is healthy if the underlying lubrication system has a problem. Low oil level, incorrect oil, a restricted filter or pickup, an oil pump fault, or internal engine wear can all affect measured pressure.
Electrical faults can also imitate sensor failure. A damaged wire, loose connector, corrosion, or oil contamination at the connector can interrupt or distort the signal. This is why diagnosis should separate the pressure problem from the electrical reporting problem.
False warning
The sensor or its circuit reports a problem even though actual engine oil pressure is normal.
Real low pressure
The sensor is accurately reporting inadequate oil pressure caused by a lubrication-system or engine problem.
Check These Things Before Replacing the Sensor
Before trying to fix an oil pressure sensor problem by replacing the part, check the engine oil and the sensor circuit. These basic inspections can identify problems that a new sensor will not solve.
Park the vehicle on a suitable level surface and follow the owner’s manual procedure for checking the oil. If the oil level is low, correct the level using the specified oil before continuing diagnosis. Do not treat adding oil as proof that the sensor is defective.
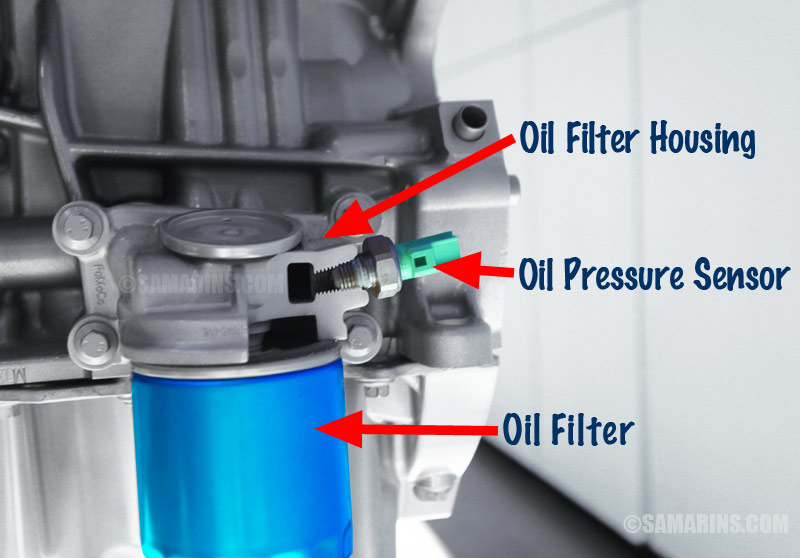
Next, inspect the area around the sensor. Look for oil leaking from the sensor body or its mounting area, a cracked housing, damaged insulation, a loose connector, bent terminals, corrosion, or oil inside the electrical connector. Also inspect nearby wiring for contact with hot or moving components.
Source: samarins.com
Check oil level
Confirm that the engine has the correct amount of oil according to the vehicle manufacturer’s procedure.
Check oil condition
Look for severely contaminated oil, sludge, unusual discoloration, or visible metallic particles that may indicate a larger engine problem.
Inspect the connector
Check for corrosion, broken locks, loose terminals, oil contamination, or a connector that does not seat securely.
Inspect the wiring
Look for broken, rubbed-through, burned, pinched, or otherwise damaged wires between the sensor and the vehicle harness.
When You Should Stop and Not Drive
If the oil pressure warning light remains on while the engine is running, or the vehicle displays an abnormally low pressure reading, do not assume the sensor is the problem. Stop the engine as soon as it is safe and verify the oil level.
If the engine has loud knocking, ticking, or other unusual mechanical noise together with an oil pressure warning, avoid driving the vehicle until actual oil pressure has been checked. A real low-pressure condition can cause rapid engine damage.
Persistent warning
A warning that remains on with the engine running requires diagnosis rather than simply clearing a code.
Abnormal engine noise
Unusual knocking or ticking alongside an oil pressure warning increases concern for a mechanical lubrication problem.
Test Actual Engine Oil Pressure
The most useful diagnostic step when a sensor failure is suspected is to compare the vehicle’s reported pressure with pressure measured by a mechanical gauge. This test helps determine whether the engine actually has adequate oil pressure.
The general procedure is to remove the oil pressure sensor or switch and install a suitable mechanical pressure tester using the correct adapter. Start the engine only when the tester is securely connected and the setup follows the vehicle-specific service procedure. Record the pressure under the conditions specified by the manufacturer and compare the result with the published specification.
If mechanical pressure is within specification while the vehicle reports an implausible pressure condition, the problem may be the sensor, switch, wiring, connector, or related instrumentation. If mechanical pressure is below specification, replacing the sensor alone will not fix the underlying problem.
Oil pressure specifications vary substantially by engine, oil temperature, engine speed, oil viscosity, and design. Do not use a generic PSI number as a pass-or-fail limit for every vehicle.
Source: i.ytimg.com
Normal mechanical pressure
Investigate the sensor, switch, connector, wiring, gauge, or related control circuit when the vehicle is reporting an incorrect pressure condition.
Low mechanical pressure
Investigate the oil level, oil condition, filter, pickup, oil pump, pressure-control components, and internal engine condition.
Uncertain result
Use the manufacturer’s service information or qualified professional diagnosis rather than guessing from a generic pressure value.
Why a Mechanical Gauge Matters
An electronic sensor can only report what its circuit detects. A mechanical gauge provides an independent pressure measurement at the engine’s oil-pressure port. That makes it especially useful when a dashboard warning or diagnostic code does not clearly identify the cause.
The mechanical test does not replace vehicle-specific diagnosis. The correct adapter, test locations, operating temperature, engine speed, and acceptable pressure range depend on the application.
Independent measurement
The gauge helps distinguish an actual pressure problem from a reporting problem.
Vehicle-specific specification
Use the manufacturer’s pressure specification for the exact engine rather than a universal pressure target.
How to Fix a Faulty Oil Pressure Sensor
If testing shows that actual oil pressure is normal and the sensor or switch is faulty, replacing the component is usually the practical repair. A sensor generally is not repaired internally because its pressure-sensing element is a sealed component.
The exact replacement procedure varies by vehicle. The sensor may be mounted on the engine block, cylinder head, oil filter housing, or another oil passage. Some applications provide easy access, while others require removal of surrounding components.
Before removing the old part, obtain the correct replacement for the exact year, make, model, engine, and configuration. Compare the connector, thread, sealing method, and physical design with the original part. Some applications also require a specific seal or sealing washer.
Allow the engine to cool when appropriate, disconnect the electrical connector, and remove the sensor with the correct tool. Protect the surrounding area from oil that may escape from the sensor port. Install the replacement according to the manufacturer’s torque and sealing instructions. Do not guess at torque values or apply thread sealant where the manufacturer specifies a different sealing method.
Reconnect the electrical connector and inspect the area before starting the engine. After starting, verify that the warning light behaves normally, check for oil leakage, and confirm the pressure reading or related fault has returned to the expected condition.
Source: i.ytimg.com
1. Identify the correct replacement
Match the part to the exact vehicle and engine rather than relying only on appearance.
2. Disconnect the connector
Release the locking tab correctly and avoid pulling on the wiring itself.
3. Remove the old sensor
Use the correct sensor socket or wrench and protect nearby components from oil.
4. Prepare the mounting area
Clean contamination from the mounting area and follow the specified sealing procedure.
5. Install the replacement
Thread the new component carefully and tighten it to the manufacturer’s specified torque.
6. Reconnect and inspect
Reconnect the electrical connector and check the surrounding area for damage or leaks.
7. Verify the repair
Start the engine and confirm normal warning-light operation, pressure information, and absence of leaks.
Tools You May Need
The required tools depend on the vehicle. A typical replacement may require a ratchet, appropriate socket or oil pressure switch socket, extensions, shop towels, a drain pan, and any vehicle-specific sealing material. Diagnosis may additionally require an OBD-II scanner, digital multimeter, and mechanical oil pressure tester.
Use jack stands and other lifting equipment only when the vehicle-specific procedure requires access from underneath. Never rely on a jack alone to support a vehicle while working beneath it.
Basic hand tools
A suitable socket, ratchet, extension, and wrench may be enough for an accessible sensor.
Electrical tools
A digital multimeter can help check wiring and electrical circuits when the service procedure calls for it.
Pressure tester
A mechanical oil pressure gauge is useful when actual engine pressure must be separated from a sensor or circuit fault.
What If Replacing the Sensor Does Not Fix the Problem?
If a new sensor does not correct the warning or code, return to the diagnosis instead of installing another sensor. A replacement part cannot correct low engine oil pressure, damaged wiring, a defective connector, or a problem elsewhere in the lubrication system.
Start by confirming that the replacement part is correct and properly installed. Then recheck the connector and wiring. If actual oil pressure has not already been measured, perform that test using the manufacturer’s procedure.
A diagnostic trouble code such as P0520 can involve the oil pressure sensor or switch circuit rather than proving that the sensor itself is defective. Other oil pressure-related codes can also point toward signal, range, or performance problems. The code should therefore be treated as a starting point for diagnosis, not as a direct instruction to replace a part.
If measured oil pressure is genuinely low, possible causes can include insufficient oil, a restricted filter or oil passage, an oil pump problem, a pressure-control problem, or excessive internal engine wear. Those conditions require a different repair path and may justify professional diagnosis.
Source: carsensorhub.com
New sensor but same warning
Recheck actual oil pressure and the sensor circuit instead of assuming the new component is defective.
Code returns immediately
Inspect wiring, connector terminals, circuit voltage or resistance as specified, and verify the correct replacement part.
Mechanical pressure is low
Stop treating the issue as a sensor-only problem and investigate the engine lubrication system.
Common Mistakes to Avoid
The most serious mistake is replacing the sensor without confirming that engine oil pressure is safe. A new sensor can remove a warning caused by an electrical fault, but it cannot restore pressure that the engine is not producing.
Another common mistake is installing the wrong replacement or tightening it incorrectly. Thread size, electrical connector design, sealing method, and torque can vary by application. Follow the vehicle-specific repair information for these details.
Do not guess the pressure specification
Oil pressure limits are engine-specific and may change with temperature and engine speed.
Do not ignore wiring
A damaged wire or corroded connector can reproduce the same symptoms as a failed sensor.
Do not reuse damaged sealing components
Follow the manufacturer’s instructions for washers, seals, or approved thread-sealing methods.
Do not keep driving with confirmed low pressure
A real lubrication-system problem can cause severe engine damage even if the vehicle still runs normally.
How to Know the Oil Pressure Sensor Repair Worked
A successful repair should correct the original sensor-related symptom without creating an oil leak or new electrical fault. Start the engine and observe the oil pressure warning system according to the vehicle’s normal operating behavior.
If the vehicle has an oil pressure gauge, the reading should behave consistently with the manufacturer’s specifications and operating conditions. If it uses a warning light instead, the light should operate normally after startup. A scan tool can also be used to confirm whether the original diagnostic code returns.
Inspect the replacement sensor and surrounding area for oil leakage after the engine has run. If the warning remains, the gauge still behaves incorrectly, or the engine develops abnormal noise, stop and continue diagnosis rather than assuming the repair failed because of the new sensor.
Source: i.ytimg.com
Warning system
The oil pressure warning should operate according to the vehicle’s normal startup behavior.
Pressure reading
A gauge or scan-data reading should be consistent with the vehicle manufacturer’s specifications.
Leak inspection
The sensor mounting area should remain dry or otherwise match the manufacturer’s expected sealing condition.
Diagnostic codes
Any original sensor-related code should be rechecked after the repair and appropriate drive-cycle conditions.
When Professional Diagnosis Is the Better Choice
Professional help is appropriate when actual oil pressure is low, the sensor is difficult to access, the vehicle requires extensive disassembly, wiring faults are difficult to trace, or the engine produces abnormal mechanical noise.
A qualified technician can follow the exact pressure-testing procedure and service specifications for the engine. This is especially valuable when a warning could indicate a lubrication-system failure rather than a simple sensor fault.
Low measured pressure
Have the lubrication system and engine condition evaluated before replacing additional electrical parts.
Difficult access
Professional service can reduce the risk of damaging surrounding components during removal.
Unresolved electrical fault
A technician with wiring diagrams and diagnostic equipment can trace the circuit beyond the sensor.
Frequently Asked Questions
Q
Can an oil pressure sensor be repaired instead of replaced?
Usually, the sensor itself is replaced rather than repaired because its internal pressure-sensing components are not designed for normal field repair. If the problem is the connector or wiring, however, repairing the electrical circuit may solve the fault without replacing the sensor.
Q
How do I know if the oil pressure sensor is bad?
Common clues include an incorrect or erratic oil pressure gauge, an oil pressure warning that appears despite normal actual pressure, or an oil pressure-related diagnostic code. These symptoms do not prove sensor failure, so checking oil level, inspecting the circuit, and measuring actual oil pressure provide a more reliable diagnosis.
Q
Can I drive with a bad oil pressure sensor?
Do not assume it is safe to drive until actual engine oil pressure has been verified. A failed sensor can create a false warning, but the same warning can also indicate genuinely low oil pressure that may damage the engine.
Q
Will changing the oil fix an oil pressure sensor problem?
An oil change can correct a lubrication problem caused by incorrect or degraded oil, but it does not repair a defective sensor or damaged wiring. If the sensor is faulty, the electrical component still needs to be diagnosed and replaced when appropriate.
Q
Where is the oil pressure sensor located?
Location varies by vehicle and engine. The sensor or switch is commonly installed in an engine oil passage, often near the engine block or oil filter housing, but the exact location should be confirmed using the vehicle’s service information.
Q
What causes an oil pressure sensor to fail?
Failure can result from age, internal electrical failure, oil contamination, connector damage, wiring problems, or physical damage. A warning attributed to the sensor can also actually be caused by low oil pressure from a lubrication-system or engine problem.
Q
What should I do if the new oil pressure sensor does not fix the warning?
Do not keep replacing sensors. Verify the replacement part, inspect the wiring and connector, and measure actual engine oil pressure using the manufacturer’s procedure. If measured pressure is low, investigate the lubrication system and engine rather than treating the issue as an electrical sensor fault.
✦ Wrapping Up
Conclusion
The safest way to fix an oil pressure sensor problem is to diagnose before replacing. Check the oil level and condition, inspect the sensor and wiring, and verify actual engine oil pressure when the cause is uncertain.
If mechanical oil pressure is normal and the electrical circuit is in good condition, replacing the faulty oil pressure sensor or switch can resolve false warnings and incorrect readings. If pressure is genuinely low, the sensor is only the messenger and the underlying lubrication or engine problem needs attention.
💡 Key Takeaway
Before replacing an oil pressure sensor, verify that the engine has the correct oil level and that actual oil pressure meets the vehicle manufacturer’s specification. Replace the sensor only after the diagnosis points to the sensor or its circuit.
Ethan Brooks is an automotive writer at Auto News 7, covering car news, vehicle maintenance, new model updates, recalls, and practical buying guides. He focuses on clear, useful information that helps drivers understand their vehicles and make better ownership decisions.
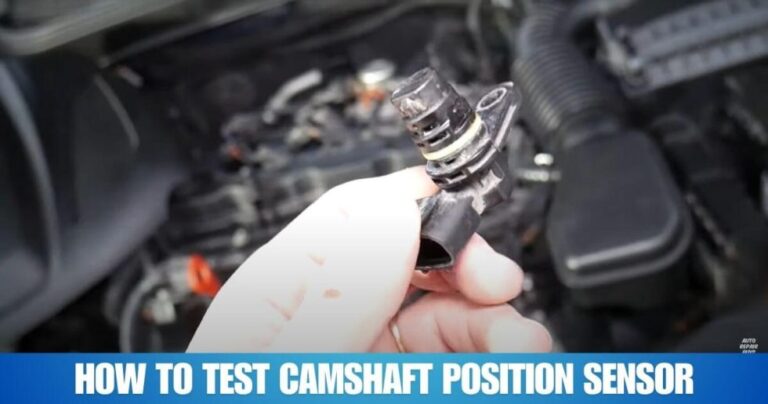
Learn how to test camshaft position sensor wiring with a multimeter. Follow a safe step-by-step process to check power, ground, signal circuits, and common wiring faults.
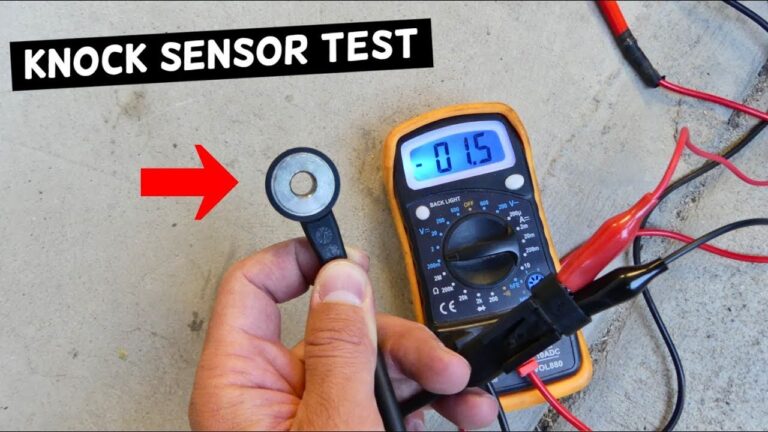
Learn whether a bad knock sensor will throw a code, which trouble codes are common, what symptoms to expect, and how to diagnose the problem correctly.