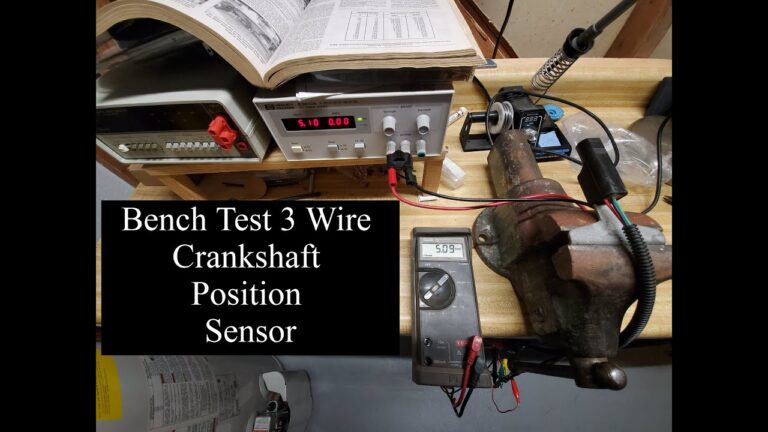
Replacing a Ford F150 crankshaft position sensor requires identifying the exact engine, safely accessing the sensor, installing the correct part, and checking for proper operation.
If you are working on a Ford F150 in the United States, the first step is to confirm the truck’s model year and engine before buying a crankshaft position sensor. Ford used different engine layouts and sensor locations across F150 generations, so a procedure that works on one truck may not apply to another. For example, documented repair procedures differ between older 4.2L models and later 3.5L EcoBoost applications.
The crankshaft position sensor, often called the CKP sensor, reports crankshaft position and speed to the engine control system. A faulty sensor can contribute to hard starting, stalling, poor engine operation, or a no-start condition. The replacement process can be straightforward on some F150 configurations but considerably more difficult when the sensor is positioned at the rear of the engine.
Source: 1aauto.com
What the Ford F150 Crankshaft Position Sensor Does
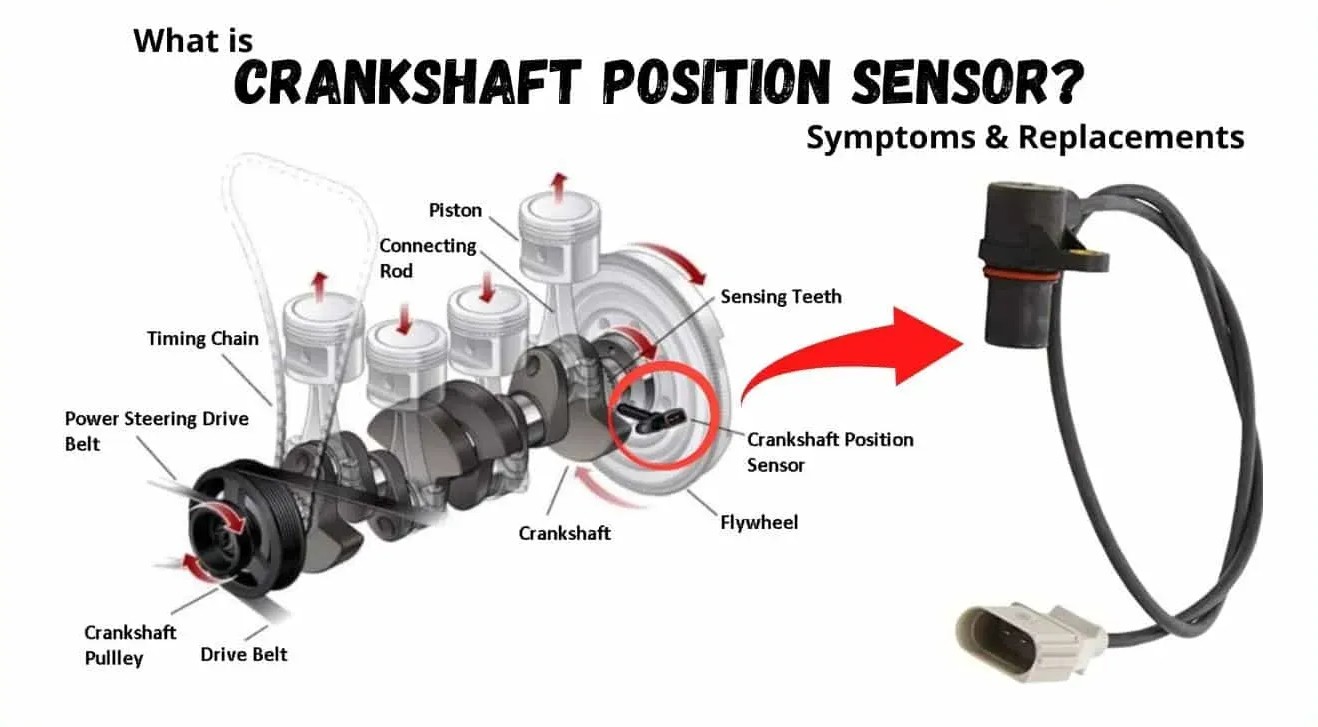
The crankshaft position sensor monitors crankshaft movement and provides position and rotational-speed information to the engine control system. That information helps the control system coordinate engine operation. Because the signal is fundamental to engine control, a sensor or circuit problem can cause symptoms ranging from difficult starting to a complete no-start condition.
The exact sensor design and location depend on the F150 generation and engine. This is why the safest approach is to treat the model year and engine combination as part of the repair specification rather than assuming every F150 uses the same procedure.
Source: storage.googleapis.com
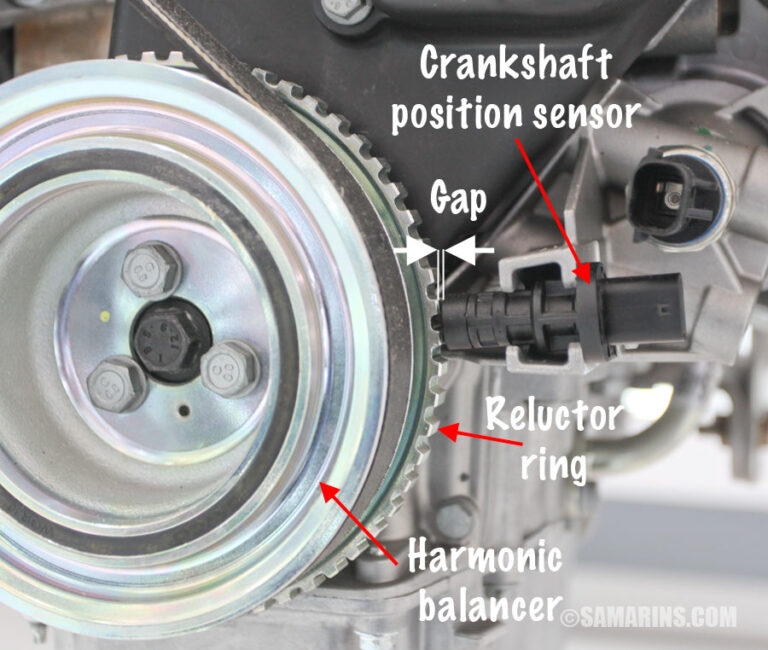
Crankshaft position sensor
The CKP sensor detects crankshaft position and speed and sends an electrical signal to the engine control system.
Sensor connector
The wiring connector carries the sensor signal and electrical connections. Corrosion, damaged terminals, or broken wires can produce symptoms similar to a failed sensor.
Reluctor or tone feature
The sensor reads a rotating feature associated with the crankshaft. Damage, contamination, or incorrect positioning of that feature can affect the signal even when the sensor itself is new.
Why Sensor Location Changes by F150 Year and Engine
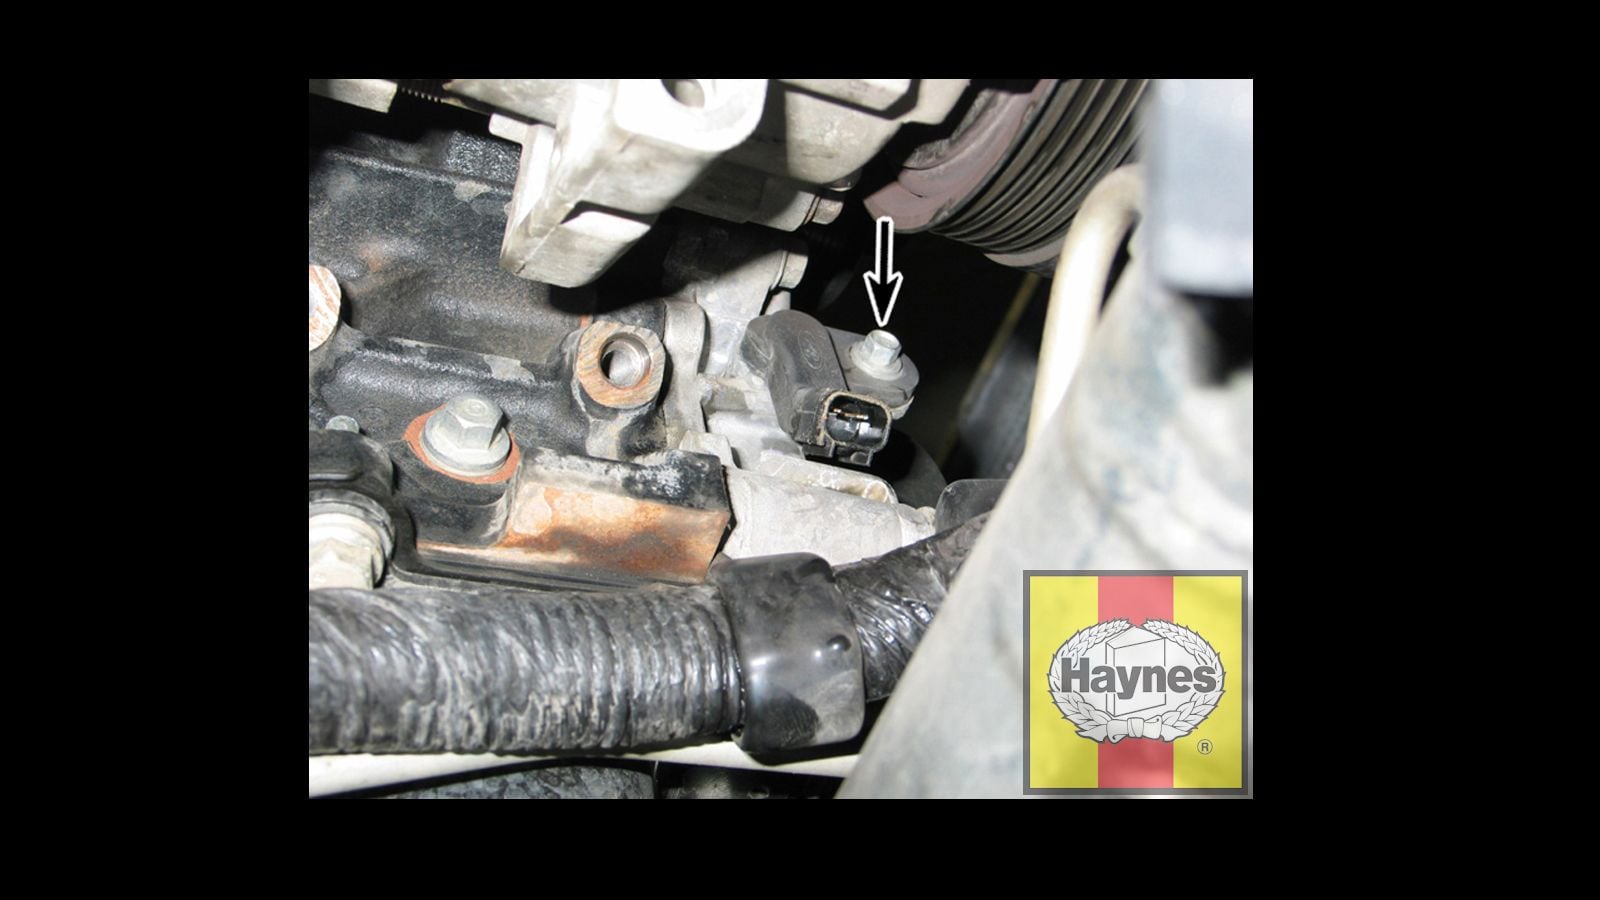
F150 crankshaft sensor locations are not universal. A documented 1997 to 1999 procedure places the sensor between the air-conditioning compressor and harmonic balancer and requires moving the compressor for access. A 2009 to 2014 forum discussion describes rear-engine access for certain configurations, while a documented 2015 to 2020 3.5L EcoBoost procedure accesses the sensor from underneath the vehicle. These differences make engine identification essential before beginning the repair.
Check the engine first
Verify the model year, engine displacement, and engine family before following any step-by-step procedure.
Do not assume location
A sensor location shown for a 3.5L EcoBoost should not automatically be applied to a 5.0L V8 or an older 4.2L V6.
Before You Replace the Crankshaft Position Sensor
Before removing anything, confirm that the crankshaft position sensor is actually the likely source of the problem. A diagnostic trouble code can point toward the CKP circuit, but a code or symptom does not automatically prove that the sensor itself has failed. Wiring, connector damage, poor electrical connections, and mechanical signal problems can create similar results.
Let the engine cool completely before working near the engine, exhaust components, pulleys, or other hot parts. Park on a firm, level surface, set the parking brake, and use wheel chocks. If you must work underneath the truck, support it with appropriately rated jack stands on proper support points.
Source: ford-trucks.com
Verify the truck
Record the F150 model year, engine, drivetrain, and any relevant diagnostic trouble codes before purchasing a replacement sensor.
Gather basic tools
Depending on the F150 configuration, you may need sockets, a ratchet, extensions, a wrench, wheel chocks, a floor jack, jack stands, gloves, and safety glasses.
Compare the replacement part
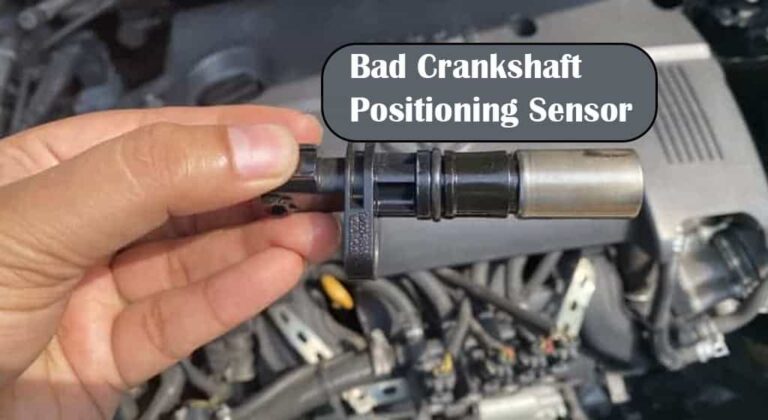
Before installation, compare the new sensor with the original for connector style, mounting arrangement, overall shape, and sealing features.
Protect the electrical system
Follow the applicable service procedure for disconnecting the battery or isolating electrical power before working on the sensor circuit.
Tools You May Need
The required tools depend on the F150 generation and engine. A documented 2004 to 2008 4.2L replacement uses an 8 mm socket and ratchet, while a documented 2015 to 2020 3.5L EcoBoost procedure lists 7 mm and 10 mm sockets, a ratchet, floor jack, jack stands, wheel chocks, gloves, and safety glasses. Do not buy tools based only on a generic F150 procedure; verify the requirements for your exact truck.
Hand tools
Prepare the socket and wrench sizes specified for your exact engine and access procedure.
Lifting equipment
Use a suitable floor jack and jack stands when the sensor must be reached from underneath the truck.
Safety equipment
Use safety glasses and gloves, and keep loose clothing away from belts, pulleys, and rotating components.
How to Replace Crankshaft Position Sensor Ford F150
The general replacement sequence is to make the truck safe, gain access to the sensor, disconnect its electrical connector, remove the retaining fastener or locking arrangement, remove the old sensor, install the replacement correctly, reconnect the wiring, and verify engine operation. The exact access work must follow the procedure for your specific F150 engine.
Do not treat the following as a universal bolt-by-bolt procedure. Ford changed the sensor location and surrounding components between F150 generations. For example, a 1997 to 1999 procedure involves moving the A/C compressor for access, while a 2015 to 2020 3.5L EcoBoost procedure reaches the sensor from underneath the vehicle.
Source: f150forum.com
1. Make the truck safe
Park on a level surface, allow the engine to cool, apply the parking brake, chock the wheels, and safely support the truck if underneath access is required.
2. Locate the CKP sensor
Use the exact year and engine configuration to identify the sensor. Do not confuse the crankshaft position sensor with a camshaft position sensor.
3. Gain access
Remove only the covers, wheel-well components, belts, brackets, or other parts required by the applicable procedure. On some older configurations, the A/C compressor must be moved without disconnecting the refrigerant system.
4. Disconnect the sensor
Release the connector lock and unplug the electrical connector without pulling on the wires.
5. Remove the retaining fastener
Remove the sensor’s retaining bolt or other securing hardware using the correct tool and keep the hardware clean.
6. Remove the old sensor
Pull or rotate the sensor out according to its design. If it is stuck, do not pry against delicate engine components or damage the mounting bore.
7. Inspect the mounting area
Check for dirt, damaged wiring, damaged connector terminals, oil contamination, broken seals, or other conditions that could prevent the replacement sensor from seating correctly.
8. Install the replacement
Install the correct sensor in the correct orientation and seat it fully. Tighten the retaining hardware to the vehicle-specific specification rather than guessing.
9. Reconnect the wiring
Reconnect the electrical connector until its locking feature is properly engaged. Route the harness so it cannot contact belts, pulleys, exhaust components, or other moving or hot parts.
10. Reassemble and test
Reinstall removed components, lower the truck safely if applicable, start the engine, and check for abnormal operation or warning lights.
Example: Older F150 Front-Mounted Sensor Access
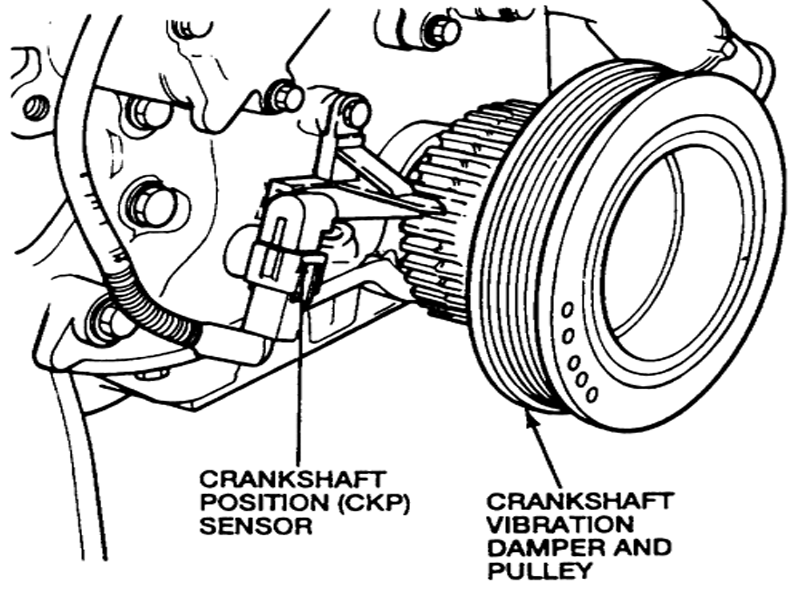
On documented 1997 to 1999 F150 applications, the crankshaft position sensor is positioned between the A/C compressor and harmonic balancer. The procedure includes relieving belt tension, moving the A/C compressor for access, disconnecting the sensor, removing its retaining bolt, and installing the replacement. The source procedure also calls for lubricating the sensor seal before installation.
Do not open the refrigerant system
Moving an A/C compressor for access is different from disconnecting refrigerant lines. Follow the vehicle-specific procedure and do not release refrigerant.
Example: 2004 to 2008 F150
A documented 2004 to 2008 F150 4.2L replacement procedure uses an 8 mm socket and ratchet and identifies the crankshaft position sensor as a serviceable component. The exact access and fastener arrangement should still be verified against the engine in the truck before starting.
Confirm engine
The 2004 to 2008 F150 range included multiple engines, so a procedure demonstrated on a 4.2L truck should not automatically be applied to every engine offered during those years.
How to Install the New CKP Sensor Correctly
Correct installation matters because the sensor must sit in the intended position relative to the crankshaft’s sensing feature. A sensor that is not fully seated, has a damaged seal, or is installed with the wrong part can produce continued starting or engine-control problems.
Before tightening the fastener, make sure the sensor is aligned with its mounting hole and that the wiring connector is positioned correctly. Do not force a sensor into place. If the replacement does not fit like the original, stop and verify the part number and application.
Source: obdtech.co.nz
Use the correct sensor
Match the replacement to the exact F150 year, engine, and application rather than relying only on the truck’s model name.
Inspect the seal
If the sensor uses a sealing O-ring or similar seal, inspect it before installation and follow the applicable service instructions for lubrication.
Use the specified torque
Torque the retaining fastener according to the service specification for the exact engine. Avoid estimating torque for a critical engine sensor.
Protect the harness
Make sure the harness is secured away from rotating pulleys, belts, sharp edges, and hot exhaust components.
Do You Need to Relearn the Crankshaft Sensor?
Whether a crankshaft position variation or related relearn procedure is required depends on the specific Ford engine and control system. Do not assume that every F150 needs the same post-repair procedure. If the vehicle continues to set a crankshaft-related code after a correct replacement, follow the service procedure for that exact powertrain and use a compatible diagnostic scan tool when required.
Check the service procedure
Use the correct procedure for the specific model year and engine instead of applying a generic relearn instruction.
How to Tell Whether the Replacement Worked
After reassembly, start the F150 and observe the engine carefully. A successful repair should restore normal starting and operation if the crankshaft position sensor was actually the cause of the problem. The engine should not develop new warning lights, abnormal noises, or wiring-related symptoms.
If the truck still will not start or continues to set a crankshaft-related fault, do not immediately install another sensor. Recheck the connector, wiring, sensor seating, power and signal circuits where applicable, and the mechanical components that the sensor reads.
Source: mechlesson.com
Starts normally
Normal engine starting is an encouraging sign, but the repair should still be checked for warning lights and recurring diagnostic codes.
No new warning symptoms
The truck should not show new electrical, mechanical, or harness symptoms after reassembly.
Scan for remaining faults
If a diagnostic trouble code was present before the repair, verify whether it returns after the vehicle has been properly tested.
Inspect the repair if problems remain
A persistent fault can indicate wiring damage, connector problems, incorrect installation, a damaged reluctor or tone feature, or another engine-control issue.
Common Reasons a New Sensor Does Not Fix the Problem
A new CKP sensor does not guarantee that the original fault will disappear. The sensor circuit includes the sensor, connector, wiring, engine-control system, and the mechanical feature being sensed. A fault elsewhere can create the same basic symptom or diagnostic code.
Damaged wiring
Broken, rubbed-through, corroded, or poorly connected wiring can interrupt the sensor signal.
Connector damage
Bent, loose, corroded, or pushed-back terminals can prevent a good electrical connection.
Incorrect sensor
A visually similar sensor may not have the correct electrical or physical characteristics for the truck.
Mechanical signal problem
Damage or abnormal movement involving the crankshaft sensing feature can prevent a good sensor from producing the expected signal.
Common Mistakes to Avoid During F150 CKP Sensor Replacement
The biggest mistake is treating every Ford F150 as though it uses the same crankshaft sensor location and procedure. The F150 has been sold with many engines and generations, and documented procedures show significant differences in sensor access.
Another common mistake is replacing the sensor without checking the rest of the circuit. If the connector or wiring is damaged, a replacement sensor may leave the original problem unchanged. Careful identification and inspection can prevent unnecessary parts replacement.
Source: storage.googleapis.com
Following the wrong engine procedure
Always match the repair instructions to the exact model year and engine.
Working under an unsupported truck
Never rely on a floor jack alone to support the F150 while you work underneath it.
Pulling on sensor wires
Release the connector properly instead of using the harness as a handle.
Forcing the new sensor
If the sensor does not seat correctly, verify alignment, part compatibility, and the condition of the mounting area.
Guessing torque
Use the correct service specification for the engine rather than applying a generic torque value.
Replacing parts without diagnosis
A crankshaft-related code can result from several causes, so inspect the circuit and related components before assuming the sensor is defective.
When Professional Help Makes Sense
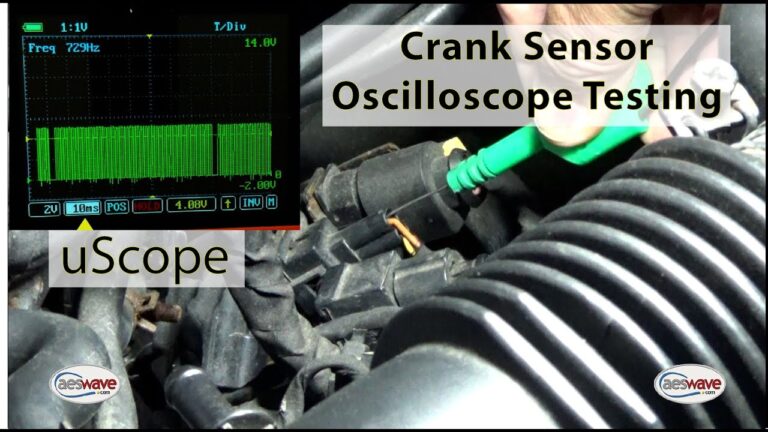
Consider professional diagnosis when the sensor is difficult to reach, the transmission or other major components appear to require removal, the wiring fault is unclear, or the truck still has a no-start condition after a verified replacement. A professional technician can also use diagnostic equipment to evaluate the CKP signal and related engine-control data.
Limited access
If reaching the sensor requires major component removal, confirm the complete procedure before continuing.
Persistent no-start
If the F150 still will not start after the repair, further diagnosis is preferable to repeated parts replacement.
Electrical diagnosis
Intermittent wiring and signal problems may require electrical testing and a wiring diagram specific to the vehicle.
Ford F150 Crankshaft Sensor Replacement by Generation
There is no single crankshaft position sensor replacement procedure that covers every F150. The following examples show why the truck’s engine must be identified before work begins.
These examples are useful for narrowing the repair approach, but they should not replace the service procedure for the exact vehicle. Engine options can overlap model years, and access can differ between configurations.
Source: ford-trucks.com
1997 to 1999 examples
A documented procedure places the sensor near the A/C compressor and harmonic balancer and requires moving the compressor for access.
2004 to 2008 examples
A documented 4.2L procedure uses an 8 mm socket and involves direct sensor removal and installation, but other engines in the same model-year range may differ.
2009 to 2014 examples
Forum documentation for certain configurations places the sensor toward the rear of the engine, making access from the wheel-well area a possible approach.
2015 to 2020 3.5L EcoBoost examples
A documented procedure accesses the crankshaft position sensor from underneath the truck on a 3.5L EcoBoost application.
Why a Model-Year Search Is Not Enough
Searching only for a phrase such as Ford F150 crankshaft position sensor can return procedures for different engines and generations. Before following a video or guide, confirm that its engine, model year, drivetrain, and sensor location match your truck. This simple check can prevent removing unrelated components or overlooking the actual sensor.
Match the engine
Confirm the engine displacement and engine family.
Match the generation
Use a procedure made for the same F150 generation whenever possible.
Match the access method
Confirm whether the procedure requires work from above, below, through the wheel well, or around another component.
Frequently Asked Questions
Q
Where is the crankshaft position sensor on a Ford F150?
The location depends on the model year and engine. Some older F150 applications position the sensor near the harmonic balancer and A/C compressor, while certain later engines place it toward the rear of the engine and may require access from underneath or through a wheel-well area.
Confirm the exact engine before following a location guide because the F150 was offered with multiple engine designs.
Q
How do I know if my F150 crankshaft position sensor is bad?
Possible symptoms include difficult starting, stalling, poor engine operation, a no-start condition, or a crankshaft-related diagnostic trouble code. These symptoms are not proof that the sensor itself has failed.
The connector, wiring, mechanical sensing feature, and engine-control system can also cause similar symptoms. Diagnosis should therefore include the complete CKP circuit.
Q
Can I replace a Ford F150 crankshaft position sensor myself?
A mechanically experienced DIY owner may be able to replace the sensor when access is straightforward and the correct procedure is available. The difficulty varies substantially by engine because some sensors are easy to reach while others are positioned in tight areas.
If the repair requires extensive component removal or you cannot safely support the truck, professional service is the safer option.
Q
Do I need to disconnect the battery when replacing the CKP sensor?
Follow the electrical safety procedure specified for your exact F150 before disconnecting or reconnecting the sensor. Disconnecting battery power can also affect vehicle settings on some vehicles, so it should not be treated as a universal step without checking the applicable procedure.
Regardless of the exact electrical procedure, do not work on the connector with the engine running and protect the wiring from accidental damage.
Q
How long does it take to replace a crankshaft position sensor on a Ford F150?
Labor time varies by model year, engine, access, corrosion, and the condition of surrounding components. A sensor that is readily accessible can be a relatively short repair, while a rear-mounted sensor in a confined area can take substantially longer.
Do not use a single generic time estimate for every F150 because access requirements differ between engines.
Q
Will a new crankshaft position sensor make my F150 start?
It can restore starting if the original sensor was the actual cause of the no-start condition. However, a no-start problem can also result from wiring faults, connector problems, fuel or ignition issues, engine timing problems, or other control-system faults.
If the truck still will not start after a verified sensor installation, continue diagnosis rather than assuming another sensor is required.
✦ Wrapping Up
Conclusion
Learning how to replace crankshaft position sensor Ford F150 models starts with identifying the exact truck and engine. The sensor’s location and removal procedure can vary significantly between F150 generations, so using an engine-specific procedure is more reliable than following a generic F150 guide.
Once the correct procedure is confirmed, the repair generally involves safe vehicle preparation, sensor access, connector removal, removal of the retaining hardware, careful installation of the replacement, correct reassembly, and post-repair testing. If the original symptom remains, inspect the sensor circuit and related mechanical components before replacing additional parts.
💡 Key Takeaway
Before turning a wrench, verify your F150 model year and engine, obtain the matching service procedure and sensor, and confirm the sensor location and required tools. If the replacement does not resolve the fault, diagnose the complete CKP circuit instead of automatically installing another sensor.
Ethan Brooks is an automotive writer at Auto News 7, covering car news, vehicle maintenance, new model updates, recalls, and practical buying guides. He focuses on clear, useful information that helps drivers understand their vehicles and make better ownership decisions.
Learn how to fix a crankshaft position sensor with step-by-step diagnostics, testing, wiring checks, replacement tips, common symptoms, and troubleshooting advice for U.S. vehicle owners.
Learn how to diagnose a bad crankshaft position sensor with symptoms, testing methods, scan tool checks, multimeter tests, and practical troubleshooting steps.
Learn what are symptoms of a bad crankshaft position sensor, including hard starting, stalling, misfires, poor acceleration, and check engine light warnings.