What Is Potting Soil? Types, Ingredients, and How to Use It Right
Potting soil is a growing medium made for plants in containers, not ordinary soil dug from a yard. It gives roots room to grow while holding the right balance of water and air.
Are you trying to choose a bag for a houseplant, porch pot, or raised planter and wondering why the labels all sound alike? Have you had a plant stay soggy for days, or dry out before you’ve finished your coffee?
I once grabbed a bag based on the words “all-purpose” and planted a container of herbs without checking how water moved through the mix. The top looked fine, but the bottom stayed wet and the roots struggled; this is a common mistake, not a dumb one.
I wrote this for anyone who wants to understand what’s in potting soil, pick a blend that suits a plant, and use it without turning watering into a guessing game. A little knowledge can save you from buying the wrong bag or blaming yourself for a plant’s decline.
Get the mix right, and you can give roots steady moisture, useful air pockets, and a clean start. Choose a poor match, and you may end up with waterlogged roots, a crusty surface, or a container that needs watering twice a day.
This should take about 18 minutes to read. By the end, you’ll know how to:
- Tell potting soil apart from garden soil and potting mix.
- Read ingredient labels and match a blend to your plant.
- Fill containers, water, and reuse or replace mix safely.
- Spot and fix common drainage and moisture problems.
What Is Potting Soil?
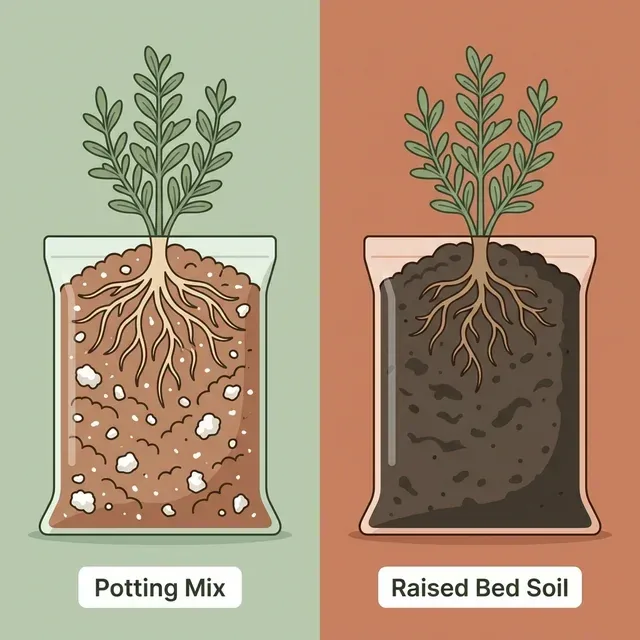
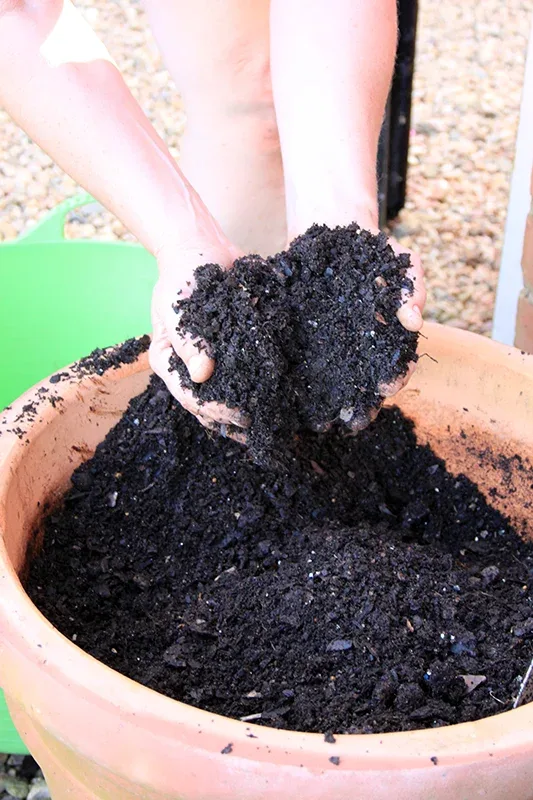
Potting soil is a prepared growing medium for plants in pots and other containers; it usually contains organic materials and amendments rather than ordinary field soil. A good blend holds enough water for roots to use, while letting extra water drain and air move through.
The name causes confusion because a bag labeled “potting soil” may contain little or no mineral soil. Many container blends use materials such as peat moss or coconut coir, plus bark, compost, perlite, or other ingredients. The exact recipe varies by brand and by the plants the product is meant to support.
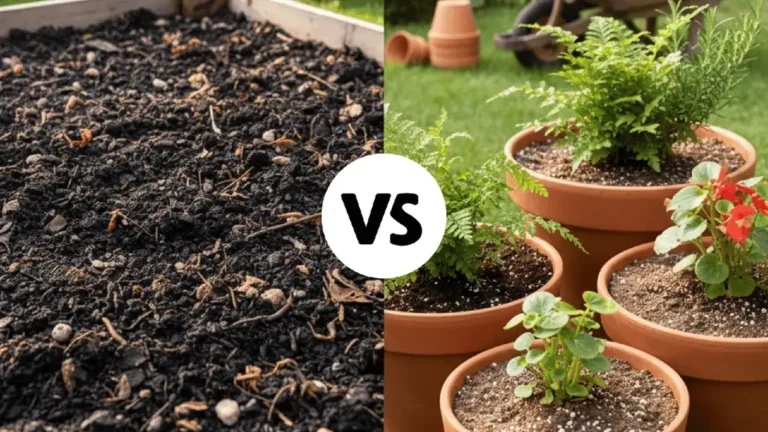
That difference matters because container roots have less room to find air and water than roots growing in the ground. Yard soil can pack tightly inside a pot, leaving little space for oxygen and slowing drainage. A container mix is designed to keep a more open structure.
A plant’s roots need water, oxygen, and physical room to grow. Potting soil balances those needs, though no single blend works perfectly for every plant. A moisture-loving fern and a cactus, for instance, shouldn’t be expected to thrive in the same dense mix.
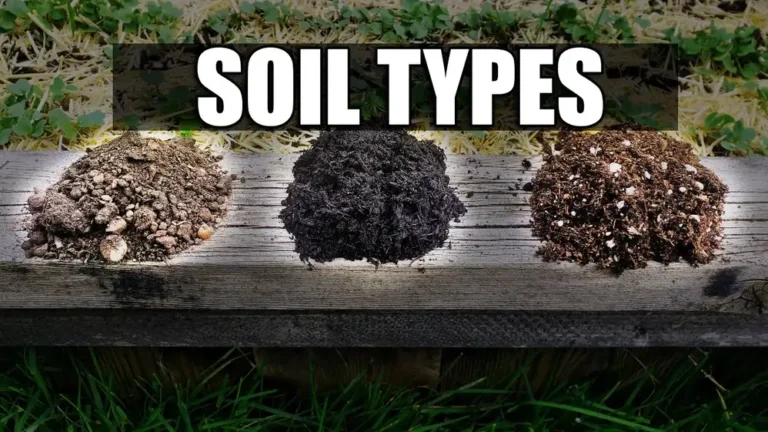
Potting soil, potting mix, and garden soil
Potting soil and potting mix are often used as overlapping product terms, but neither label tells you the full recipe. The ingredients and intended use on the bag matter more than the name on the front.
A potting mix often refers to a soilless mix, meaning it’s made without field soil. A product called potting soil may contain compost, mineral soil, or other heavier materials, but some products with that name are also soilless. Labels aren’t perfectly consistent, so check the ingredient list and directions.
Garden soil is different: it’s generally meant to be worked into in-ground beds, where surrounding soil and the local environment affect drainage. Putting garden soil straight into a container can leave the contents dense and slow to drain. If you’re weighing those labels against each other, the differences in potting mix and potting soil are worth sorting out before you buy.
| Material | Common use | What to know |
|---|---|---|
| Potting soil or potting mix | Containers and houseplants | Check the ingredients and plant-use directions; the product name alone doesn’t tell you the texture. |
| Garden soil | In-ground beds | Usually too dense for pots when used by itself. |
| Topsoil | Landscaping and ground leveling | Not a substitute for a container-growing blend. |
| Seed-starting mix | Germinating seeds | Usually finer and lighter than general potting blends; it may not contain enough nutrients for long-term growth. |
| Cactus or succulent mix | Plants that need faster drainage | Often includes more coarse or mineral material than a standard houseplant mix. |
You might be tempted to use a scoop of backyard soil to save money. For container plants, I’d skip that shortcut unless you’re blending it as part of a tested or specifically recommended recipe; a small pot doesn’t offer much room for compacted soil to recover.
Pro Tip: Check the product label for the intended plant types and container use, not just words such as “premium,” “natural,” or “all-purpose.”
What potting soil does for roots
A container mix supports plant roots by balancing moisture, drainage, and air space. Those jobs work together, so a blend that holds water well can still fail if it stays packed and airless.
Water retention is the amount of moisture a medium can hold after watering. Peat moss and coconut coir can help retain moisture, while bark and coarse particles can create larger spaces that let water move through more freely. The exact balance depends on the recipe and how the mix is packed.
Drainage is water moving through the medium and out of the pot’s drainage holes. Good drainage doesn’t mean the mix should dry out instantly; it means excess water has a route out. If water sits in a cachepot or saucer, roots can stay submerged even when the soil itself seems loose.
Aeration means having air spaces among the particles. Roots use oxygen, and tiny organisms in the medium do too. When water fills nearly all the spaces for too long, roots can struggle and decay.
A potting blend also provides a place for roots to anchor and may supply nutrients. Some bags contain fertilizer or compost, while others are low in nutrients and rely on added fertilizer later. That’s why two blends can feel alike in your hands but call for different feeding schedules.
Common potting soil ingredients
Potting soil ingredients affect how heavy a blend feels, how quickly it drains, and how long it holds moisture. Labels may list several materials, and the same ingredient can behave differently depending on its size and how much the blend contains.
- Peat moss is a lightweight material that holds water. It can become difficult to rewet after drying out completely, so a peat-based mix may need slow, thorough watering after it gets very dry.
- Coconut coir is made from coconut husk fibers. It can hold moisture while keeping a different texture from peat, though its performance depends on processing and the blend around it.
- Perlite is a lightweight, expanded mineral that creates air space and helps loosen a mix. The white bits in a bag are often perlite.
- Pumice is a porous volcanic material used to add structure and drainage. It’s heavier than perlite and tends to stay put in a pot.
- Bark adds larger pieces and structure. It’s common in mixes for orchids and other plants that need more air around their roots.
- Compost adds organic matter and can supply nutrients. Its texture and nutrient content vary, so compost-heavy mixes may behave differently from light, mostly soilless blends.
- Worm castings are material produced by earthworms and used as an organic amendment. They can add nutrients and organic matter, but they don’t replace a whole potting blend.
- Vermiculite is a lightweight mineral that can hold water and nutrients. It’s often used in seed-starting and moisture-retaining blends.
- Sand can add weight and texture, but fine sand in a potting blend may pack tightly. Coarse horticultural sand is not the same as fine play or construction sand.
The ingredient list helps, but you don’t need to memorize every material. If your plant likes evenly moist soil, look for a blend that retains moisture without staying soggy; if it needs a fast-draining root zone, choose a product with a looser, coarser texture.
What potting soil does not do
Potting soil doesn’t automatically provide the right nutrients, watering schedule, or container for every plant. The mix is one part of the growing setup, not a fix for every problem.
A bag can contain starter fertilizer, slow-release fertilizer, compost, or no added nutrients at all. If the label says fertilizer is included, follow its directions before adding more. Extra fertilizer can harm roots, especially when the plant is already stressed or the mix is dry.
The medium also can’t make a pot drain if the container has no drainage holes. A decorative outer pot may hold water around the nursery pot; empty that standing water after watering. Otherwise, the roots sit in a reservoir they didn’t ask for.
And a well-chosen blend won’t save a plant from too much water. Watering frequency depends on the plant, pot size, material, room temperature, light, and airflow. The surface can look dry while the lower root zone is still wet, so check deeper before watering again.
How to Choose and Use Potting Soil
Choose potting soil based on the plant’s moisture needs, the container, and how quickly the mix drains. Then loosen the blend, fill a pot with drainage holes, plant at the right depth, and water thoroughly.
A universal mix is a reasonable starting point for many common houseplants and container flowers. It’s not a magic blend, though. If a plant needs unusually fast drainage or steady moisture, a blend made for that plant type can save you from constant corrections.
Match the blend to the plant
Plant type is the best starting point for choosing a potting blend. Check the plant’s basic needs, then choose a texture that can support those needs in your home or garden.
- Tropical foliage plants: Many prefer a mix that holds some moisture but drains freely. A standard indoor potting mix may work, while dense or waterlogged conditions can cause trouble.
- Ferns: Many ferns prefer consistently moist conditions, so a mix with good moisture retention may suit them. They still need airflow and drainage; “likes moisture” doesn’t mean “likes a swamp.”
- Cacti and succulents: These plants generally need a faster-draining mix than a moisture-loving tropical plant. A cactus blend may be a useful start, but check its texture because product recipes vary.
- Orchids: Many commonly grown orchids need a coarse, airy medium rather than ordinary potting soil. A bark-based orchid mix is often more suitable for those roots.
- Seedlings: A seed-starting blend is usually finer and lighter than a standard potting mix. Young roots can struggle in large chunks, and some seed-starting products contain little fertilizer.
- Vegetables and herbs: A general container blend labeled for edible plants may work well. Check the label, and don’t assume every potting product is intended for food crops.
- Bonsai and specialty plants: These may need a specific particle size and drainage behavior. A regular indoor mix can hold too much moisture for some bonsai setups.
What if the label says “all-purpose” but your plant has special needs? Treat the label as a broad starting point, then compare the texture with the plant’s water needs; a bag designed for general use won’t always fit a dry-loving plant.
You can adjust a base mix with suitable amendments, but changing one thing at a time makes the result easier to judge. Adding a handful of perlite to a dense mix may loosen it; adding several ingredients without a plan can leave you with a blend that dries unevenly.
Read the bag before you buy
The package label tells you more about a potting blend than its marketing name does. Look for its intended use, ingredients, fertilizer information, and any directions about feeding or reusing the mix.
Check these points:
- Does the product say it’s for containers, indoor plants, seed starting, orchids, or another use?
- Does the ingredient list show materials that fit your plant’s needs?
- Is fertilizer included, and if so, how long does the label say it may last?
- Does the bag say the mix is ready to use, or does it require added material?
- Are there directions for wetting or feeding the mix?
- Is the bag torn, soaked through, or visibly contaminated?
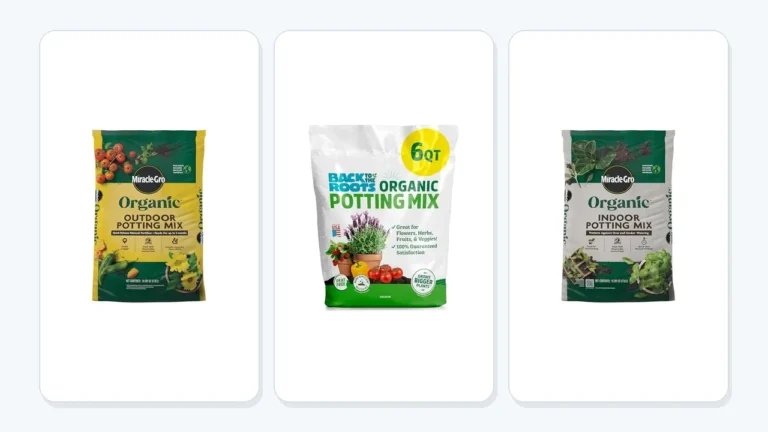
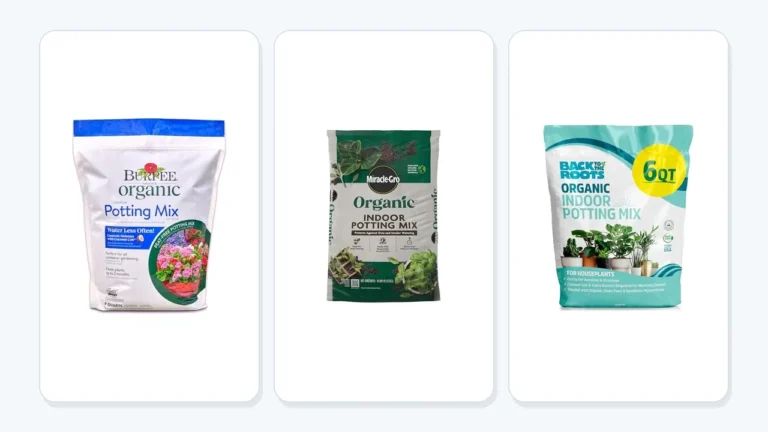
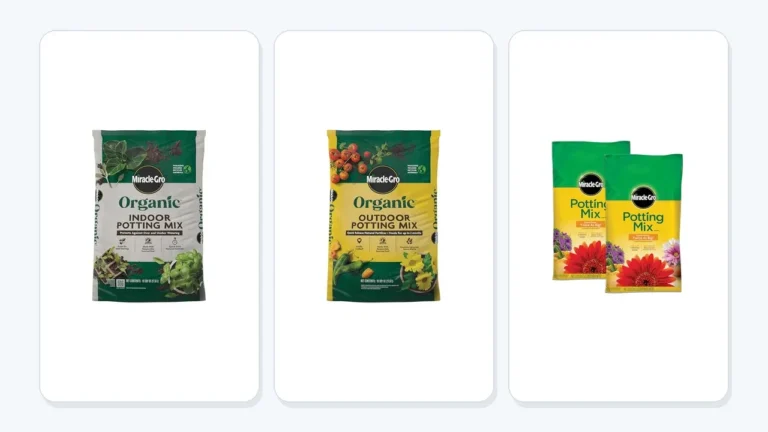
A product marketed as organic can still vary in texture and nutrient content. “Organic” doesn’t automatically mean the mix drains well, suits your plant, or contains everything it needs. Let the plant’s requirements lead the decision.
If you’re comparing brands, focus on what the product says it’s made for and how it feels when you open it. A suitable blend from a local garden center can be a better choice than a heavily advertised bag that doesn’t fit your use. The best potting soil for your plants is the one that matches their needs and your watering habits, not necessarily the fanciest label.
Important Tip: Don’t buy more bags than you can store properly. An opened bag left in a wet, sealed corner can develop mold or attract pests, and an old bag may become compacted or difficult to wet.
Pick a container that supports the mix
A pot needs drainage holes if you’re using it as the plant’s main growing container. The holes give excess water a way out, which helps keep roots from sitting in soaked medium.
A decorative pot without holes can still work as a cachepot. Keep the plant in a nursery pot with holes inside it, then remove the inner pot for watering or empty the outer pot after water drains through. Don’t leave a plant’s roots standing in water just because the outer container looks tidy.
Pot size matters, too. A pot that’s much larger than the root ball contains a larger volume of wet mix than the plant can use. That extra wet medium can take longer to dry.
Choose a container only somewhat larger than the root system, and size up as the plant grows.
Container material affects drying speed. Unglazed clay lets moisture evaporate through its sides, so the mix may dry faster than it would in plastic or glazed ceramic. A small plastic nursery pot in a warm, bright spot may dry differently from a large clay pot in a cool room.
Adding gravel to the bottom doesn’t fix poor drainage. Water still has to move through the potting medium and exit through the holes. Gravel also takes up room that roots could use, so it’s better to choose a pot with the right size and working drainage.
Prepare and fill the pot
Preparing the mix before planting helps water move evenly through the container. Fluff the blend, check that the drainage holes are open, and avoid packing the medium down hard.
- Check the pot. Confirm that it has open drainage holes and is clean enough for the plant you’re adding. If you’re reusing a container, remove old roots and stuck-on residue.
- Fluff the mix. Break apart compressed clumps with your hands or a clean tool. Don’t grind the ingredients into dust; a loose texture helps preserve air spaces.
- Pre-moisten very dry mix. Add water gradually and mix until the medium feels evenly damp, not muddy. Peat-based blends that have dried out can repel water at first, so give them time to absorb it.
- Add enough mix to set the plant at the right height. The root ball should sit below the rim, with a little room for watering. Keep the stem base or crown at the same level it was growing before unless the plant’s directions say otherwise.
- Fill around the roots. Add mix around the root ball and tap the pot lightly to settle it. Pressing hard can squeeze out air pockets.
- Water slowly. Apply water over the surface until it begins to drain from the bottom. Let the pot finish draining before you return it to a decorative cover.
A little settling after watering is normal. If the mix sinks enough to expose roots, add more around them without burying the crown or stem base. A plant that’s set too low can stay damp around its stem.
I once filled a pot almost to its rim because I wanted the soil line to look neat. The first watering washed mix over the edge and left a brown ring on the floor, so I now leave a small gap for water and soil to settle; skipping that detail is easy, not careless.
Water based on the plant and pot
Water when the plant’s root zone needs it, not just because the surface looks dry. Different blends and containers dry at different rates, so a fixed schedule can leave one plant thirsty and another soaked.
For a small pot, lift it before watering and learn how heavy it feels when wet and dry. For a larger pot, check several inches below the surface with a finger or a clean wooden stick. If the deeper mix feels damp, wait; if it feels dry and the plant’s needs fit, water thoroughly.
When watering, wet the whole root zone rather than splashing a little on one spot. A slow pour gives dry medium time to absorb water. If water runs straight through a very dry, peat-heavy mix, add smaller amounts over a few minutes or set the pot in a shallow tray briefly, then let it drain fully.
Don’t leave water in a saucer for long unless you’re following a method suited to that plant. Bottom watering can help some dry mixes absorb moisture, but the pot still needs to drain afterward. Leaving it to sit in water can keep the lower roots too wet.
Watch the plant and the medium together. Wilting can come from dry soil, but roots damaged by excess water can make a plant wilt too. Yellow leaves, soft stems, fungus gnats, and a sour smell may point to a wet root zone, though any one sign alone doesn’t prove the cause.
Feed plants without overdoing it
Potting soil may contain nutrients, but those nutrients can run out or wash away. Check the bag’s fertilizer directions, then feed according to the plant’s growth and the product label.
A slow-release fertilizer may release nutrients over time, while a water-soluble fertilizer is mixed into water and applied more directly. Don’t combine products or increase the dose just because growth looks slow. Poor light, temperature stress, root crowding, or soggy soil can slow a plant even when nutrients are available.
Plants also have different feeding needs. A actively growing plant may use more nutrients than a dormant one, and seedlings can be sensitive to strong fertilizer. Use the label’s rate rather than guessing, and avoid feeding a plant whose roots are stressed until you’ve addressed the underlying problem.
If the bag includes starter fertilizer, note that when planning later feeding. Adding more right away can lead to excess salts in the mix, which may show up as leaf-edge browning or a pale crust on the surface. Flush the mix only when the pot drains freely, and follow plant-specific advice if the plant is sensitive.
Use potting soil outdoors
Potting soil can work in outdoor containers, but the container’s exposure changes how fast the mix dries. Sun, wind, temperature, and pot material all affect watering needs.
A patio pot in hot sun may dry much faster than an indoor planter, especially if it’s small or made of porous clay. A shaded container may stay moist for longer. Check the root zone rather than copying the schedule from another pot nearby.
Rain can also saturate an outdoor container. Make sure drainage holes aren’t blocked by a patio surface, pot feet, or a saucer holding water. In a long wet spell, move a container under cover if the plant can tolerate the change in light and temperature.
For edible plants, choose a product labeled for container gardening and check the package directions. Use clean containers and avoid treating an ornamental product as suitable for food crops unless the label supports that use. Keep fertilizer and potting materials away from harvested produce, and wash hands after handling them.
Reuse or replace old potting soil
Old potting soil can sometimes be reused, but its condition and the plant’s health matter. A mix from a healthy plant may be refreshed for a less demanding planting; a mix from a diseased plant is safer to discard.
Used medium often loses structure as organic materials break down. It may also contain depleted nutrients, old roots, or pests. If the mix is compacted, smells sour, stays wet too long, or has a history of root disease, don’t use it for a new container plant.
If you do reuse a healthy mix, remove roots and debris, then blend it with fresh material that restores structure. Don’t assume old fertilizer is still active, and don’t add a large amount of fertilizer to compensate without checking the new product’s directions.
Avoid reusing potting soil for seedlings if you need a clean, fine-textured starting medium. Seedlings are small and more sensitive to poor structure or contamination than established plants. Fresh seed-starting mix is often the simpler choice.
Never dump old potting mix into a natural area or storm drain. It can contain fertilizer or plant pests, and the best disposal route depends on local rules. Bag it for household waste when local guidance calls for that, or use it in a suitable garden bed only if it’s free of disease and appropriate for that site.
- Choose a mix for the plant’s water needs, not just the bag’s front label.
- Use a container with drainage holes and leave room at the top for watering.
- Check moisture below the surface before watering again.
- Discard mix from a plant with suspected root disease.
Potting Soil Problems and Safe Handling
Most potting soil problems come from a mismatch between the mix, the pot, and the way it’s watered. Check the moisture level and drainage first, then look at roots and the plant’s growing conditions before changing the blend.
When a plant looks unhappy, it’s tempting to add fertilizer or repot it right away. That can make things worse if the roots are already stressed. Start with the simplest checks: Is the soil wet or dry below the surface?
Can water escape? Is the pot much larger than the root ball?
Troubleshoot common problems
The texture and moisture of the mix can help point to the source of a plant problem. Use the signs as clues, not as a diagnosis by themselves, because light, pests, and root damage can cause overlapping symptoms.
| What you notice | Possible cause | A sensible first step |
|---|---|---|
| Water pools on the surface | Compacted mix, very dry peat, or a clogged surface | Check drainage holes, then rewet dry mix slowly or loosen the top gently. |
| Pot stays heavy and wet | Too much water, a large pot, or a dense blend | Pause watering and check the drainage holes and lower root zone. |
| Water runs through immediately | Mix is very dry, too coarse, or has pulled away from the pot | Water in several slow passes and check whether the root ball is actually absorbing water. |
| White crust on the surface | Mineral or fertilizer salts may have collected | Review fertilizer use and water quality; remove the crust and refresh the surface if appropriate. |
| Fine flies around the pot | Fungus gnats may be breeding in damp organic material | Let the surface dry between watering when the plant can handle it, and remove standing water. |
| Sour or rotten smell | The root zone may have stayed too wet or roots may be decaying | Check roots and drainage; repot only if the plant’s condition calls for it. |
| Roots circle tightly around the pot | The plant may be root-bound | Move it to a modestly larger pot and loosen tightly circling roots as appropriate. |
| Mix shrinks from the pot edge | The medium may have dried too far or pulled away as it shrank | Rewet gradually so the root ball can absorb moisture rather than channeling water down the sides. |
If the soil is wet and the plant is wilting, don’t assume it needs more water. Wet roots can lose access to oxygen, which makes it harder for the plant to take up water. Let the mix drain, check the roots if the problem continues, and correct the container or watering issue.
If dry mix repels water, don’t dump a large amount on top and hope for the best. Pour slowly in stages, allowing the medium time to absorb water. A pot that dries out completely on a regular basis may need a more moisture-retentive blend or a different watering routine.
A white surface crust can come from mineral deposits or fertilizer salts, but it’s not a sure sign of one cause. Scrape away a small amount of crust, review how often you feed the plant, and check whether the water source leaves deposits on other surfaces. If leaf damage is spreading, look at the whole growing setup rather than treating the crust alone.
Pro Tip: Change one part of the setup at a time. If you repot, change the soil, move the plant, and alter the watering schedule all at once, you won’t know which change helped or hurt.
Handle potting soil with care
Potting soil is easy to use, but dry mix can create dust, and stored bags can grow mold or attract pests. Use common-sense care, especially if you have asthma, allergies, or a weakened immune system.
Open the bag outside or in a well-ventilated area if the mix is dusty. Avoid breathing in dust, wash your hands after handling it, and keep the material away from your face. Dampen dusty mix lightly before working with it, but don’t soak the whole bag.
Wear gloves if you have sensitive skin or cuts on your hands. Keep potting materials away from food-preparation surfaces, pets, and children, and close the bag between uses. Don’t store damp mix in a warm, sealed space where mold can grow.
If you have a condition that makes exposure to soil or organic dust risky, ask a health professional about precautions suited to you. A mask designed to filter dust may be appropriate for some people, but your own health needs should guide that choice. Get professional advice if handling potting material causes breathing trouble or a strong reaction.
Be careful around fertilizer mixed into a bag. Follow the label for handling and feeding, and don’t let children or pets eat or play in the material. Store fertilizer and potting products in their original containers whenever possible, since the label carries the directions you may need later.
When a custom mix makes sense
A custom potting blend is useful when a plant needs a texture that a general product doesn’t provide. It isn’t automatically better, and a poor recipe can create the same drainage problems as the wrong store-bought mix.
For a plant that needs faster drainage, a grower may add coarse, stable particles such as perlite, pumice, or bark to a suitable base mix. For a plant that needs moisture to last longer, a blend with more water-retaining material may work better. Make small changes and watch how the mix behaves after watering.
A custom blend is especially helpful for orchids, bonsai, and plants with unusual root needs. Match particle size to the roots and container: chunky material can leave large gaps in a tiny pot, while fine material can pack around roots that need lots of air.
Don’t use fine sand as a universal fix for heavy soil. Fine particles can fill air spaces rather than open them, making a container mix denser. If you aren’t sure what to add, buying a blend made for that plant is often easier than building a recipe from scratch.
Choose a mix that fits your routine
The best potting blend is one you can use consistently for the plant in front of you. If you tend to underwater, a mix that dries very fast may create extra work; if you water frequently, a dense mix can stay wet too long.
Think about where the pot will sit. A warm, bright windowsill, a cool bathroom, and a windy porch all change how fast moisture disappears. A blend that works in one place may need more frequent checks in another.
Price and bag size can matter, but don’t buy a large quantity just because the price per bag seems low. If you have one small houseplant, an oversized bag may sit around long enough to get damp or compacted. A smaller bag of a suitable mix is often the less wasteful choice.
For a collection of common houseplants, a general indoor blend can be a practical base. Keep a separate cactus mix or orchid bark if you grow plants with very different root needs. That small bit of organization beats trying to make one bag suit everything.
FAQs About What Is Potting Soil
Is potting soil real soil?
Potting soil may contain mineral soil, compost, or other organic materials, but many products are soilless blends made mainly from materials such as peat, coir, bark, and perlite. The label varies by brand, so check the ingredient list instead of assuming the word “soil” means dirt from the ground.
Can I use potting soil in my garden?
Potting soil can be added to a garden bed, but it’s usually designed for containers rather than to replace garden soil across a whole bed. For in-ground planting, use a soil amendment suited to the bed’s needs, and follow package directions. A small amount of container mix won’t correct every soil problem.
Can I use garden soil in a pot?
Garden soil usually isn’t a good choice by itself in a container because it can become dense and drain poorly. Roots in pots have limited space, so compacted soil can stay wet and short on air. Use a container blend, or a specific recipe recommended for the plant you’re growing.
Does potting soil have fertilizer in it?
Some potting soil contains starter fertilizer or slow-release nutrients, while other products contain little or none. Read the bag’s feeding directions before adding fertilizer. Extra feeding can damage roots or leave salts in the medium, especially if the plant is stressed or the mix is already dry.
How often should I replace potting soil?
Replace potting soil when it breaks down, stays wet too long, smells sour, or comes from a plant with suspected root disease. A healthy plant doesn’t need fresh soil on a fixed calendar. Repot when the medium or root growth calls for it, and choose a clean blend suited to the plant.
Is potting soil safe for vegetables?
Potting soil can be used for vegetables when the product label says it’s suitable for edible plants and container gardening. Follow the package directions for fertilizer and handling, and use a clean container with drainage holes. Don’t assume every ornamental potting product is intended for growing food.
Choose the Mix Your Plant Can Use
Potting soil isn’t complicated once you stop treating every bag as the same product. The right blend gives your plant’s roots a workable balance of water and air, while the pot and your watering habits determine how that blend performs day to day.
I’d start with a container blend suited to the plant, then watch how quickly it dries in the place where you’ll keep the pot. That tells you more than the label’s fancy wording ever will. If the mix stays soggy, adjust the container or blend; if it dries too fast, change the moisture balance or watering routine.
Your next step is simple: check the plant’s needs, read the ingredient list, and choose a pot with drainage holes. That’s a much steadier start than grabbing the first bag on the shelf and hoping for the best.