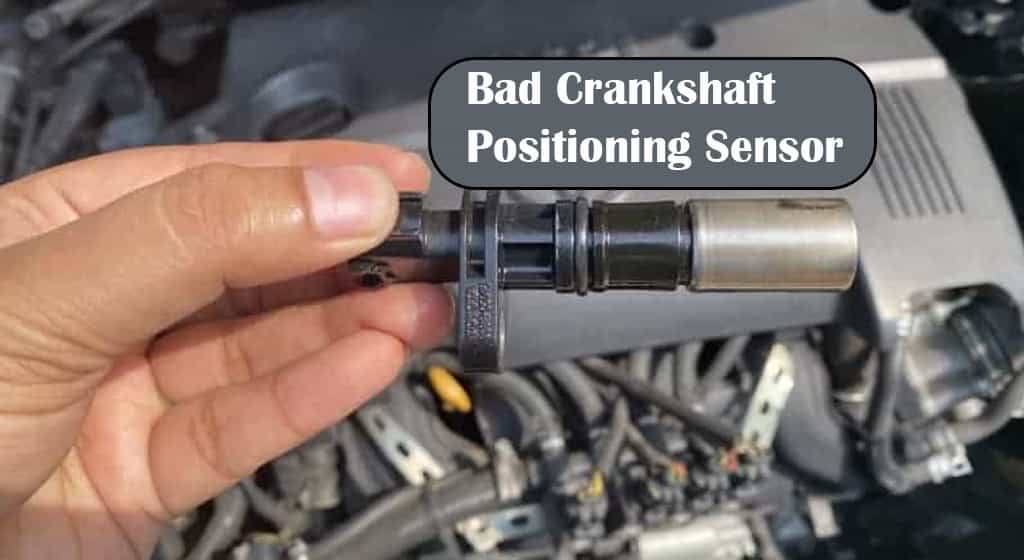
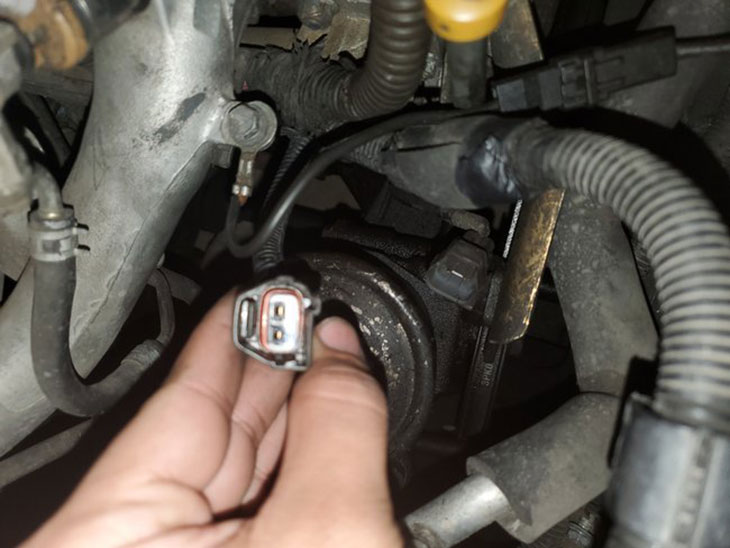
Heat, age, vibration, contamination, wiring damage, and reluctor problems can make a crankshaft position sensor fail.
For drivers in the United States, a failing crankshaft position sensor can turn an otherwise normal trip into a no-start, stall, or rough-running problem. The crankshaft position sensor, often called the CKP sensor, tells the engine control module how fast the crankshaft is turning and where it is positioned. That information helps the computer coordinate ignition and fuel delivery.
What causes a crankshaft position sensor to go bad is not always the sensor itself. Excessive engine heat, normal aging, vibration, damaged wiring, loose connections, contamination, physical impact, and problems with the reluctor or trigger wheel can all interrupt the signal. Because several other engine faults can create similar symptoms, replacing the sensor without testing the circuit can waste money.
This guide explains the main causes of crankshaft position sensor failure, the symptoms that commonly appear, how to check the problem safely, and when a professional diagnosis is the better option.
Source: trade.ra-grasse.de
What Does a Crankshaft Position Sensor Do?
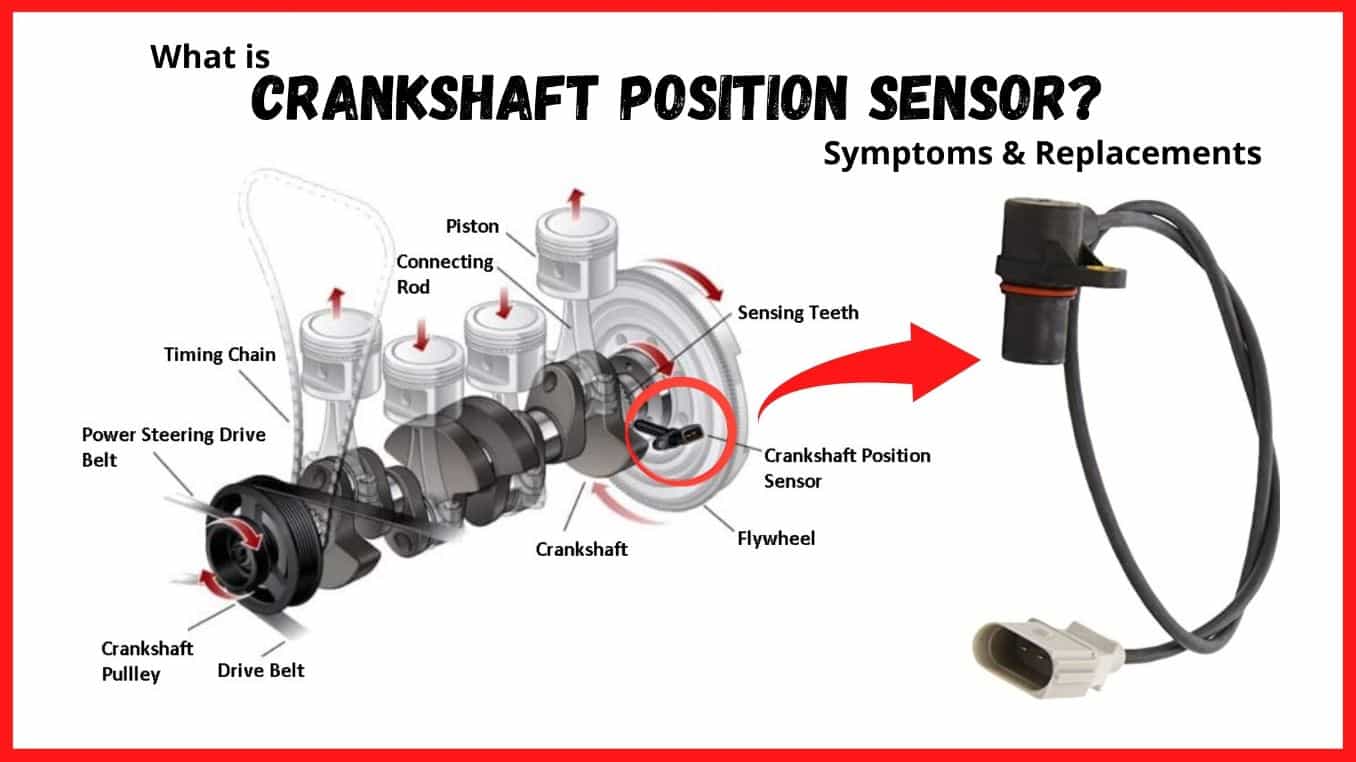
A crankshaft position sensor monitors the crankshaft’s position and rotational speed and sends that information to the engine control module. The computer uses the signal as a reference for controlling engine operation, including fuel injection and ignition timing on many vehicles.
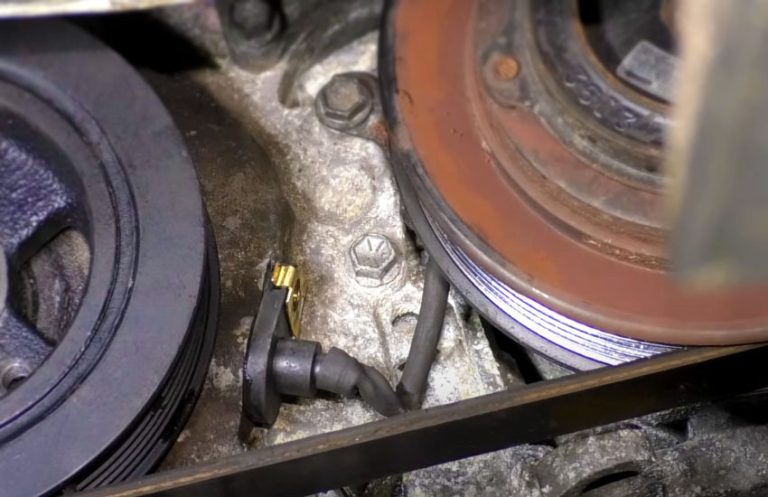
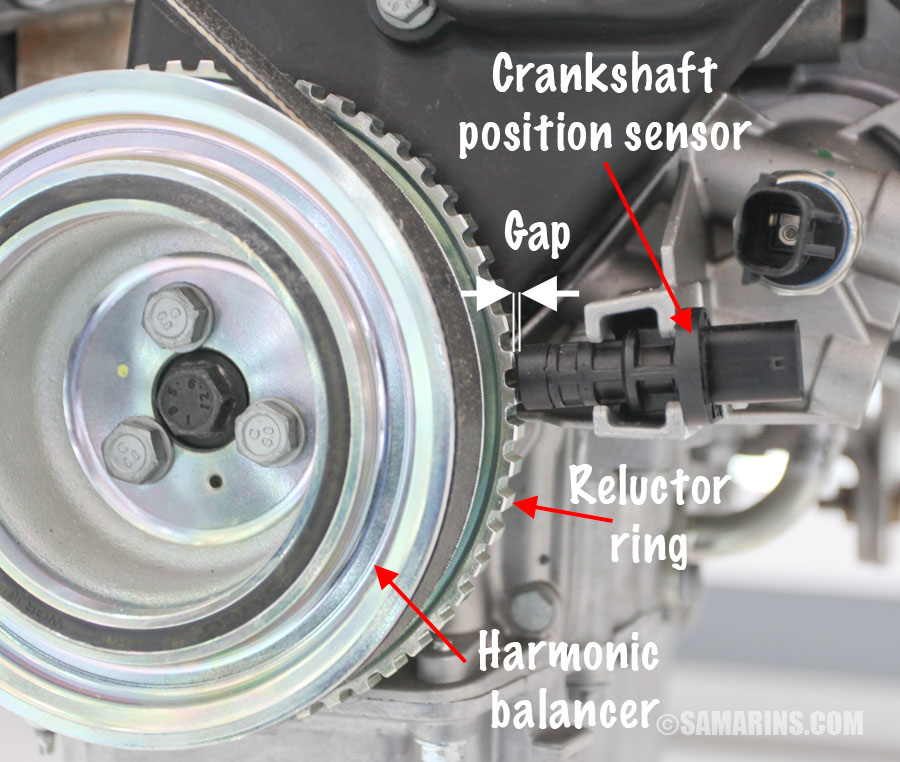
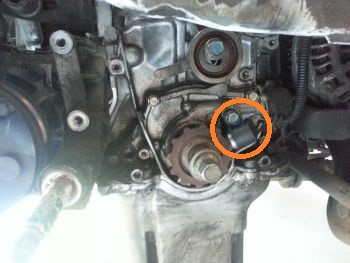
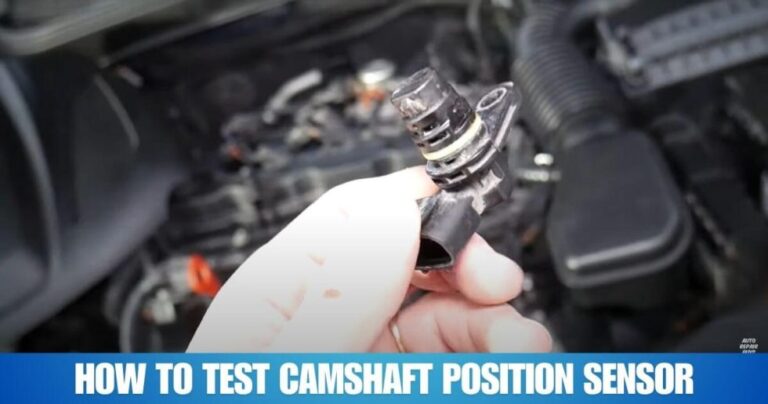
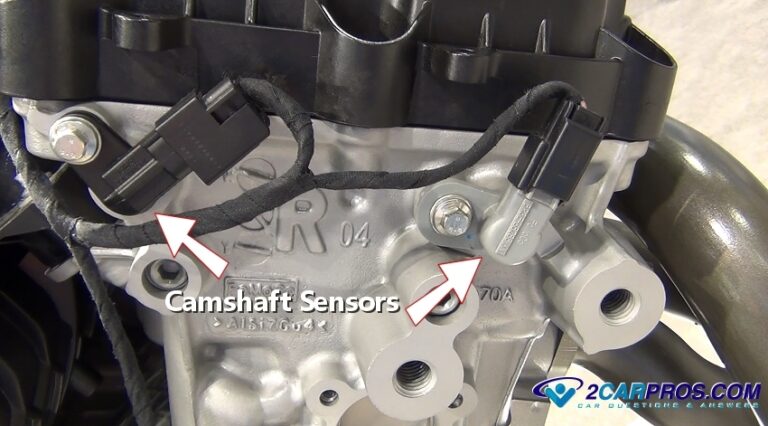
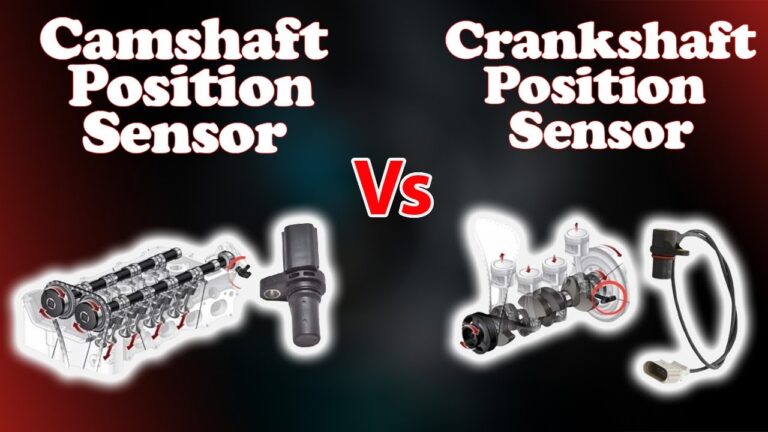
The sensor is commonly installed near the crankshaft, flywheel, flexplate, or timing area, although the exact location varies by vehicle. Some systems use magnetic or variable-reluctance sensors, while others use Hall-effect technology. The testing method therefore depends on the sensor design and the vehicle manufacturer’s specifications.
The sensor works with a toothed or patterned reluctor, sometimes called a trigger wheel or tone wheel. As the wheel moves past the sensor, it creates a changing signal that the engine computer can interpret. If the sensor, wiring, connector, or reluctor cannot produce a reliable signal, the engine computer may lose an accurate reference for crankshaft position.
Source: ar.inspiredpencil.com
Sensor
Detects crankshaft position and rotational speed.
Reluctor or trigger wheel
Provides the physical pattern that the sensor detects as the crankshaft rotates.
Wiring and connector
Carry the sensor signal and, depending on the design, power and ground between the sensor and engine computer.
Engine control module
Interprets the crankshaft signal and uses it with other inputs to control engine operation.
What Causes a Crankshaft Position Sensor to Go Bad?
The most common causes are physical wear, excessive heat, vibration, contamination, electrical faults, and damage to the components that the sensor reads. A sensor can also appear to have failed when the real problem is a connector, wiring harness, reluctor wheel, mounting issue, or related engine component.
There is no single failure pattern that applies to every vehicle. Sensor construction, location, engine design, temperature exposure, wiring layout, and maintenance history all affect the likely cause.
Source: hitchesguide.com
1. Normal aging
Crankshaft position sensors can deteriorate over time. Internal electronic or magnetic components may become less reliable, particularly after years of heat cycles and vibration.
2. Excessive heat
A sensor mounted close to the engine or exhaust system can experience repeated high temperatures. Heat can eventually affect electronic components, insulation, connectors, and wiring.
3. Vibration
Continuous engine vibration can stress the sensor housing, internal components, connector, or wiring. Vibration can also expose a weak connection that works intermittently.
4. Wiring damage
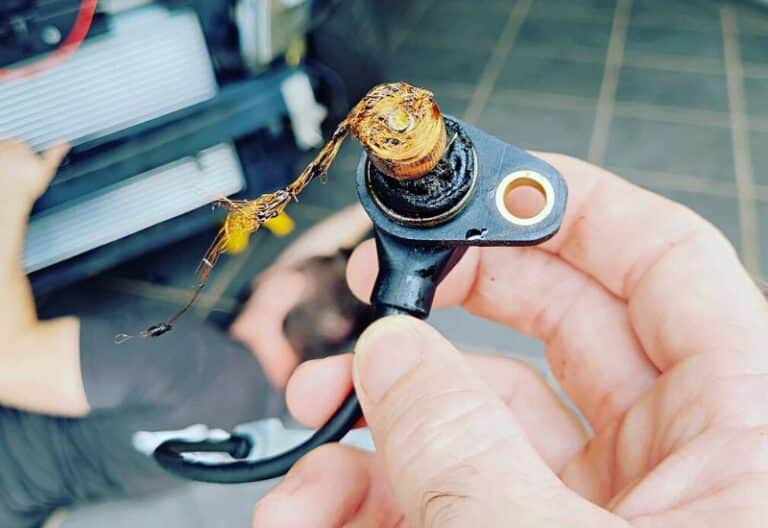
Broken, rubbed-through, stretched, melted, or incorrectly repaired wires can interrupt the crankshaft signal. A wiring fault can look exactly like a sensor failure from the driver’s seat.
5. Connector corrosion or looseness
Moisture, contamination, damaged terminals, or a loose connector can increase electrical resistance or interrupt the signal. The sensor itself may still be functional.
6. Dirt or metal contamination
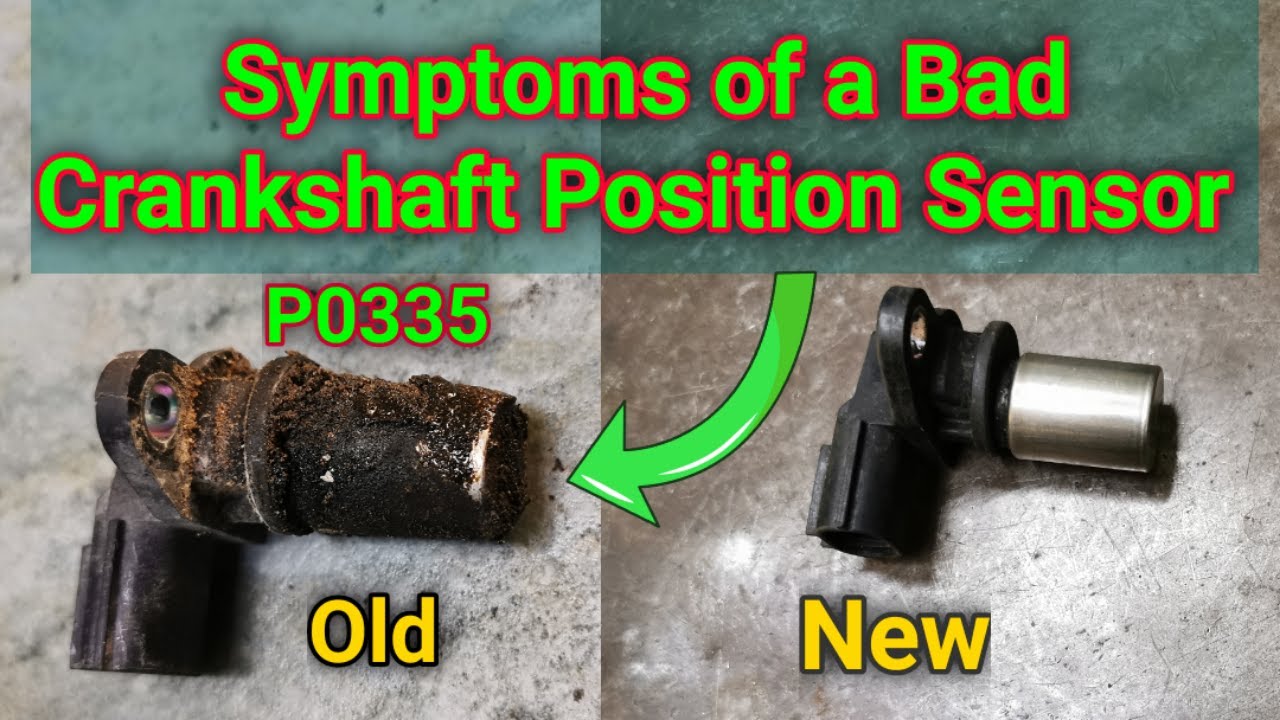
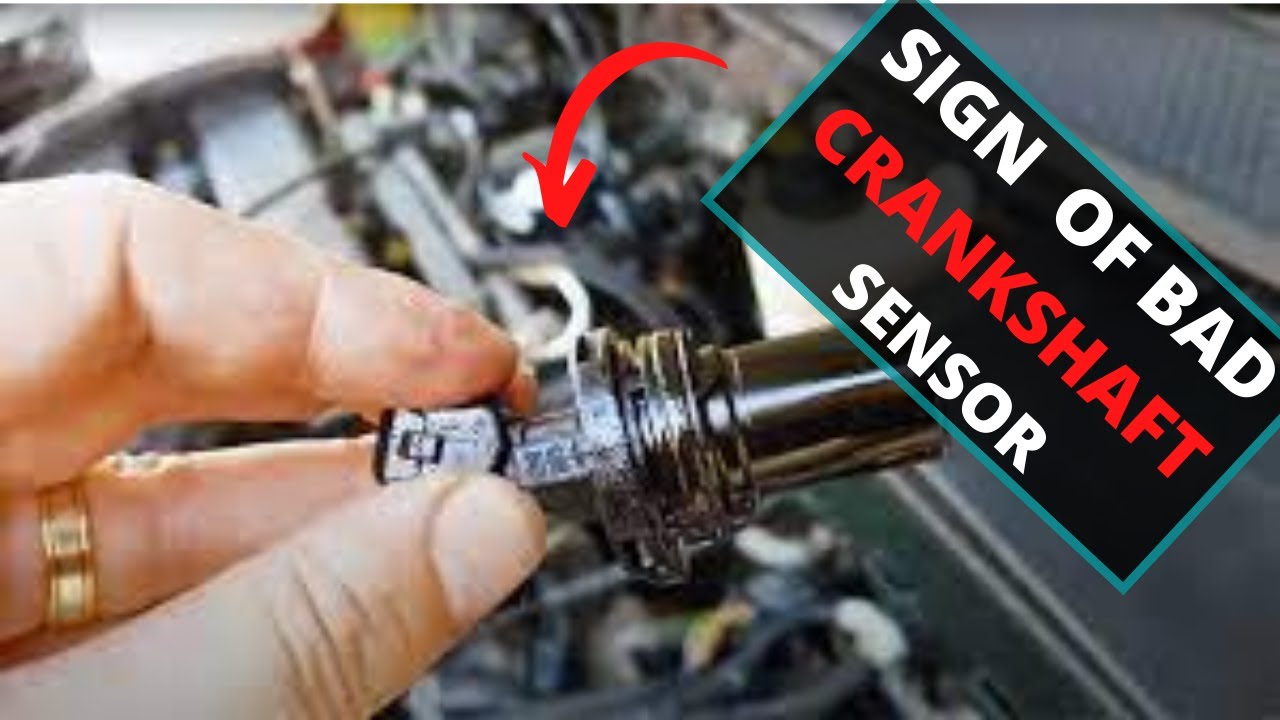
Some crankshaft sensors use magnetic sensing elements. Metal particles or other contamination near the sensing area can interfere with the signal, depending on the sensor design.
7. Physical impact
A sensor can be damaged by contact with a moving component, incorrect installation, road debris, or other physical interference.
8. Incorrect sensor-to-reluctor clearance
Some sensor designs require a specific gap between the sensing tip and reluctor. If the sensor is installed incorrectly or the related component moves out of position, the signal can become weak or inconsistent.
9. Damaged reluctor or trigger wheel
A bent, damaged, loose, cracked, or otherwise abnormal reluctor can cause a sensor to report an incorrect signal even when the sensor itself is working.
10. Poor previous repair or installation
Incorrect routing, inadequate wire repairs, damaged terminals, improper mounting, or an incorrect replacement sensor can create a recurring fault.
Heat and repeated temperature cycles
Heat is especially relevant when the sensor sits near the engine block, cylinder head, timing components, or other hot areas. Repeated heating and cooling can place stress on electronic components and wire insulation rather than causing an instant failure.
A sensor that works when the engine is cold but fails after the engine reaches operating temperature can point toward a heat-sensitive electrical or sensor problem. That pattern is useful diagnostic information, but it does not prove the sensor is defective.
Vibration and physical damage
The crankshaft area is exposed to constant mechanical movement. Excessive vibration, an incorrectly secured harness, or contact between the sensor and a rotating component can damage the sensor or its wiring.
A damaged sensor tip, damaged mounting point, or wiring that changes behavior when moved should be investigated before installing a replacement part.
How Wiring Problems Can Make a Good Sensor Look Bad
A crankshaft position sensor cannot send a reliable signal if the electrical path between the sensor and engine computer is damaged. This is why replacing the sensor immediately after seeing a crankshaft sensor fault code is not always the correct repair.
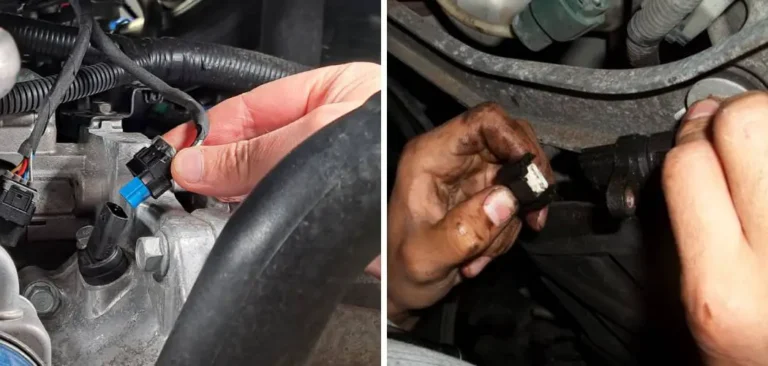
Common wiring problems include broken conductors inside the insulation, wires rubbing against engine components, melted insulation, loose terminals, corrosion, poor previous repairs, and connectors that are not fully seated.
An intermittent fault is particularly difficult because the vehicle may start and run normally during one test and fail later. A wiring harness can also behave differently when the engine moves, when the harness becomes hot, or when vibration is present.
Source: mechanicsdiary.com
Inspect the harness
Look for rubbing, cuts, melted insulation, stretched sections, previous repairs, and wires routed too close to hot or moving components.
Inspect the connector
Check for corrosion, moisture, bent terminals, damaged locks, contamination, and loose connections.
Check continuity and circuit integrity
Use the vehicle’s wiring diagram and manufacturer specifications to test the relevant circuits rather than relying on a generic resistance value.
Check the signal
Where appropriate, a suitable oscilloscope or scan-tool data can help determine whether the sensor is generating a usable signal and whether that signal reaches the engine computer.
Why an intermittent wire fault is easy to miss
A partially broken wire can make electrical contact most of the time. Movement, temperature, and vibration can then separate the damaged conductors and interrupt the signal. This can produce a random stall, difficult restart, or intermittent fault code.
A documented diagnostic case from Delphi shows why testing the signal at more than one point matters. In that case, the sensor produced a good signal, but the signal did not reach the engine computer because of a damaged wiring connection.
Do not assume the code names the failed part
A crankshaft sensor-related code identifies a system or signal problem, not necessarily a defective sensor.
Look for changes under operating conditions
Heat, vibration, and harness movement can expose faults that a stationary visual inspection may miss.
Can Contamination or the Reluctor Wheel Cause Sensor Failure?
Yes. The crankshaft position sensor and the component it reads must work together. Dirt, metal debris, physical damage, incorrect spacing, or a damaged reluctor can interfere with the signal.
For magnetic sensor designs, metal particles around the sensing area can be particularly relevant because the sensor relies on magnetic changes associated with the rotating target. The exact effect depends on the sensor and engine design.
A damaged reluctor can create a misleading diagnosis. If a tooth, reference feature, or mounting position is abnormal, the engine computer may receive a signal that does not match the expected pattern. Replacing the sensor alone will not correct that mechanical problem.
Source: autotoride.com
Check the sensor tip
Look for excessive debris, impact marks, cracking, or other physical damage when the vehicle manufacturer’s procedure allows inspection.
Check the target wheel
Inspect the reluctor or trigger wheel for damage, looseness, missing features, or abnormal positioning where accessible.
Verify sensor clearance
Use the manufacturer’s specification for the required air gap or mounting position. Do not assume one clearance applies to every vehicle.
Consider mechanical timing
If the sensor signal appears normal but engine timing information is inconsistent, related mechanical timing components may need inspection.
Why the sensor and reluctor must be diagnosed together
The sensor only reports what it detects. If the rotating target is damaged or incorrectly positioned, a healthy sensor can still produce an abnormal signal. This is one reason a complete diagnosis should consider the sensor, wiring, connector, target wheel, and related mechanical components as one system.
What Symptoms Can a Bad Crankshaft Position Sensor Cause?
A failing crankshaft position sensor can cause starting, running, and engine-control problems because the engine computer may no longer receive a reliable crankshaft reference. The exact symptoms vary by vehicle and by how the system responds when the signal becomes weak or disappears.
The most useful clue is often the pattern. For example, a vehicle that consistently fails to start may have a different diagnostic path from one that starts normally but stalls after warming up.
Source: samarins.com
Hard starting or no start
The engine may crank normally but fail to start if the computer cannot obtain the crankshaft information it needs.
Intermittent stalling
A signal that drops out while driving can cause the engine to stop running or behave erratically.
Misfires or rough running
An incorrect or unstable crankshaft signal can interfere with engine control and may be associated with misfires or rough operation.
Uneven acceleration
Incorrect crankshaft information can contribute to poor or inconsistent engine response.
Check engine light
The engine computer may store a diagnostic trouble code and illuminate the check engine light when it detects a crankshaft signal problem.
Reduced engine performance
Some vehicles may limit engine operation when an important engine-speed or position signal becomes unreliable.
Difficult hot restarting
A sensor or circuit that becomes unreliable with heat can cause a vehicle to start when cold and struggle to restart after driving.
Symptoms that do not prove the sensor is bad
Hard starting, stalling, misfires, and a check engine light have many possible causes. Fuel delivery problems, ignition faults, camshaft sensor issues, timing problems, low battery voltage, wiring faults, and other engine-control problems can create similar symptoms.
For that reason, a crankshaft sensor should be tested rather than replaced solely because the vehicle displays a symptom that matches a bad sensor.
A check engine light is not a diagnosis
The stored code must be interpreted together with the vehicle’s symptoms, wiring, sensor data, and manufacturer test procedure.
A no-start does not automatically mean CKP failure
A no-start condition can result from fuel, ignition, compression, immobilizer, battery, timing, or electrical problems.
How to Diagnose a Crankshaft Position Sensor Problem
Start with the simplest checks and move toward signal testing. The goal is to determine whether the sensor itself is faulty or whether another part of the crankshaft position sensing system is causing the problem.
Because sensor designs and specifications differ, use the service information for the specific year, make, model, engine, and sensor type. Do not apply a generic resistance or voltage specification unless it is confirmed for that vehicle.
Source: storage.googleapis.com
Step 1: Record the symptoms
Note whether the engine fails to start, stalls, misfires, loses power, or develops the problem only when hot or under certain conditions.
Step 2: Scan for diagnostic trouble codes
Use an appropriate scan tool and record all relevant codes and available freeze-frame or live-data information before clearing anything.
Step 3: Inspect the sensor
Check the sensor body, mounting area, sensing tip, and connector for visible damage or contamination.
Step 4: Inspect the wiring
Follow the harness from the sensor toward the engine computer and look for rubbing, heat damage, corrosion, loose connections, or previous repairs.
Step 5: Verify power and ground when applicable
For sensors that require an external power supply and ground, verify those circuits against the manufacturer’s specifications.
Step 6: Test the sensor signal
Depending on sensor type, use the specified test method. An oscilloscope can show the actual waveform and can reveal dropouts or abnormal patterns that a simple resistance test cannot.
Step 7: Check the reluctor and related mechanical parts
If the electrical side checks out, inspect the rotating target and related components for damage, abnormal movement, or incorrect positioning.
Step 8: Replace the sensor only after confirmation
If testing identifies the sensor as the failed component, install the correct replacement using the manufacturer’s installation procedure.
Can you test a crankshaft position sensor with a multimeter?
Sometimes, but the useful test depends on the sensor design. A multimeter can be appropriate for certain power, ground, continuity, or resistance checks, but resistance alone may not prove that a crankshaft sensor produces a correct signal while the engine is cranking.
For some applications, waveform testing with an oscilloscope provides more useful information because it shows whether the signal is present, consistent, and reaching the engine computer. Always follow the vehicle-specific service procedure.
Do not use a generic resistance value
Different sensor designs use different electrical characteristics, so an internet-sourced resistance value may not apply to your vehicle.
Avoid damaging the circuit
Use proper back-probing or breakout equipment and follow the manufacturer’s electrical testing instructions rather than piercing insulation unnecessarily.
Common Mistakes When Diagnosing a Bad Crankshaft Sensor
The biggest diagnostic mistake is treating a crankshaft sensor fault code as proof that the sensor itself needs replacement. The code can identify a problem with the signal or circuit while the underlying cause is wiring, a connector, the reluctor, or another related component.
Another mistake is ignoring the operating conditions. A sensor that fails only after the engine becomes hot needs a different diagnostic approach from one that has no signal at any temperature. Recording when the problem occurs can save diagnostic time.
Source: youtube.com
Replacing the sensor without checking wiring
A damaged harness or connector can make a replacement sensor appear to fail.
Clearing codes before recording them
Clearing diagnostic information can remove useful clues such as stored codes and freeze-frame data.
Ignoring the reluctor
A damaged or incorrectly positioned target wheel can produce a bad signal even with a new sensor.
Using the wrong replacement part
Sensors can differ by engine, application, connector, operating principle, and calibration characteristics. Verify compatibility using the vehicle’s exact application information.
Testing a hot fault only when cold
Intermittent failures can disappear during a cold inspection. Reproduce the conditions when safe and appropriate.
Working near moving engine components
Keep hands, tools, clothing, and test leads away from belts, pulleys, fans, and other moving parts. Follow safe service procedures.
When Should You Replace the Crankshaft Position Sensor?
Replace the crankshaft position sensor when testing confirms that the sensor is defective or when the vehicle manufacturer’s diagnostic procedure identifies it as the failed component. A replacement should not be based on symptoms alone.
Before installation, confirm that the replacement matches the vehicle’s exact application. After installation, make sure the sensor is correctly positioned, the connector is fully seated, the wiring is properly secured, and any required clearance or torque specification is followed.
Some vehicles may require diagnostic procedures after sensor replacement. If the check engine light remains on or the symptoms continue, the original problem may involve wiring, the reluctor, engine timing, or another system rather than the replacement sensor.
Source: storage.googleapis.com
Use the correct application
Match the replacement to the exact vehicle and engine rather than relying only on a general model name.
Follow installation specifications
Use the specified mounting method, fastener torque, connector procedure, and sensor clearance when applicable.
Inspect the old sensor
Physical damage or contamination on the removed part may provide clues about why the original sensor failed.
Verify the repair
After installation, confirm that the engine starts and runs correctly and perform the appropriate diagnostic checks.
When professional diagnosis makes sense
Professional help is appropriate when the vehicle has an intermittent no-start, stalls while driving, requires waveform testing, has difficult sensor access, or shows evidence of a mechanical timing or reluctor problem. A qualified technician has access to vehicle-specific wiring diagrams, service specifications, scan tools, and signal-testing equipment.
If the engine stalls in traffic or the vehicle repeatedly loses the ability to restart, avoid treating the issue as a routine maintenance item. Arrange a safe inspection or towing service when continued driving could leave you stranded or create a road hazard.
Frequently Asked Questions
Q
What causes a crankshaft position sensor to go bad?
Common causes include age, repeated heat exposure, vibration, contamination, physical damage, wiring problems, connector faults, and problems with the reluctor or trigger wheel. The sensor itself is not always the failed component when a crankshaft sensor fault is detected.
Q
How long does a crankshaft position sensor usually last?
There is no universal replacement interval for crankshaft position sensors. Service life depends on the vehicle design, sensor location, heat exposure, vibration, electrical conditions, and component quality. Many are replaced only when testing identifies a fault.
Q
Can overheating cause a crankshaft position sensor to fail?
Excessive heat can contribute to sensor and wiring deterioration, especially when the component is located near a high-temperature engine area. If the fault appears mainly after the engine warms up, heat-related sensor or wiring behavior should be considered during diagnosis.
Q
Can a bad crankshaft sensor cause a car not to start?
Yes. If the engine computer cannot obtain a usable crankshaft position or speed signal, some vehicles may be unable to control engine operation correctly during starting. However, many other faults can cause a no-start condition, so the sensor should be tested before replacement.
Q
Can bad wiring cause crankshaft sensor symptoms?
Yes. A broken, shorted, corroded, melted, or loose connection can interrupt the sensor signal and produce symptoms similar to a failed sensor. Wiring inspection and circuit testing are therefore important parts of a complete diagnosis.
Q
Can dirt make a crankshaft position sensor fail?
Contamination can interfere with some crankshaft sensor designs, particularly magnetic types that detect a nearby rotating target. The correct response depends on the sensor design and the type of contamination, so the manufacturer’s inspection and cleaning procedure should be followed.
Q
Will a crankshaft position sensor code always mean the sensor is bad?
No. A diagnostic trouble code can indicate that the engine computer detected an abnormal crankshaft position signal or circuit condition. Wiring, connectors, the reluctor, mechanical timing, or another related fault can cause the same diagnostic result.
Q
Is it safe to drive with a failing crankshaft position sensor?
It depends on the symptoms and vehicle. A failing sensor can cause stalling, reduced performance, or a no-start condition, which can create a safety problem if the engine stops unexpectedly. If the vehicle is stalling or repeatedly losing the crankshaft signal, have it diagnosed rather than continuing to drive it normally.
✦ Wrapping Up
Conclusion
The main causes of crankshaft position sensor failure include age, heat, vibration, contamination, physical damage, electrical problems, and faults involving the reluctor or trigger wheel. These problems can produce similar symptoms, so identifying the actual cause is more useful than simply replacing the sensor.
If your vehicle has hard starting, stalling, rough running, or a crankshaft-related diagnostic code, begin with the vehicle-specific fault information and a careful inspection of the sensor, connector, wiring, and related mechanical components. Signal testing can provide stronger evidence when the cause is not obvious.
💡 Key Takeaway
Before replacing a crankshaft position sensor, verify the fault by checking the vehicle-specific codes, wiring, connector, sensor condition, and crankshaft signal. If the diagnosis requires waveform testing or mechanical inspection, use a qualified technician.
Ethan Brooks is an automotive writer at Auto News 7, covering car news, vehicle maintenance, new model updates, recalls, and practical buying guides. He focuses on clear, useful information that helps drivers understand their vehicles and make better ownership decisions.
Learn how to test a camshaft position sensor on Ford vehicles using a multimeter and scan tool. Follow a clear step-by-step process to diagnose sensor faults, wiring issues, and engine performance problems.
Learn how to replace camshaft position sensor connector wiring safely. Follow step-by-step instructions, tools needed, troubleshooting tips, and common mistakes to avoid.
Learn how to remove crankshaft position sensor safely and correctly. Follow step-by-step instructions, tools needed, troubleshooting tips, and common mistakes to avoid.
Learn whether camshaft and crankshaft sensors are interchangeable, how they differ, common symptoms of failure, compatibility concerns, and the correct replacement approach.
Learn how to reset camshaft position sensor Ford vehicles after replacement or repairs. Follow safe troubleshooting steps, relearn procedures, and common fixes.