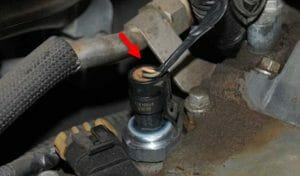
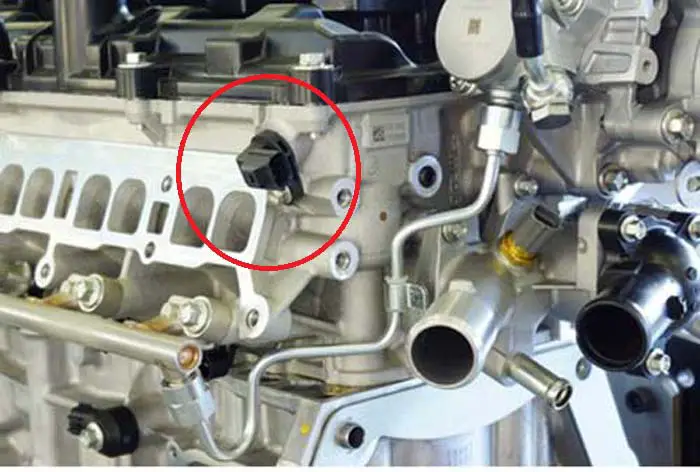
Tighten an oil pressure sensor only to the vehicle maker’s specified torque, using the correct sealant and socket.
For drivers and DIY mechanics in the United States, learning how to tighten oil pressure sensor fittings correctly starts with one rule: do not guess the torque. Oil pressure sensors and switches vary by engine, thread design, sealing method, and manufacturer. A sensor that feels loose may need the specified torque, a new seal, or replacement rather than simply more force.
The correct procedure normally involves shutting down and cooling the engine, disconnecting the electrical connector, checking the threads and sealing surface, installing the sensor by hand, and tightening it with the specified tool. Manufacturer service information shows that torque values can differ substantially between applications, so a generic torque number is not safe for every vehicle.
Source: namibian.com.na
What You Need Before Tightening an Oil Pressure Sensor
Before you tighten an oil pressure sensor, identify the exact engine and obtain its service procedure. The same general-looking sensor can use a different thread, sealing method, tool, or torque specification on another engine. Vehicle-specific information should always take priority over a generic repair guide.
Work on a cool engine when practical. Park on a stable surface, apply the parking brake, and keep the ignition off. If access requires lifting the vehicle, use properly rated jack stands or an appropriate lift rather than relying on a jack alone.
Gather the correct oil pressure switch socket or deep socket, a calibrated torque wrench, the specified sealant or replacement sealing washer, and basic cleaning supplies. Do not use an adjustable wrench on the sensor body if the manufacturer specifies a dedicated socket.
Source: fridayparts.com
Correct torque specification
Find the torque for the exact year, model, engine, and sensor application. Do not assume that a value from another vehicle applies.
Correct sealing method
Determine whether the sensor uses thread sealant, a sealing compound, a gasket, a crush washer, or another specified method.
Correct installation tool
Use the socket or specialty oil pressure switch wrench that fits the sensor without damaging its body or electrical connector.
Torque wrench
Use a suitable torque wrench when the manufacturer provides a torque specification. Make sure the wrench is appropriate for the low torque range involved.
Why You Should Not Guess the Torque
Oil pressure sensor torque is not universal. Published service procedures show different specifications across engines, including examples around 10 N·m, 15 N·m, 19 N·m, and 20 N·m. These figures demonstrate why the correct specification must come from the applicable service information rather than from the sensor’s appearance.
Overtightening can damage threads, crack a sensor or fitting, distort a sealing surface, or make later removal difficult. Under-tightening can allow oil to escape or leave the sensor insufficiently secured.
How to Tighten Oil Pressure Sensor Step by Step
The safest way to tighten an oil pressure sensor is to follow the engine-specific installation procedure from start to finish. Do not simply turn a loose sensor farther with a wrench while the engine is running.
The following sequence applies to many threaded oil pressure sensors and switches, but the vehicle’s service information overrides any general step when the procedures differ.
Source: hitchesguide.com
1. Turn off the engine
Allow the engine and nearby components to cool enough for safe access. Keep the ignition off during the repair.
2. Locate the sensor
Find the oil pressure sensor or switch on the engine using the vehicle’s service information. Access may require removing a cover, shield, intake component, or other obstruction.
3. Disconnect the electrical connector
Release the connector lock and pull the connector from the sensor without pulling on the wires. Inspect the connector for oil contamination or damaged terminals.
4. Inspect the sensor and threads
Check the sensor body, threaded area, mounting hole, and sealing surface. Stop if the threads are damaged, the fitting is cracked, or the sensor appears defective.
5. Apply the specified sealant or install the specified seal
Use only the sealing method called for by the manufacturer. Keep sealant away from the sensor opening and oil passage.
6. Start the sensor by hand
Thread the sensor into the mounting hole by hand first. It should turn smoothly without cross-threading. If it binds immediately, remove it and inspect the threads.
7. Tighten with the correct socket
Use the specified oil pressure switch socket or equivalent tool. Avoid applying force to the electrical connector or plastic portion of the sensor.
8. Apply the specified torque
Set the torque wrench to the exact specification for the vehicle and tighten the sensor smoothly until the wrench reaches that value. Do not add an extra turn after the torque is reached unless the service procedure specifically requires it.
9. Reconnect the electrical connector
Reconnect the plug until its locking mechanism is properly engaged. Make sure the wiring is routed away from hot, moving, or sharp components.
10. Check the repair
Inspect the area for oil leakage after following any required sealant curing period. Start the engine only when the service procedure permits it, then check the sensor area again for leaks and verify normal oil-pressure indications.
How Tight Should an Oil Pressure Sensor Be
An oil pressure sensor should be tight enough to reach the manufacturer’s specified torque and create the intended seal. It should not be tightened until it simply feels extremely tight.
For example, service procedures for different applications can specify approximately 10 N·m, 15 N·m, 19 N·m, or 20 N·m. Those values are examples from specific applications, not a universal specification for all vehicles.
Oil Pressure Sensor Torque and Thread Sealant
The torque specification and sealing method work together. A threaded oil pressure sensor may rely on approved thread sealant, a sealing compound, a gasket, or a washer. Using the wrong material can cause leakage or interfere with the sensor or oil passage.
Manufacturer procedures illustrate why the details matter. Some applications specify a particular thread sealant and a defined curing period before the engine is started. Others use a gasket or sealing washer instead. Follow the procedure for the exact engine rather than applying sealant automatically to every sensor.
Source: storage.googleapis.com
Thread sealant
Use the specified product and apply only the required amount to the prescribed threads.
Sealing washer or gasket
If the design uses a washer or gasket, replace it when the service procedure requires replacement and keep the sealing surface clean.
Do not block the oil passage
Excess sealant can migrate into the sensor opening or oil passage. Keep the application controlled and follow the manufacturer’s placement instructions.
Cure time matters
Some sealants require a waiting period before the engine is started. If the service procedure specifies a curing period, follow it exactly.
Can You Use Teflon Tape on an Oil Pressure Sensor
Do not automatically use Teflon tape on an oil pressure sensor. Some manufacturers specify liquid sealant, adhesive, or a particular sealing compound, while other designs use a gasket or washer. Tape can also be inappropriate if it interferes with the sensor’s intended electrical grounding or can enter an oil passage.
Use the sealing material identified by the vehicle manufacturer or sensor manufacturer for the specific application.
What to Do If the Oil Pressure Sensor Still Leaks
If oil appears around the sensor after installation, do not assume that tightening it farther will solve the problem. First shut the engine off when safe and identify where the oil is actually coming from.
Oil can travel along an engine surface, wiring, or nearby fittings and make a different component look like the source. Clean the area and inspect it again after following the appropriate safety procedure.
Source: storage.googleapis.com
Check the torque
Confirm that the sensor was tightened to the correct specification for the exact application.
Inspect the threads
Damaged or cross-threaded threads may prevent the sensor from seating correctly and can require repair rather than additional tightening.
Check the sealing method
Verify that the required sealant, gasket, or washer was used correctly and was not omitted or damaged.
Inspect the sensor
A cracked sensor housing or damaged sealing area can leak even when the installation torque is correct.
Look for another leak source
Oil from an oil filter, gasket, hose, fitting, or another component can collect near the sensor and create a misleading leak pattern.
When Tightening Is Not the Fix
If the sensor is already at its specified torque, do not keep tightening it to stop a leak. More torque can turn a minor sealing problem into damaged threads or a broken component.
Remove and inspect the sensor when the service procedure permits. Replace damaged sealing components and repair damaged threads using a method appropriate for the engine. If the mounting hole or engine casting is damaged, professional repair may be the safest option.
Common Mistakes When Tightening an Oil Pressure Sensor
Most installation problems come from using the wrong torque, tool, sealing method, or installation technique. A small threaded component can be easy to overtighten because it is located in a confined area and may feel loose even when it is already near specification.
Avoid the following mistakes to reduce the risk of leaks, damaged threads, or sensor failure.
Source: toolsweek.com
Using a generic torque value
Do not assume that one torque value applies to every oil pressure sensor. Specifications vary by vehicle and engine.
Tightening by feel
Hand feel is not a reliable substitute for a torque specification, especially for small threaded components.
Using the wrong socket
An ill-fitting wrench can damage the sensor body or connector and make future removal harder.
Applying too much sealant
Excess sealant can contaminate the oil passage or interfere with proper seating.
Cross-threading the sensor
Starting the sensor with a wrench can hide resistance and damage the mounting threads. Start it by hand whenever the design permits.
Ignoring a warning light
If the oil-pressure warning light remains on after the repair, do not assume the sensor is merely loose. Low engine oil pressure can indicate a serious lubrication problem.
Oil Pressure Warning Light After Installation
If the oil-pressure warning light stays illuminated with the engine running, shut the engine off as soon as it is safe to do so. Check the engine oil level and inspect for an obvious leak, but do not continue driving simply because the sensor was recently tightened.
A warning can result from a faulty sensor or wiring problem, but it can also indicate genuinely low oil pressure. If the cause is uncertain, have the oil pressure tested with appropriate equipment before treating the issue as a sensor-only problem.
How to Know the Oil Pressure Sensor Is Properly Tightened
A properly installed oil pressure sensor should be seated as specified, tightened to the correct torque, connected securely, and free of oil leakage after installation. The surrounding wiring should also remain properly routed and undamaged.
Do not judge the repair only by how tight the sensor feels. The best verification combines the manufacturer’s installation specification with a visual leak check and the vehicle’s normal oil-pressure indication.
Source: faq.f650.com
Correct torque reached
The torque wrench reaches the exact vehicle-specific specification without requiring an arbitrary additional turn.
Sensor remains secure
The sensor does not move or rotate after installation when checked according to the applicable service procedure.
No oil leak
The sensor and surrounding area remain dry after the appropriate installation and sealant procedure.
Connector is locked
The electrical connector is fully seated and its locking mechanism is engaged.
Oil-pressure indication is normal
The vehicle’s warning light or gauge behaves normally after startup, with no unexplained oil-pressure warning.
When to Stop and Get Professional Help
Stop the repair if the sensor will not thread smoothly, the mounting threads appear damaged, the sensor or fitting cracks, or oil leaks heavily after installation. These conditions can require repairs beyond simply tightening the sensor.
Professional diagnosis is also appropriate when an oil-pressure warning remains on, the engine makes unusual lubrication-related noises, or measured oil pressure does not meet the vehicle manufacturer’s specification.
Frequently Asked Questions
Q
How tight should an oil pressure sensor be?
An oil pressure sensor should be tightened to the exact torque specified for the vehicle’s engine. There is no single universal torque value because sensor designs, threads, sealing methods, and engine applications differ.
For example, documented service procedures can specify values such as 10 N·m, 15 N·m, 19 N·m, or 20 N·m for different applications. These examples should not be substituted for the specification for your vehicle.
Q
Can I tighten an oil pressure sensor without a torque wrench?
You can physically tighten the sensor without a torque wrench, but that does not provide a reliable way to meet the manufacturer’s specification. Because these components often use relatively low torque values, overtightening can damage threads or the sensor.
A suitable torque wrench is the better choice whenever a specified torque is available.
Q
Should I use thread sealant on an oil pressure sensor?
Use thread sealant only when the vehicle or sensor installation procedure calls for it. The required product and application amount can vary, and some sensors instead use a gasket or sealing washer.
Never allow excess sealant to enter the sensor opening or block an engine oil passage.
Q
Why does my oil pressure sensor leak after tightening?
A leak can result from incorrect torque, damaged threads, a damaged sensor, an incorrect or damaged sealing component, or an improperly applied sealant. Oil from another nearby component can also make the sensor appear to be the source.
Do not keep tightening a sensor that has already reached its specified torque. Inspect the sealing method and surrounding area instead.
Q
What happens if you overtighten an oil pressure sensor?
Overtightening can damage the sensor, strip or distort the engine’s threaded mounting hole, damage a sealing surface, or make the component difficult to remove later.
If the sensor has been significantly overtightened, inspect the sensor and mounting threads rather than assuming that additional tightening improves the seal.
Q
What should I do if the oil pressure warning light stays on after tightening the sensor?
Do not continue driving simply because the sensor was recently tightened. A persistent oil-pressure warning can indicate a sensor or wiring fault, but it can also indicate genuinely low engine oil pressure.
Check the oil level and inspect for leaks, then follow the vehicle’s diagnostic procedure. If the cause is not obvious, have the engine oil pressure measured with appropriate test equipment.
✦ Wrapping Up
Conclusion
Knowing how to tighten oil pressure sensor components correctly is less about applying maximum force and more about following the exact installation specification. Use the correct socket, start the sensor carefully by hand, apply the specified sealing method, and finish with the manufacturer’s torque value.
After installation, reconnect the wiring and check for leaks and normal oil-pressure indications. If the sensor leaks at the specified torque or an oil-pressure warning remains active, investigate the underlying problem instead of tightening the sensor further.
💡 Key Takeaway
Find the exact service specification for your vehicle, tighten the oil pressure sensor to that torque, verify the seal and connector, and stop driving if an oil-pressure warning remains on.
Ethan Brooks is an automotive writer at Auto News 7, covering car news, vehicle maintenance, new model updates, recalls, and practical buying guides. He focuses on clear, useful information that helps drivers understand their vehicles and make better ownership decisions.
Learn when to replace a camshaft position sensor, the warning signs of failure, diagnostic tips, replacement timing, costs, and whether it is safe to keep driving.
Learn how many ohms a camshaft sensor should have, why resistance varies by sensor type, and how to test a camshaft position sensor accurately with a multimeter.
Learn whether a bad knock sensor can cause overheating, how the sensor affects engine timing, common symptoms, diagnostic steps, and when overheating points to a different problem.
Learn whether bad gas can cause a knock sensor code, how poor fuel quality affects engine knock, common symptoms, diagnostic steps, and when the knock sensor is actually faulty.
Learn how to unplug an oil pressure sensor safely, identify the electrical connector, release its locking tab, inspect the wiring, and avoid common mistakes.
Learn what to do after replacing camshaft position sensor, including resetting codes, testing engine performance, checking wiring, and troubleshooting persistent problems.