You can test a knock sensor without a multimeter by checking trouble codes, wiring, live scan data, and sensor response.
For drivers and DIY mechanics in the United States, a failed knock sensor can be confusing because the same warning light may come from the sensor, its wiring, the connector, or an engine control problem. A multimeter is useful for some electrical tests, but it is not the only way to investigate a suspected knock sensor problem.
The practical alternative is to combine an OBD2 scanner with a careful visual inspection and, when supported by the vehicle, live data or a dedicated diagnostic test. The exact procedure varies by vehicle because manufacturers use different knock-sensor circuits and diagnostic strategies.
This guide explains how to test a knock sensor without a multimeter while avoiding a common mistake: treating a knock-sensor trouble code as proof that the sensor itself is bad. Codes such as P0325 and P0330 identify a circuit or system problem, not necessarily a failed sensor.
Source: youtube.com
Can You Test a Knock Sensor Without a Multimeter?
Yes. You can perform useful knock-sensor checks without a multimeter, but you cannot reproduce every electrical test that a manufacturer may specify. The most practical method is to use an OBD2 scanner, inspect the sensor circuit, and examine the engine computer’s response.
Many modern vehicles monitor the knock-sensor circuit electronically. Manufacturer diagnostic documentation shows that the engine control system can monitor knock-sensor circuits and set different diagnostic trouble codes for circuit faults and signal-related problems. The exact monitoring strategy differs by engine and control module.
This means a scanner can often tell you whether the vehicle has detected a problem, while visual inspection can help determine whether an obvious physical cause exists. Neither method alone proves that the sensor itself is defective.
Source: toolsweek.com
What you can check
You can check stored and pending trouble codes, freeze-frame information, available live data, wiring condition, connector condition, sensor location, and related engine symptoms.
What you cannot confirm from a code alone
A code by itself cannot always distinguish a failed sensor from damaged wiring, a poor connection, incorrect mounting, control-module issues, or another engine problem.
Best tool substitute
An OBD2 scanner with live-data capability is generally more informative than a basic code reader because it can provide additional information about how the vehicle is monitoring the sensor.
Why a Knock Sensor Matters
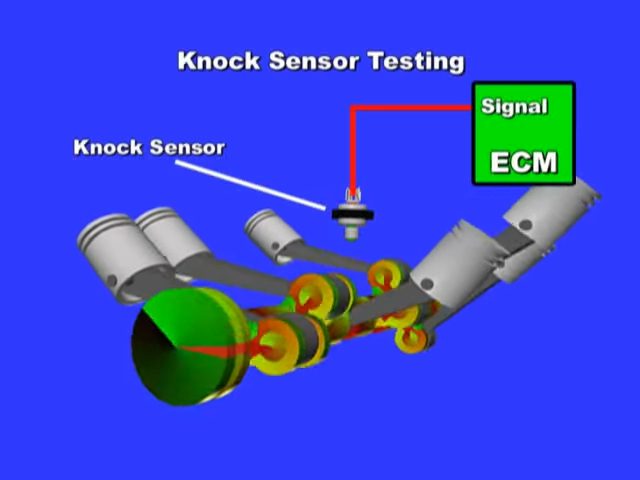
A knock sensor detects vibration associated with abnormal combustion and provides a signal to the engine control system. The control system can use that information to adjust ignition or other engine-control parameters according to the vehicle’s design.
A problem in this system may trigger a check-engine light and may be associated with symptoms such as reduced performance, hesitation, or changes in engine operation. However, symptoms vary considerably by vehicle.
What You Need Before Testing
You do not need a multimeter for the basic procedure, but you should have an OBD2 scanner that is compatible with the vehicle. A basic code reader can identify many diagnostic trouble codes, while a more capable scanner may show live data and manufacturer-specific information.
You should also have the vehicle’s service information available. Knock-sensor circuits differ between models, and some vehicles use one sensor while others use multiple sensors. Sensor location and access also vary widely.
Work with the engine off whenever you are inspecting connectors or wiring. Keep hands, clothing, and tools away from moving or hot components when the engine must be running for a diagnostic observation.
Source: safetyfic.com
OBD2 scanner
Use a scanner that can read engine trouble codes. Live-data capability is helpful but not mandatory for the initial check.
Vehicle service information
Use the correct information for the exact year, engine, and model because knock-sensor wiring and diagnostic procedures are not universal.
Flashlight
A bright flashlight helps you inspect wiring, connectors, corrosion, broken clips, chafing, and obvious physical damage.
Basic safety equipment
Use appropriate eye protection and keep the vehicle securely parked when performing under-hood inspections.
Check the Sensor Location First
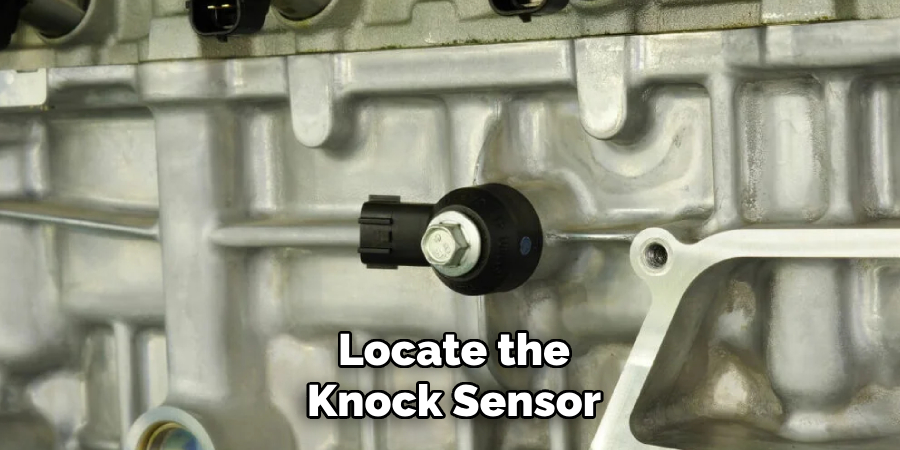
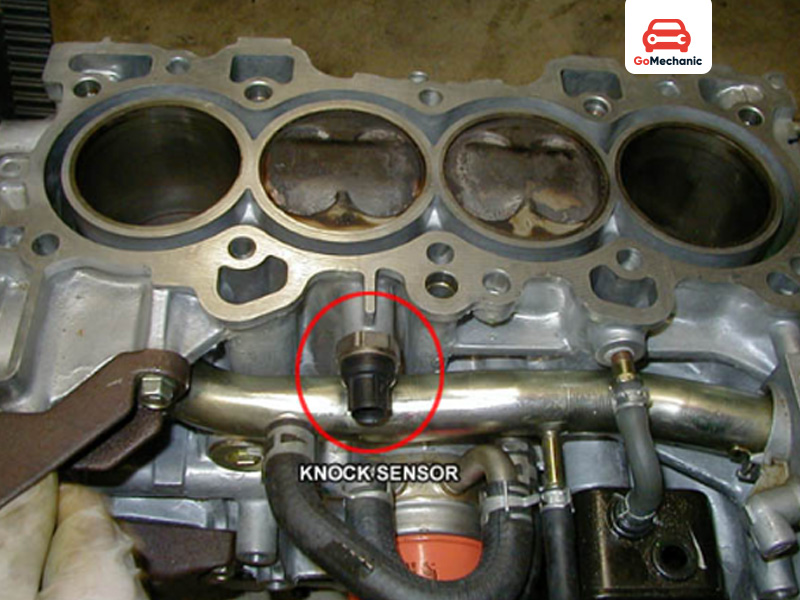
Before testing, find the knock sensor using the service information for your vehicle. Depending on the engine, the sensor may be mounted to the engine block or positioned in an area that requires removal of other components for access.
Do not assume that a sensor visible on one engine will be located in the same place on another engine. The number of sensors can also vary.
Step 1: Scan the Vehicle for Knock Sensor Codes
Connect the OBD2 scanner to the vehicle’s diagnostic connector and retrieve stored and pending powertrain codes. Record every code before clearing anything.
Common knock-sensor-related codes include P0325 and P0330, with additional code variations used on some vehicles for circuit-low, circuit-high, range, or performance conditions. The exact code definitions depend on the vehicle’s diagnostic system.
Do not immediately replace the sensor after seeing a knock-sensor code. The code tells you where the control system detected a problem, but further diagnosis is needed to determine the cause.
Source: youtube.com
Record the exact code
Write down the complete code and its description. Do not rely on a generic description from a low-cost scanner if the vehicle manufacturer provides more specific information.
Check for other codes
Additional engine, wiring, ignition, fuel, or communication codes may change the diagnostic path.
Save freeze-frame data
If the scanner provides freeze-frame information, record engine speed, load, temperature, and other available values associated with the fault.
What P0325 or P0330 Means
P0325 generally identifies a knock-sensor circuit problem for sensor 1, while P0330 is commonly associated with the circuit for sensor 2. Some manufacturers use additional codes to identify low or high signal conditions.
These codes should be treated as diagnostic starting points. Manufacturer documentation shows that a knock-sensor code can sometimes be caused by wiring or other system conditions rather than a failed sensor.
Step 2: Inspect the Knock Sensor and Wiring
Turn the engine off and inspect the knock sensor, connector, and wiring as far as they are accessible. Look for broken insulation, chafing, crushed sections, loose connectors, corrosion, oil contamination, water intrusion, or wiring that has been pulled tight.
Pay particular attention to areas where the harness passes near brackets, engine components, exhaust heat, or moving parts. A damaged wire can create symptoms that look like a failed sensor.
Check whether the connector is fully seated. If the connector has a locking tab, make sure the lock is engaged. Do not pull directly on the wires when disconnecting a connector.
Source: safetywish.com
Look for chafing
Damaged insulation can expose conductors and create intermittent or permanent circuit faults.
Check for corrosion
Moisture or corrosion at a connector can interfere with the electrical signal.
Inspect the mounting area
A knock sensor relies on its specified mounting arrangement, so incorrect installation or a damaged mounting surface can affect its operation.
Avoid guessing at torque
If the sensor must be removed or installed, use the exact torque specification supplied for that vehicle rather than a generic value.
Why Wiring Inspection Is Important
Manufacturer service information demonstrates why a visual wiring check belongs early in the diagnostic process. Some documented knock-sensor faults have been traced to wiring conditions rather than the sensor itself.
A wiring problem may also be intermittent, which means the vehicle can appear to work normally during a brief inspection. Look for evidence of harness movement, rubbing, heat exposure, or connector damage.
Step 3: Use the OBD2 Scanner to Check Live Data
If your scanner supports manufacturer-specific live data or knock-related parameters, examine the available information while following the vehicle’s service procedure. Not every vehicle exposes a raw knock-sensor voltage or a simple parameter that can be used for a universal test.
Some engine control systems monitor knock-sensor signals internally rather than presenting a straightforward sensor value to a generic scan tool. Ford diagnostic documentation, for example, describes internal knock-sensor monitoring and signal processing rather than relying only on a simple resistance measurement.
Because scan-data names vary, do not treat a missing knock-sensor PID as evidence that the sensor is bad. The control module may simply not make that parameter available through the scanner.
Source: youtube.com
Compare related information
Look for knock-related data, ignition timing information, engine speed, load, and diagnostic status when those parameters are available for the vehicle.
Watch for abnormal changes
An unusual change that occurs at the same time as a repeatable fault can support the diagnosis, but it does not automatically prove the sensor is defective.
Use manufacturer thresholds
If the service manual specifies a test condition or threshold, use that information instead of applying a generic value from another vehicle.
Can You Test Knock Sensor Response With a Scan Tool?
Sometimes. Certain scan tools and vehicle systems provide special tests or data that can help assess knock-sensor operation. Other vehicles do not provide a user-accessible functional test through a generic scanner.
Do not intentionally create severe engine knock simply to see whether the scan data changes. Controlled diagnostic procedures, when provided by the manufacturer, should be followed instead.
Step 4: Clear the Code Only After Recording the Evidence
After recording the codes and diagnostic information, you can clear the codes if the vehicle service procedure allows it. Clearing a code does not repair the underlying problem. It only resets the stored diagnostic information and may turn off the check-engine light temporarily.
If the same code returns after the vehicle completes the required monitoring conditions, the problem is still present or has been detected again. Some diagnostic monitors require particular operating conditions before they run.
Do not repeatedly clear the code just to make the warning light disappear. That removes useful diagnostic information and can make troubleshooting harder.
Source: youtube.com
Before clearing
Save the trouble codes and freeze-frame information.
After clearing
Operate the vehicle only as appropriate and monitor whether the same fault returns.
If the code returns
Continue diagnosis using the manufacturer’s wiring, circuit, and sensor test procedure rather than replacing parts based solely on the code.
When a Code Does Not Return Immediately
An intermittent fault may not return immediately after clearing. A single drive without a code does not necessarily prove that the system is repaired.
The engine control module may need specific operating conditions before it runs a particular monitor. Some manufacturer documentation describes knock-sensor checks that operate only under defined engine conditions.
Step 5: Decide Whether the Sensor Is Actually the Problem
The sensor becomes a stronger suspect when the correct trouble code returns, the wiring and connector pass inspection, the mounting arrangement is correct, and the manufacturer’s diagnostic procedure points toward the sensor.
If the wiring shows damage, repair the circuit according to the vehicle’s service instructions before condemning the sensor. If the vehicle has unusual engine operation or other trouble codes, those conditions may need to be resolved first.
A scan tool can narrow the problem, but it is not a universal substitute for electrical testing. If the manufacturer’s procedure specifically requires resistance, voltage, continuity, waveform, or another measurement, a qualified technician may need to perform that test with the appropriate equipment.
Source: safetyfic.com
Sensor is more suspect
The same fault returns and the vehicle-specific diagnostic procedure eliminates wiring, connector, mounting, and related causes.
Wiring is more suspect
You find chafing, corrosion, broken insulation, loose terminals, water intrusion, or other physical evidence near the knock-sensor circuit.
More diagnosis is needed
The code is intermittent, multiple unrelated codes are present, live data is unavailable, or the manufacturer’s procedure requires equipment you do not have.
Do Not Use Engine Tapping as a Universal Test
You may find instructions online telling you to tap the engine or sensor and watch for a change in engine behavior. This is not a universal diagnostic procedure and can produce misleading results because engines and knock-control strategies differ.
A controlled functional test should come from the service information for the exact vehicle. Avoid striking the sensor, engine block, or other components with force just to generate a signal.
Common Mistakes When Testing a Knock Sensor Without a Multimeter
The biggest mistake is assuming that a knock-sensor trouble code automatically means the sensor needs replacement. The engine control module monitors a circuit and its behavior, so several faults can lead to a similar code.
Another mistake is applying a resistance or voltage specification from a different vehicle. Knock sensors can use different designs and circuits, so a value that applies to one engine may be meaningless for another.
It is also easy to confuse an engine problem with a sensor problem. If abnormal combustion, wiring damage, or another engine-control fault is present, replacing the sensor may not solve the underlying issue.
Source: gomechanic.in
Replacing the sensor immediately
A code identifies a diagnostic area, not necessarily the failed component.
Using generic electrical values
Always use specifications for the exact engine and sensor system.
Forcing engine knock
Deliberately causing severe detonation is an unnecessary risk and is not a universal diagnostic method.
Ignoring the connector
A damaged or contaminated connector can interrupt the signal even when the sensor itself is functional.
Clearing codes too early
Erase diagnostic information only after recording it so that important evidence is not lost.
When You Should Use a Professional Diagnostic Test
Professional diagnosis makes sense when the knock-sensor code keeps returning but no obvious wiring problem is visible, when the sensor is difficult to access, or when the manufacturer requires electrical or waveform testing.
A professional technician may have access to manufacturer-level scan data, wiring diagrams, service procedures, oscilloscopes, and other diagnostic equipment. That equipment can help distinguish a sensor fault from a circuit or control-module problem.
If the vehicle is experiencing severe loss of power, persistent engine noise, overheating, or other serious symptoms, avoid using repeated road tests as a diagnostic experiment. Have the vehicle inspected before continued driving if there is a risk of engine damage.
Source: youtube.com
Use professional testing
Seek additional testing when the available scan information cannot identify the cause.
Stop experimenting
Do not deliberately induce knock or repeatedly stress the engine to obtain a sensor response.
Follow vehicle-specific procedures
The service manual should control the final diagnosis, sensor replacement procedure, wiring repair, and any required calibration.
Frequently Asked Questions
Q
Can I test a knock sensor without a multimeter?
Yes. You can use an OBD2 scanner to check trouble codes and, when supported, live data or manufacturer-specific diagnostic tests. You can also inspect the sensor connector and wiring for visible problems.
These checks can narrow the cause, but they may not replace the electrical measurements required by the vehicle manufacturer.
Q
How do I know if my knock sensor is bad?
A recurring knock-sensor code combined with a failed vehicle-specific diagnostic test can point to a defective sensor. However, the same code can sometimes result from wiring, connector, mounting, software, or other control-system problems.
Do not condemn the sensor from the code alone.
Q
Can an OBD2 scanner test a knock sensor?
An OBD2 scanner can identify many knock-sensor-related codes and may show useful live data. Some advanced scanners can also access manufacturer-specific tests.
A generic scanner cannot perform every knock-sensor test on every vehicle, so the available functions depend on the vehicle and scanner.
Q
What does code P0325 mean?
P0325 is commonly used for a knock-sensor 1 circuit malfunction. The exact diagnostic description and testing procedure can vary by manufacturer.
The code should be followed by wiring, connector, sensor, and control-system checks rather than immediate sensor replacement.
Q
What does code P0330 mean?
P0330 is commonly associated with a knock-sensor 2 circuit problem on vehicles equipped with that sensor arrangement. The exact system configuration varies by vehicle.
Check the manufacturer’s service information for the correct sensor location, circuit, and diagnostic procedure.
Q
Can I tap the engine to test a knock sensor?
A controlled knock-sensor response test may exist for a particular vehicle, but tapping an engine or sensor is not a universal test. Results can be misleading and aggressive impacts can cause damage.
Use the manufacturer’s specified functional test instead of deliberately creating engine knock.
Q
Will a bad knock sensor make my car run badly?
It can, depending on the vehicle’s control strategy and the nature of the fault. Some vehicles may show reduced performance, hesitation, or a warning light, while others may show fewer noticeable symptoms.
A check-engine light or drivability symptom should be diagnosed alongside the stored trouble codes and other available evidence.
✦ Wrapping Up
Conclusion
Learning how to test a knock sensor without a multimeter is possible when you combine an OBD2 scan, a careful wiring inspection, and vehicle-specific diagnostic information. The scanner is especially useful for identifying codes and, on compatible vehicles, examining live data or special tests.
The key is to avoid treating a knock-sensor code as automatic proof of sensor failure. Wiring damage, connector problems, mounting issues, software conditions, and other engine faults can produce similar diagnostic symptoms.
If the basic checks do not identify the cause, use the manufacturer’s service procedure or have a qualified technician perform the required electrical or waveform testing. That approach is safer and more reliable than guessing or deliberately creating engine knock.
💡 Key Takeaway
Start by recording the OBD2 codes and freeze-frame data, then inspect the knock-sensor connector and wiring before deciding whether the sensor itself needs replacement.
Ethan Brooks is an automotive writer at Auto News 7, covering car news, vehicle maintenance, new model updates, recalls, and practical buying guides. He focuses on clear, useful information that helps drivers understand their vehicles and make better ownership decisions.
Learn how to test a camshaft position sensor on Ford vehicles using a multimeter and scan tool. Follow a clear step-by-step process to diagnose sensor faults, wiring issues, and engine performance problems.
Learn how to clean camshaft position sensor components safely with a simple step-by-step process, tools list, troubleshooting tips, and common mistakes to avoid.
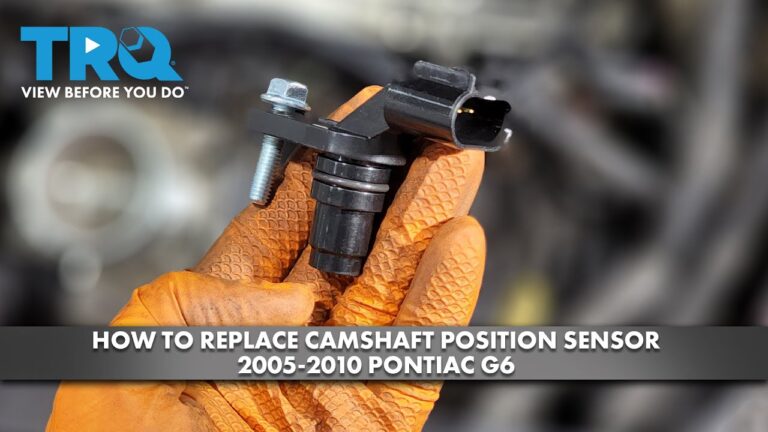
Learn how to replace camshaft position sensor Pontiac G6 models with this detailed step-by-step guide. Discover tools, symptoms, sensor location, installation tips, and troubleshooting advice.
Learn how to check camshaft position sensor operation, wiring, voltage, and signal output. Follow this practical step-by-step guide to diagnose common camshaft sensor problems.