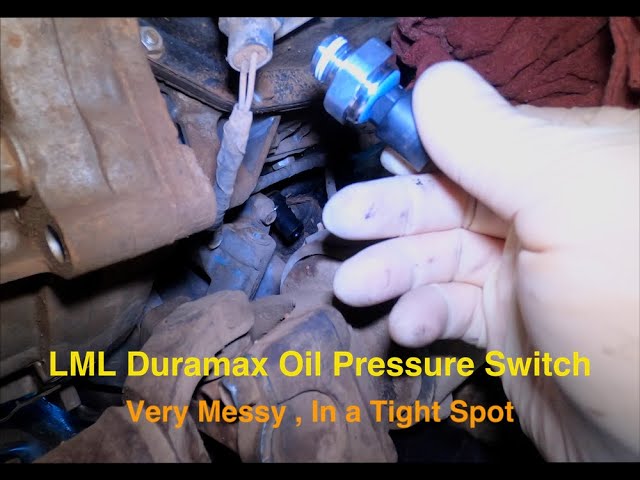
On a 2007 Chevrolet Tahoe equipped with the 5.3L V8, the oil pressure sensor is typically located at the rear of the engine block, near the firewall and behind the intake manifold. It is accessed from the engine compartment and may be difficult to see without a flashlight.
For owners working on a 2007 Chevrolet Tahoe in the United States, identifying the oil pressure sensor is a useful first step when the dashboard oil pressure gauge behaves erratically or a diagnostic trouble code appears. Most examples use a 5.3-liter V8, but checking the engine configuration and the vehicle-specific service information helps confirm the exact component and access procedure.
The sensor, also called the engine oil pressure sender, measures oil pressure and sends an electrical signal to the vehicle’s monitoring system. Before replacing it, check the electrical connector, wiring, oil level, and actual engine oil pressure when the symptoms could indicate a lubrication problem. A faulty reading does not automatically mean the sensor has failed.
Source: i.ytimg.com
Exact Location of the Oil Pressure Sensor on a 2007 Tahoe
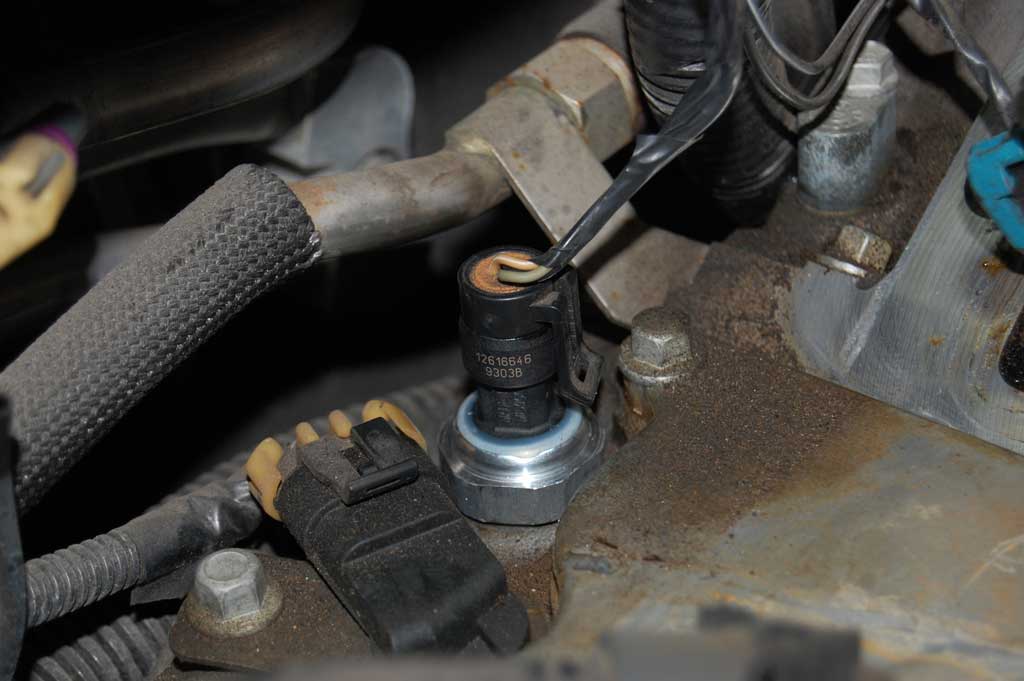
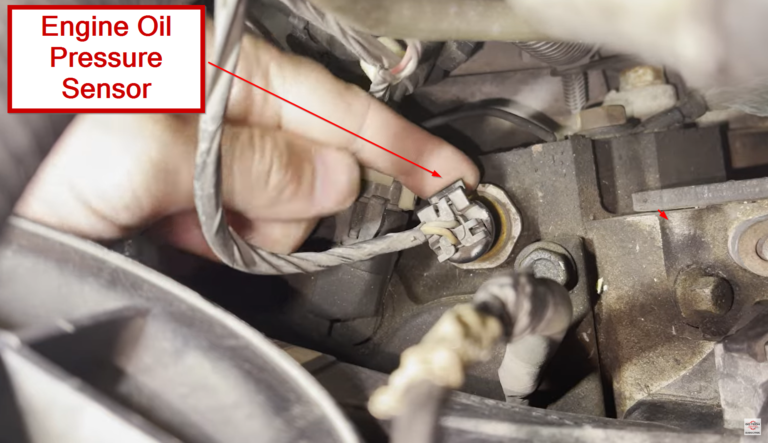
On the common 5.3L V8 configuration, look toward the rear of the engine, behind the intake manifold and near the firewall. The sensor is mounted in an oil passage at the back of the engine block area. From the front of the vehicle, it can be difficult to spot because the intake manifold and other engine components obstruct the view.
The easiest starting point is to open the hood with the engine switched off and cool. Use a bright flashlight to inspect the area between the rear of the intake manifold and the firewall. The sensor has an electrical connector attached to a threaded body. Do not assume that every nearby electrical fitting is the oil pressure sensor; compare its position and shape with service information for the installed engine.
Source: i.ytimg.com
Engine area
Rear portion of the engine, close to the firewall.
Mounting position
Threaded into the engine’s oil pressure passage in the rear intake-manifold area.
How to identify it
Look for a pressure-sensing component with an electrical connector and a threaded mounting base.
Why it is hard to reach
The intake manifold and surrounding components limit visibility and working room.
Does the 2007 Tahoe Have the Sensor Under the Intake Manifold?
The sensor is positioned at the rear of the engine in the area behind the intake manifold. Describing it as being under the intake manifold can help explain why it is difficult to see, but the precise access route depends on the engine configuration and the components installed. Consult the correct service procedure before removing intake components or disconnecting nearby wiring.
Check before disassembly
Confirm the sensor position for the specific engine using the vehicle’s service information.
Avoid unnecessary removal
Use a light and mirror first to determine whether the sensor can be reached without removing additional components.
How to Find the Sensor Without Removing Unnecessary Parts
You can often locate the sensor visually before deciding whether any components need to be removed. Work only with the engine off and cool, keep loose clothing and tools away from moving parts, and avoid leaning on plastic intake components or electrical connectors.
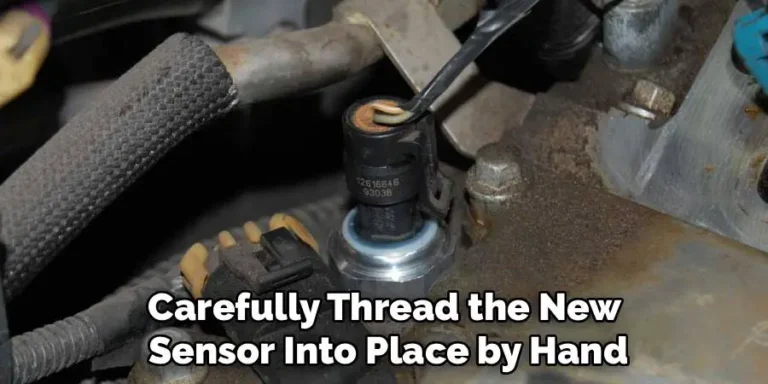
Source: vivian.smugmug.com
Step 1: Confirm the engine
Check the engine information for your Tahoe and verify that the installed engine matches the service information you are using.
Step 2: Open the hood safely
Park on level ground, switch off the ignition, remove the key or keep the key fob away from the vehicle, and allow hot engine components to cool.
Step 3: Inspect the rear of the intake manifold
Shine a flashlight into the space between the rear of the engine and the firewall. A small inspection mirror can help reveal the sensor and connector.
Step 4: Verify the component
Compare the connector, threaded body, and mounting position with a vehicle-specific diagram. Do not disconnect an unidentified connector just to test whether it is the sensor.
Step 5: Plan access
If the sensor cannot be reached safely, obtain the correct service procedure and required tools before moving wiring or removing components.
Tools That Can Help
A flashlight and inspection mirror are useful for locating the sensor. If replacement is needed, the appropriate sensor socket or deep socket and extension may make removal easier, depending on clearance. Confirm the correct socket size, thread specification, and tightening torque for the exact engine before loosening the part.
Flashlight and inspection mirror
Improve visibility around the rear of the engine.
Vehicle-specific repair information
Provides the correct component identification, access instructions, and installation specifications.
Correct socket and extension
Help prevent damage to the sensor body and allow controlled access where clearance is limited.
What the Oil Pressure Sensor Does
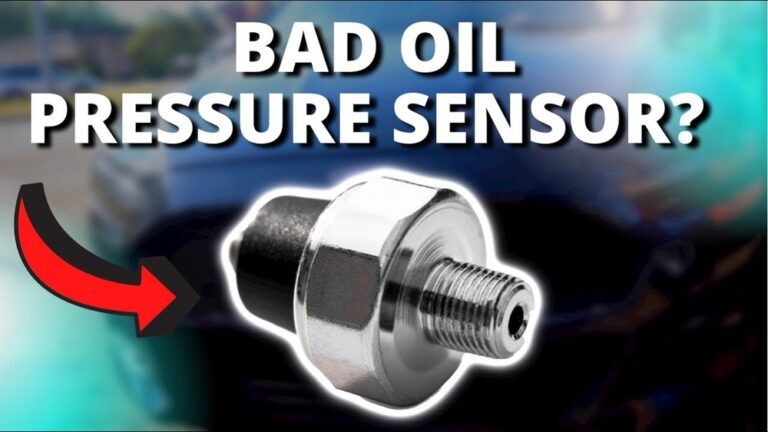
The oil pressure sensor measures pressure in the engine’s lubrication system and provides an electrical signal used by the vehicle’s monitoring and display systems. This information helps the driver recognize abnormal readings, but the sensor itself does not create oil pressure or correct a lubrication problem.
Oil pressure depends on factors such as engine speed, oil temperature, oil level, oil viscosity, internal engine clearances, and the condition of the oil pump and lubrication passages. A sensor fault can produce a misleading gauge reading, while a genuine mechanical problem can produce a similar symptom. Diagnosis must distinguish between these possibilities.
Source: i.ytimg.com
Sensor failure
May cause an erratic, implausible, or missing oil pressure reading.
Electrical fault
Damaged wiring, a loose connector, corrosion, or a circuit problem can interrupt the signal.
Mechanical pressure problem
Low oil level, a lubrication-system fault, or engine wear may cause genuinely low pressure.
Can a Bad Sensor Make the Gauge Read Zero?
Yes. A failed sensor, connector, or circuit can cause an incorrect or absent reading. However, a zero reading can also indicate a serious loss of oil pressure. If the gauge drops to zero, an oil pressure warning appears, or the engine develops knocking or tapping noises, shut the engine off as soon as it is safe and have actual oil pressure checked before restarting.
Do not assume it is only electrical
Verify actual oil pressure using the appropriate mechanical test procedure when a serious pressure loss is possible.
Protect the engine
Do not continue driving an engine with suspected inadequate lubrication.
Symptoms That May Point to a Faulty Oil Pressure Sensor
Common clues include a fluctuating oil pressure gauge, a reading that intermittently falls to zero, or a warning that appears despite an apparently normal engine condition. These symptoms are not proof of sensor failure. The engine oil level, wiring, sensor connector, oil passage, and actual pressure should be considered before replacing the component.
Source: i2.wp.com
Unstable gauge reading
The displayed pressure changes abruptly or behaves inconsistently with engine operation.
Unexpected warning
An oil pressure warning appears even though the oil level is correct; actual pressure still needs verification.
Diagnostic trouble code
A code related to the oil pressure sensor circuit may indicate a sensor, wiring, connector, or circuit problem.
Oil around the sensor
Oil leakage near the sensor may indicate a sealing or component problem, but the exact leak source must be confirmed.
What to Check Before Replacing the Sensor
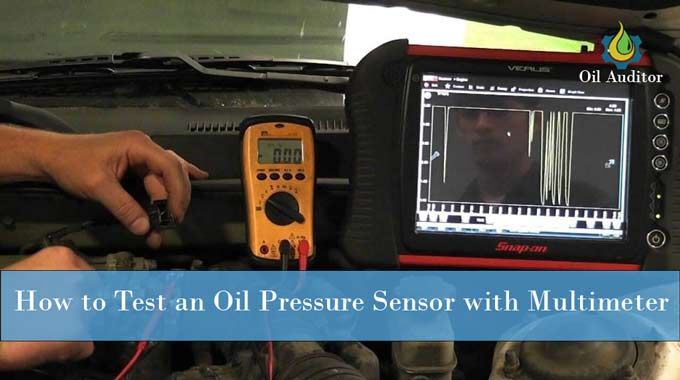
Park the Tahoe on level ground and check the engine oil level according to the owner’s manual. Inspect the visible wiring and connector for loose connections, damaged insulation, or oil contamination. If the gauge reading is abnormal, a technician can compare the vehicle’s reading with a mechanical oil pressure test and follow the applicable diagnostic procedure.
Check oil level
Correct the level if needed using the oil specification stated in the owner’s manual, then investigate any unexplained oil loss.
Inspect the connector
Look for damage or corrosion without pulling on the wires or forcing the connector.
Scan for codes
Record relevant diagnostic trouble codes and their accompanying information before clearing anything.
Verify actual pressure
Use an appropriate mechanical gauge and the correct service specifications when a real pressure problem has not been ruled out.
Can You Replace the Oil Pressure Sensor at Home?
A mechanically experienced owner may be able to replace the sensor with the correct tools and service instructions, but limited access at the rear of the engine can make the job awkward. The correct removal sequence and any required component removal should be confirmed for the installed engine before work begins.
Do not loosen the sensor while the engine is running or hot. Disconnect electrical components only as directed by the service procedure, keep dirt out of the oil passage, and avoid overtightening the replacement sensor. Use the specified thread treatment, if any, and the correct torque rather than guessing.
Source: i.ytimg.com
Before starting
Confirm the replacement part, engine application, socket requirements, torque specification, and access instructions.
During removal
Keep the work area clean and avoid damaging the connector, surrounding wiring, or threaded mounting point.
During installation
Follow the vehicle-specific torque and sealing instructions. Do not apply thread sealant unless the service information calls for it.
After installation
Reconnect components correctly, start the engine only when it is safe to do so, and check for leaks and a plausible pressure reading.
When Professional Diagnosis Is the Better Choice
Seek qualified automotive help if the sensor cannot be accessed without substantial disassembly, the mounting threads are damaged, the oil pressure reading remains abnormal after replacement, or engine noise accompanies the warning. A technician can check actual oil pressure and determine whether the fault lies in the sensor circuit or the lubrication system.
Urgent warning
Stop the engine if oil pressure appears dangerously low or abnormal engine noise develops.
Repeated sensor problems
Investigate wiring, oil passage restrictions, and other underlying causes rather than repeatedly replacing the sensor.
Common Mistakes When Locating the Sensor
The most common mistake is replacing the sensor based only on a dashboard reading. A second mistake is relying on a photograph from a different engine or model year without confirming that the component location and access procedure match the vehicle. The 2007 Tahoe’s installed engine and any previous repairs can affect what you see under the hood.
Source: tech.corvettecentral.com
Confusing a sensor with another fitting
Confirm the component using a vehicle-specific diagram and connector details.
Removing parts too early
Inspect the area with a light and mirror before deciding that intake or other components must be removed.
Ignoring actual oil pressure
A new sensor will not fix a failing oil pump, a blocked passage, low oil, or excessive internal engine wear.
Using the wrong tightening specification
Incorrect torque or unsuitable thread sealant can damage the mounting point or interfere with proper installation.
Why Model and Engine Verification Matter
Online images can help with orientation, but they should not replace service information for the exact vehicle. Confirm the engine code or configuration and compare the sensor’s position, connector, and mounting arrangement before buying parts or starting removal.
Use matching information
Prefer a repair procedure that explicitly covers the 2007 Tahoe and the installed engine.
Check the result
After any repair, verify that the reading behaves normally and that no oil leak or warning remains.
Frequently Asked Questions
Q
Where exactly is the oil pressure sensor on a 2007 Chevy Tahoe 5.3L?
It is typically mounted at the rear of the engine in the area behind the intake manifold, close to the firewall. Use a flashlight and inspection mirror to locate the electrical connector and confirm the component against the correct service diagram.
Q
Do I have to remove the intake manifold to reach the oil pressure sensor?
Not every repair requires the same amount of disassembly. Access depends on the engine configuration, available clearance, and the specified repair procedure. Inspect the area first and follow vehicle-specific service information rather than removing the intake manifold automatically.
Q
Can I drive my Tahoe with a bad oil pressure sensor?
Do not assume it is safe to drive simply because you suspect the sensor. If the gauge reads zero, an oil pressure warning stays on, or the engine makes unusual knocking or tapping noises, shut the engine off and arrange diagnosis. Driving with genuinely low oil pressure can cause severe engine damage.
Q
Will replacing the oil pressure sensor fix a fluctuating gauge?
It may fix the problem if the sensor is faulty, but fluctuating readings can also result from wiring or connector faults, a restricted oil passage, or actual changes in oil pressure. Confirm the cause before replacing parts.
Q
Where is the oil pressure sensor on a 2007 Tahoe with a different engine?
The commonly encountered 5.3L V8 has the sensor at the rear of the engine near the firewall. If your Tahoe has a different engine or a non-original engine, verify the exact location using the vehicle identification information and the correct service documentation.
Q
What should I do if the oil pressure gauge still reads incorrectly after sensor replacement?
Check the connector and wiring, confirm the replacement sensor is correct, and follow the diagnostic procedure for the vehicle. Have actual engine oil pressure measured with a suitable mechanical gauge if the cause remains uncertain. Do not continue running the engine if low pressure is suspected.
✦ Wrapping Up
Conclusion
On a typical 2007 Chevrolet Tahoe with a 5.3L V8, the oil pressure sensor is located at the rear of the engine, behind the intake manifold and near the firewall. Its position can make it difficult to see, so a flashlight, inspection mirror, and correct service diagram are useful when locating it.
Before replacing the sensor, check the oil level and inspect the connector and wiring. If the gauge indicates dangerously low pressure or the engine makes unusual noises, stop the engine and verify actual oil pressure before driving or restarting.
💡 Key Takeaway
Confirm the installed engine, inspect the rear of the intake manifold near the firewall, and verify the sensor with vehicle-specific service information before attempting replacement.
Ethan Brooks is an automotive writer at Auto News 7, covering car news, vehicle maintenance, new model updates, recalls, and practical buying guides. He focuses on clear, useful information that helps drivers understand their vehicles and make better ownership decisions.
Can an oil pressure sensor cause transmission problems? Learn how a faulty sensor affects engine performance, which symptoms to check, and how to diagnose the real cause.
Learn how to ground oil pressure sensor circuits safely, identify the correct ground path, test continuity and voltage, and avoid common wiring mistakes.