To measure an oil pressure sensor, identify its type, check its electrical response, and compare readings with the vehicle manufacturer’s specifications.
For drivers and DIY mechanics in the United States, knowing how to measure oil pressure sensor output can help separate a faulty sending unit from a real engine lubrication problem. A warning light or unusual gauge reading does not prove that the sensor itself has failed.
The correct test depends on the sensor design. A simple oil pressure switch usually changes between continuity and an open circuit as oil pressure rises. A variable-resistance sender changes its electrical resistance as pressure changes. The most reliable diagnostic process also checks actual engine oil pressure with a mechanical gauge when the sensor reading is questionable.
Source: i.pinimg.com
What an Oil Pressure Sensor Does
An oil pressure sensor or sender converts oil pressure into an electrical signal used by a warning circuit, dashboard gauge, or engine control system. The exact design varies by vehicle, so there is no single resistance value that applies to every oil pressure sensor.
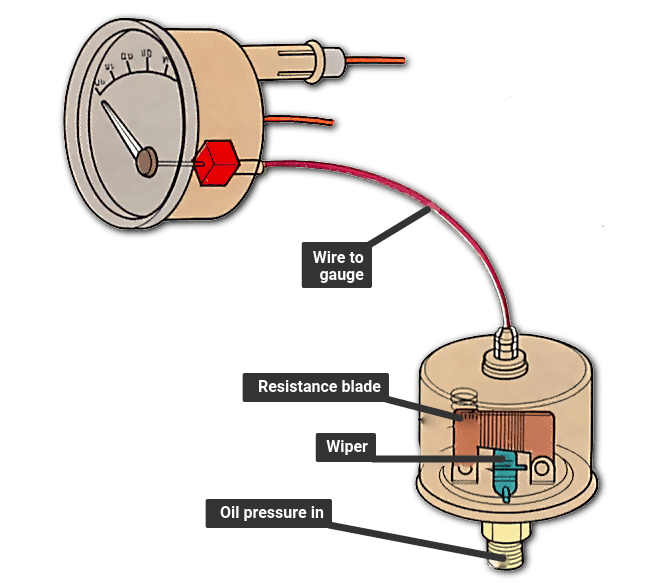
Older and simpler systems may use an oil pressure switch that opens or closes a circuit at a specified pressure threshold. Many gauge systems use a variable-resistance sender, while newer engines may use an electronic pressure sensor with a defined reference voltage, ground, and signal circuit.
Source: howacarworks.com
Oil pressure switch
A switch generally changes electrical state when oil pressure reaches its operating threshold. Continuity or resistance testing can often verify whether the switch changes state correctly.
Variable-resistance sender
A sender changes resistance as oil pressure changes. The expected resistance depends on the specific sender and must be checked against the service specification.
Electronic pressure sensor
An electronic sensor may use a reference voltage, ground, and signal circuit. Its output can require voltage testing or scan-tool data rather than a simple resistance test.
Why Sensor Type Matters
Testing the wrong terminals or applying the wrong meter setting can produce a misleading result or damage a sensitive electronic sensor. Before connecting a meter, check the vehicle service information for the sensor type, terminal identification, expected values, and testing conditions.
Check the wiring diagram
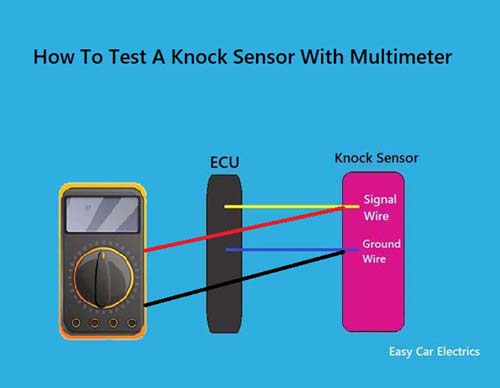
Identify the signal, ground, and reference circuits before probing a multi-wire sensor.
Check the service specification
Use the specified resistance, voltage, or pressure values for the exact engine and model year rather than a generic internet value.
Tools Needed to Measure an Oil Pressure Sensor
For a basic electrical test, you normally need a digital multimeter and access to the sensor connector. A mechanical oil pressure test requires an appropriate pressure gauge and the correct adapter for the engine’s oil pressure port.
Use insulated meter probes and keep loose clothing, hands, and test leads away from belts, pulleys, fans, and other moving engine parts. If the sensor must be removed, allow hot components to cool enough for safe access and follow the vehicle manufacturer’s service procedure.
Source: mechlesson.com
Digital multimeter
Use resistance or continuity mode for a simple switch or specified resistance sender. Use DC voltage mode when the service procedure calls for signal-voltage testing.
Mechanical oil pressure gauge
Use a suitable gauge and adapter when you need to compare actual engine oil pressure with the electrical sensor indication.
Vehicle service information
The service manual provides the terminal layout, test conditions, pressure specifications, resistance ranges, and voltage values needed for an accurate diagnosis.
Basic hand tools
Depending on the vehicle, you may need tools to disconnect the sensor connector or install a mechanical gauge adapter.
How to Measure an Oil Pressure Switch With a Multimeter
If the vehicle uses a simple oil pressure switch, the basic test checks whether the electrical circuit changes state as oil pressure rises. Many switches are closed with the engine stopped and open after sufficient oil pressure develops, but the exact behavior must be confirmed for the vehicle being tested.
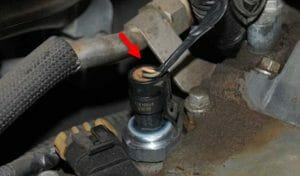
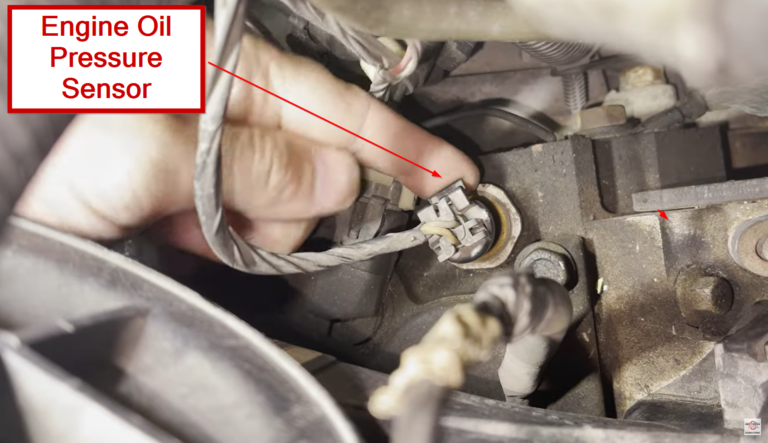
First, park the vehicle safely, switch the ignition off, and locate the oil pressure switch. Disconnect the electrical connector without pulling on the wiring. Inspect the connector for corrosion, damaged terminals, loose connections, or oil contamination before taking measurements.
Set the multimeter to resistance or continuity as specified by the service procedure. With the engine stopped and the switch disconnected, connect one meter lead to the switch terminal and the other to the specified ground point. Record the result.
If the procedure requires a running test, keep the meter and leads away from moving components. Start the engine only when the test can be performed safely. The electrical state should change when oil pressure reaches the switch’s operating threshold.
Do not assume that a particular resistance value proves the switch is good. For example, some factory procedures specify very low resistance with the engine stopped and a very high resistance while the engine is idling. Other designs use different specifications.
Source: cdsentec.com
Engine stopped
Check the switch in the condition specified by the service manual. A simple normally closed switch may show continuity or very low resistance.
Engine running
If the switch is designed to open when pressure rises, the meter should show an open circuit or a much higher resistance after the operating threshold is reached.
No change in state
A switch that does not change as specified may be defective, but actual oil pressure and the test conditions should be verified before replacing it.
How to Interpret a Continuity Test
Continuity with the engine stopped can be normal for a normally closed oil pressure switch. If the circuit remains closed after oil pressure rises above the specified switching point, the switch may be faulty. If it is open when the service procedure says it should be closed, the switch or its internal contacts may also be defective.
Normal change
The meter changes from the specified closed or low-resistance state to the specified open or high-resistance state.
No change
The switch may be defective, or the engine may not be producing the pressure needed to operate it.
How to Measure a Variable Oil Pressure Sender
A variable-resistance oil pressure sender requires a different approach. Instead of simply checking whether a circuit opens or closes, measure resistance across the specified terminals and determine whether the resistance changes as pressure changes.
Disconnect the sender and identify the correct terminals from the service information. Set the multimeter to the resistance range required by the expected specification. Measure the sender under the conditions specified by the manufacturer and record the result.
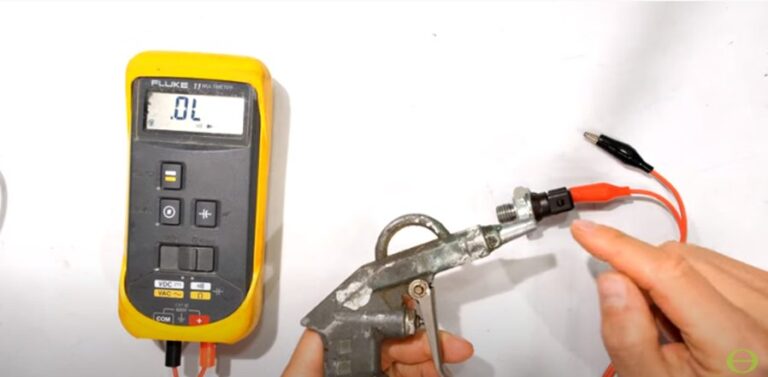
A useful bench test can involve applying controlled pressure through the sender’s pressure port while monitoring resistance. The resistance should follow the specified pressure-to-resistance relationship. A smooth change is generally more meaningful than a single resistance measurement.
Do not use compressed air pressure or a hand pump beyond the sensor’s specified test range. The pressure source and adapter must be appropriate for the sensor, and the test must follow the manufacturer’s instructions.
Source: i2.wp.com
At zero pressure
Record the resistance specified for zero or atmospheric pressure if the manufacturer provides one.
At known pressure
Apply only the specified test pressure and compare the measured resistance with the factory pressure-to-resistance chart.
Across the range
A sender that remains fixed, jumps unpredictably, or falls outside the specified range may have an internal fault.
Why Generic Resistance Values Can Mislead
Different oil pressure senders can use different resistance curves and terminal arrangements. One documented vehicle may specify very low resistance with the engine stopped and substantially higher resistance while idling, while another sender may use a completely different range. Always treat published values as vehicle-specific unless the sensor manufacturer identifies the exact part.
Use exact specifications
Match the test value to the engine, model year, sensor type, and operating condition.
Do not average readings
Different sensors are not interchangeable measurement standards, so values from unrelated vehicles should not be combined.
How to Check an Electronic Oil Pressure Sensor
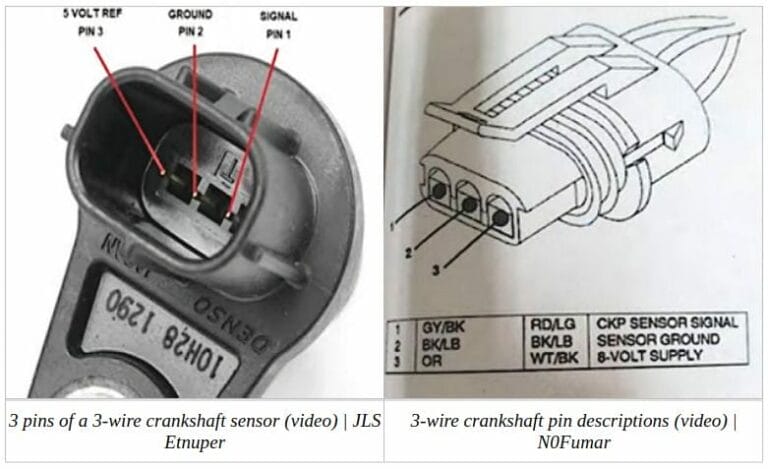
Many modern vehicles use an electronic oil pressure sensor that should not be diagnosed by simply checking resistance across random terminals. These sensors may receive a reference voltage, use a dedicated ground, and send a variable voltage signal to an engine control module or instrument system.
Start by identifying the sensor terminals and wiring colors from the vehicle service information. With the connector connected or disconnected as specified, use the multimeter on DC voltage to check the reference and ground circuits. Then measure the signal under the conditions specified by the manufacturer.
A missing reference voltage, poor ground, damaged wiring, or shorted signal wire can produce a sensor-related fault even when the pressure sensor itself is healthy. A scan tool may also help compare reported oil pressure data with the expected operating condition.
Source: howacarworks.com
Reference voltage
Verify the specified reference supply at the correct terminal rather than assuming every sensor uses the same voltage.
Ground circuit
Confirm that the sensor ground meets the manufacturer’s electrical specification and does not have excessive resistance.
Signal circuit
Measure the signal using the specified test condition and compare it with the factory diagnostic information.
Wiring inspection
Look for damaged insulation, loose terminals, corrosion, oil contamination, or a harness that has been exposed to excessive heat.
How to Measure Actual Engine Oil Pressure
If the goal is to determine whether the engine actually has low oil pressure, an electrical sensor measurement alone is not enough. A mechanical oil pressure gauge connected directly to the engine’s oil pressure port provides a direct pressure measurement that can be compared with the manufacturer’s specification.
Check the engine oil level and use the correct oil grade before testing. Install the mechanical gauge using the correct adapter and follow the vehicle-specific procedure. Start the engine and verify that oil pressure develops promptly. If the gauge shows no pressure or dangerously low pressure, shut the engine off rather than continuing to run it.
Measure pressure at the engine speeds and temperatures specified by the manufacturer. Some service procedures require a warm engine and provide separate minimum pressures for idle and a higher engine speed. Those values vary substantially between engines, so a generic pressure range should not replace the factory specification.
This mechanical test helps separate a sensor problem from a real lubrication-system problem. If mechanical pressure is normal but the dashboard reading is incorrect, investigate the sensor, wiring, connector, gauge, or control system. If mechanical pressure is below specification, investigate the engine lubrication system rather than simply replacing the sensor.
Source: mechlesson.com
Normal mechanical pressure
If actual oil pressure meets the factory specification, continue electrical diagnosis if the warning light or gauge remains incorrect.
Low mechanical pressure
Low measured pressure points toward an engine lubrication problem that may involve oil level, oil condition, pump performance, restrictions, or internal wear.
No pressure
Stop the engine immediately and diagnose the lubrication system before further operation.
Why Mechanical Testing Matters
A sensor can report a problem that is not caused by the sensor itself. A mechanical gauge bypasses the electrical measurement path and provides evidence about actual oil pressure. This is especially important when a low-pressure warning appears while the engine is running normally or when replacing the sensor does not correct the warning.
Electrical test
Determines whether the sensor and its circuit behave as specified.
Mechanical test
Determines whether the engine is actually producing the required oil pressure.
Common Oil Pressure Sensor Testing Mistakes
The most common diagnostic mistake is treating every oil pressure sensor as if it uses the same electrical design. A test that is correct for a simple switch can give meaningless results on a variable-resistance sender or electronic pressure sensor.
Another mistake is replacing the sensor before confirming actual oil pressure. If the engine has genuinely low pressure, installing another sensor will not correct the underlying lubrication problem. Electrical testing and mechanical pressure testing should answer different diagnostic questions.
Source: cdsentec.com
Using a generic resistance value
Resistance specifications vary by sensor design. Use the exact service specification for the vehicle and sensor.
Testing the wrong terminals
Multi-wire sensors can contain separate reference, ground, and signal circuits. Confirm terminal identification before probing.
Testing a hot engine unsafely
Hot oil and engine components can cause burns. Keep hands, clothing, wires, and meter leads away from moving and hot parts.
Ignoring the connector
Corrosion, oil contamination, loose terminals, and damaged wiring can create the same symptoms as a failed sensor.
Continuing to run with very low pressure
A low-pressure warning can indicate a serious lubrication problem. Do not keep operating the engine simply to complete an electrical test.
Skipping the factory procedure
The correct test may depend on engine temperature, engine speed, connector state, pressure level, and specific test equipment.
What to Do When the Test Fails
If the sensor fails its specified electrical test, inspect the connector and wiring before replacement when the procedure calls for those checks. If the electrical test passes but the oil pressure warning remains, verify actual oil pressure with a mechanical gauge and continue diagnosis through the wiring, gauge, control module, or lubrication system as appropriate.
When the measured oil pressure is outside the factory range, the issue should be treated as an engine lubrication diagnosis rather than a simple sensor replacement. A qualified technician is appropriate when access is difficult, the engine shows very low pressure, or the required test equipment is unavailable.
Sensor fails electrical test
Confirm the test conditions and terminal identification, then replace the sensor if the manufacturer’s procedure confirms the sensor is faulty.
Sensor passes but warning remains
Check actual oil pressure and then inspect the wiring, gauge, instrument system, or control module.
Mechanical pressure is low
Stop treating the issue as a sensor-only problem and investigate the lubrication system.
Frequently Asked Questions
Q
Can I measure an oil pressure sensor with a multimeter?
Yes, but the correct multimeter test depends on the sensor design. A simple oil pressure switch can often be checked for continuity or resistance, while a variable sender may require resistance measurements across a pressure range and an electronic sensor may require voltage testing.
Always use the terminal identification and specifications for the exact vehicle.
Q
What resistance should an oil pressure sensor have?
There is no universal resistance value for every oil pressure sensor. The correct value depends on the sensor type, manufacturer, engine, pressure, and temperature.
Some factory procedures specify very low resistance with the engine stopped and much higher resistance while the engine is idling, while variable senders can use a pressure-dependent resistance curve.
Q
How do I know if my oil pressure sensor is bad?
A sensor may be faulty if its electrical behavior does not match the manufacturer’s specified test results. A simple switch that fails to change state when pressure rises can indicate an internal fault, while a variable sender that does not follow its specified pressure-to-resistance relationship may also be defective.
Confirm wiring, connector condition, and actual oil pressure before replacing the sensor.
Q
Can a bad oil pressure sensor cause a warning light?
Yes. A failed switch, sender, sensor, connector, or wiring circuit can cause an incorrect oil pressure warning. However, the warning can also indicate genuinely low engine oil pressure.
If the warning remains on with the engine running, verify actual oil pressure before assuming the sensor is the problem.
Q
Should I use a mechanical gauge to test oil pressure?
A mechanical gauge is the appropriate way to directly verify actual engine oil pressure when a sensor or dashboard reading is questionable. It bypasses the electrical sensor and indicates the pressure present at the test port.
Use the exact pressure and temperature specifications for the engine. If pressure is dangerously low or absent, shut the engine off and diagnose the lubrication system.
Q
What if the oil pressure sensor tests good but the gauge is wrong?
If the sensor passes its specified test, inspect the connector and wiring and then continue toward the dashboard gauge, instrument cluster, control module, or related circuit as applicable.
A mechanical pressure test can confirm whether the engine’s actual oil pressure agrees with the electrical indication.
✦ Wrapping Up
Conclusion
The correct way to measure an oil pressure sensor depends on whether the vehicle uses a pressure switch, variable-resistance sender, or electronic pressure sensor. A multimeter can identify many electrical faults, but its readings only have meaning when compared with the correct factory specifications.
When a low-pressure warning or inaccurate gauge reading is involved, verify actual engine oil pressure with a mechanical gauge when appropriate. This separates a sensor or wiring problem from a potentially serious lubrication-system fault and prevents unnecessary parts replacement.
💡 Key Takeaway
Identify the sensor type, follow the exact factory test procedure, record the electrical readings, and verify actual oil pressure with a mechanical gauge whenever the diagnosis involves a possible low-pressure condition.
Ethan Brooks is an automotive writer at Auto News 7, covering car news, vehicle maintenance, new model updates, recalls, and practical buying guides. He focuses on clear, useful information that helps drivers understand their vehicles and make better ownership decisions.
Learn how to unplug an oil pressure sensor safely, identify the electrical connector, release its locking tab, inspect the wiring, and avoid common mistakes.
Learn how to test an oil pressure sensor with a multimeter and mechanical gauge, identify wiring faults, and separate sensor problems from real low oil pressure.
Learn how to test a single wire knock sensor with a multimeter, check its wiring and ground path, interpret resistance readings, and avoid common testing mistakes.
Learn how to test a Toyota knock sensor using a multimeter, scan tool, and visual inspection. Follow a practical step-by-step process to diagnose knock sensor problems in Toyota vehicles.