On most 2011 Chevrolet Silverado models equipped with a gasoline 4.8L, 5.3L, or 6.0L V8 engine, the oil pressure sensor is mounted at the rear of the engine block, near the back of the intake manifold and close to the firewall. The exact location and access procedure depend on the engine installed in your truck.
If you are diagnosing an oil pressure warning or a gauge that suddenly drops on a 2011 Chevrolet Silverado sold in the United States, start by identifying the engine before removing any parts. Many Silverado 1500 trucks from this model year have a 5.3L V8, but other engine configurations are possible, and the sensor arrangement may differ.
The oil pressure sensor, also called the oil pressure sending unit, monitors engine oil pressure and sends an electrical signal to the vehicle’s control and display systems. A faulty sensor, damaged connector, wiring problem, or restricted sensor passage can cause an inaccurate reading. However, a low-pressure warning can also indicate a genuine lubrication problem, so verify actual oil pressure before assuming the sensor is defective.
Source: images.platforum.cloud
Where Is the Oil Pressure Sensor on a 2011 Silverado 5.3L?
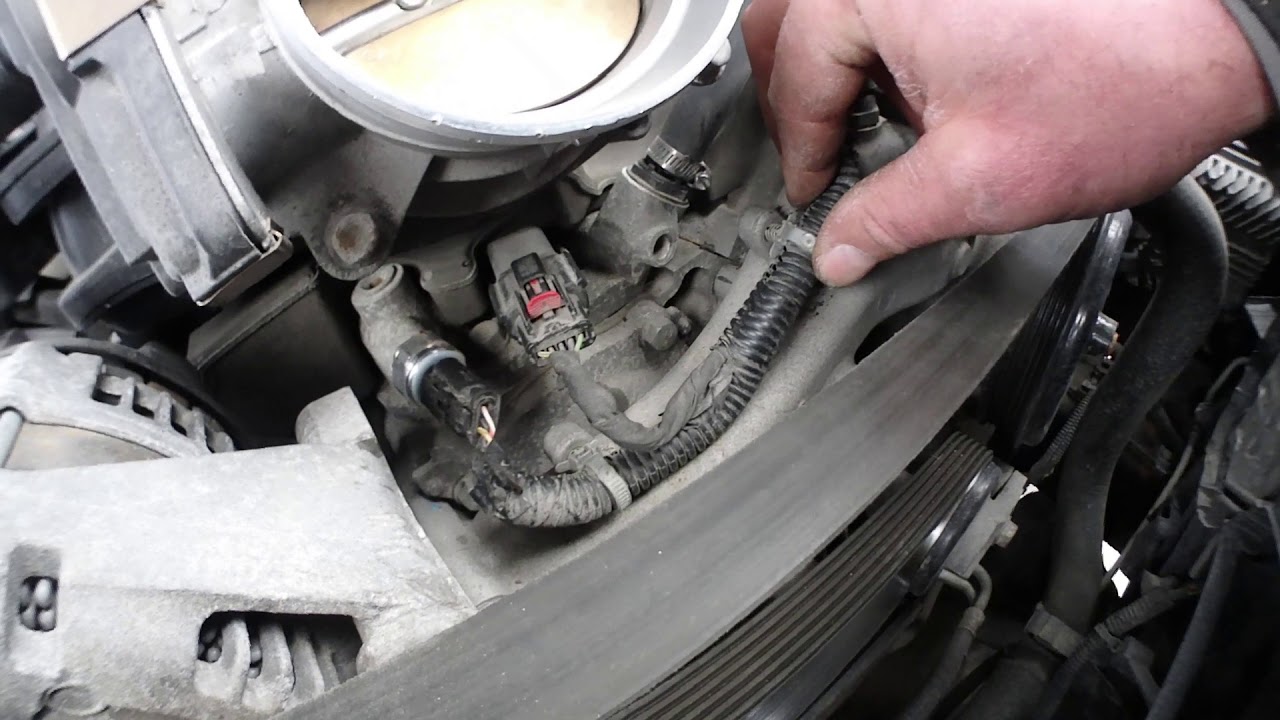
On a 2011 Chevrolet Silverado 1500 with the 5.3L V8 gasoline engine, the oil pressure sensor is typically threaded into a port at the rear of the engine block, behind the intake manifold area and near the firewall. Looking from the front of the truck, you generally need to look toward the back of the engine rather than around the front accessory drive or oil filter.
The sensor has an electrical connector attached to a threaded body. Its position can make it difficult to see from above, especially with the engine cover installed. A flashlight and inspection mirror can help you identify the connector and mounting point without removing parts unnecessarily.
Before beginning work, confirm the engine RPO code or use the VIN with a reliable repair-information source. Silverado engine options and configurations vary, and a location described for one engine should not automatically be applied to every 2011 model.
Source: i.ytimg.com
Typical position
At the rear of the engine block, near the intake manifold and firewall on common gasoline V8 configurations.
What to look for
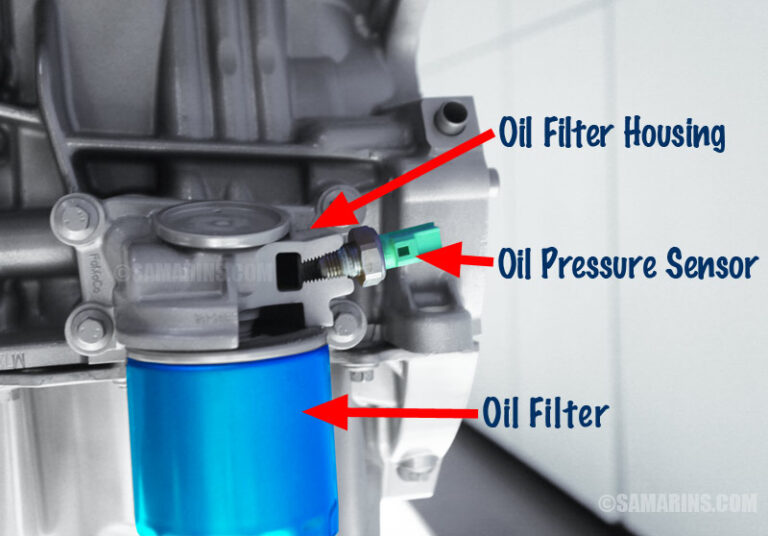
A threaded electrical pressure sensor with a wiring connector, rather than a mechanical oil line or the oil filter.
Best first step
Confirm the engine size and identify the sensor using engine-specific service information before disconnecting anything.
How to Identify the Sensor from Above
Park on level ground, switch off the ignition, remove the key or turn off the vehicle, and allow the engine to cool. Open the hood and locate the rear of the engine compartment near the firewall. On a typical 5.3L V8, inspect behind the intake manifold area for the sensor’s electrical connector.
Do not confuse the oil pressure sensor with nearby engine wiring connectors or other pressure-related components. Compare the component’s shape, threaded mounting point, and connector with an engine-specific repair diagram before attempting removal.
Use a flashlight
Illuminate the rear of the engine and look for the sensor connector and wiring harness.
Avoid pulling the wiring
Release the connector lock before disconnecting it. Pulling on the wires can damage the terminals or harness.
Can You Reach It from Under the Truck?
Access from underneath may help with inspection on some configurations, but the sensor’s high, rearward mounting position can make it difficult to reach from below. The exhaust, transmission area, and other components can obstruct access.
If you raise the truck, use properly rated jack stands on a firm, level surface and follow the vehicle’s approved lifting points. Never work beneath a vehicle supported only by a hydraulic jack. Do not remove exhaust or drivetrain components solely to gain access without confirming the service procedure.
Inspect before disassembly
Determine whether the connector and sensor can be reached from above or below on your exact engine.
Protect yourself
Let hot exhaust components cool completely and keep clear of unstable lifting equipment.
Does the Oil Pressure Sensor Location Change by Engine?
Yes. The engine installed in your 2011 Silverado determines the sensor’s exact mounting point and the parts that must be moved for access. The 1500 series commonly came with several gasoline engine options, while heavy-duty models could use different gasoline or diesel powertrains.
A 4.8L, 5.3L, or 6.0L gasoline V8 may share a broadly similar rear-engine sensor arrangement, but component placement and service procedures are not guaranteed to be identical. Diesel engines require their own service information. Do not use a gasoline V8 diagram to locate a sensor on a diesel engine.
Source: 2carpros.com
4.8L gasoline V8
Confirm the rear engine-block mounting point using the specific engine’s repair diagram.
5.3L gasoline V8
The sensor is typically at the rear of the engine block near the intake manifold and firewall.
6.0L gasoline V8
Verify the exact mounting location and access requirements for the particular engine configuration.
Diesel or heavy-duty configuration
Use the correct engine-specific service manual because sensor locations and monitoring systems may differ.
How to Confirm Which Engine Your Silverado Has
Check the vehicle identification number, emissions label, or original vehicle documentation. A VIN-based parts catalog or service manual can help identify the correct engine and sensor. An engine RPO code, where available, can provide additional confirmation.
Do not rely on the trim badge alone. A Silverado’s exterior badging may not reliably identify every engine or component revision, especially on a used truck that may have had repairs or an engine replacement.
Verify the VIN
Use a reliable vehicle-specific catalog or repair-information source to confirm the engine.
Match the replacement part
Check connector design, thread specifications, and application compatibility before buying a sensor.
How to Access the Oil Pressure Sensor on a 2011 Silverado
The correct access procedure depends on the engine and the components covering the sensor. On a common 5.3L V8, begin with a visual inspection from above. Some repair procedures require removing an engine cover or moving an obstructing component; do not assume that every truck requires intake manifold removal.
Gather the correct replacement sensor if testing confirms failure, an appropriate socket or tool specified for the sensor, a flashlight, and the vehicle-specific service instructions. A torque wrench may be necessary for installation. Avoid improvising with pliers or an incorrectly sized socket, which can damage the sensor body or its electrical connector.
Source: i.ytimg.com
1. Park and cool the engine
Park on a level surface, apply the parking brake, switch off the engine, and wait for hot components to cool.
2. Confirm the sensor location
Use an engine-specific diagram to identify the sensor at the appropriate mounting point.
3. Inspect the connector
Check for broken locking tabs, damaged wiring, corrosion, oil contamination, or a loose connection.
4. Remove only necessary obstructions
Follow the specified procedure for any covers or components that must be moved to reach the sensor.
5. Remove and install carefully
Disconnect the electrical plug, remove the sensor with the specified tool, and install the correct replacement using the manufacturer’s torque and sealing requirements.
6. Verify the repair
Reconnect everything, check for leaks, start the engine only when it is safe to do so, and verify the oil pressure reading against the specified operating range.
Should You Remove the Intake Manifold?
Not automatically. Access requirements depend on the engine, installed components, and the applicable service procedure. Some configurations allow the sensor to be reached with less disassembly, while others may require additional parts to be removed or moved.
Removing the intake manifold without a verified procedure can introduce extra work and risks, including damaged connectors, vacuum leaks, and installation problems. Confirm the service instructions before deciding how far to disassemble the engine.
Check access first
Use a mirror or inspection camera to determine what blocks the sensor.
Follow the service manual
Use the specified gasket replacement, tightening sequence, and torque values if manifold removal is required.
What to Check After Installation
After installation, make sure the electrical connector is fully seated and the wiring is routed away from hot or moving parts. Inspect the sensor base for oil leakage and compare the dashboard reading with the engine’s specified oil pressure behavior.
If a warning or trouble code remains, use a suitable scan tool to check current and pending codes. A code may need to be cleared according to the applicable diagnostic procedure, but clearing it does not repair a persistent electrical fault or a real oil pressure problem.
Look for leaks
Check around the sensor mounting point with the engine off first and follow the service procedure for any running-engine inspection.
Recheck the gauge
Confirm the reading is plausible for the engine’s temperature and operating condition.
Symptoms of a Bad Oil Pressure Sensor
A failing oil pressure sensor can cause an inaccurate dashboard reading, an intermittent oil pressure warning, or a diagnostic trouble code related to the oil pressure signal. Oil leaking around the sensor or visible damage to its connector may also point toward a sensor or installation problem.
These symptoms are not conclusive by themselves. Low engine oil, a restricted oil passage, a failing oil pump, worn engine bearings, or a wiring fault can produce similar warnings. Because inadequate lubrication can damage an engine quickly, verify actual pressure rather than replacing the sensor based only on the dashboard gauge.
Source: i.ytimg.com
Erratic gauge reading
The displayed pressure may fluctuate unexpectedly or disagree with a verified mechanical pressure measurement.
Oil pressure warning
The warning may reflect a bad sensor or an actual loss of oil pressure; investigate promptly.
Diagnostic trouble code
Codes such as P0521 can indicate an oil pressure sensor or range/performance concern, but the code alone does not prove the sensor has failed.
Oil around the sensor
A leak may come from the sensor body, its mounting seal, or a nearby source. Clean and inspect the area to identify the origin.
Can You Drive with a Faulty Oil Pressure Sensor?
Do not continue driving if the oil pressure warning indicates dangerously low pressure, the gauge falls to zero, or the engine develops knocking or other abnormal mechanical noise. Pull over safely and shut the engine off. Continuing to run an engine with inadequate oil pressure can cause severe internal damage.
If the gauge appears faulty but actual oil pressure has been verified as safe, a short trip to a repair facility may be reasonable depending on the circumstances. Without that verification, treat a serious oil pressure warning as a potential lubrication emergency.
Stop the engine
Shut it off promptly if low oil pressure is suspected, particularly if accompanied by engine noise.
Check the oil level
With the truck parked level and the engine off, follow the owner’s manual procedure for checking the dipstick.
Confirm actual pressure
Have a qualified technician use an appropriate mechanical gauge when the displayed reading cannot be trusted.
How to Diagnose an Oil Pressure Sensor Problem
Start with the safest and least invasive checks before replacing the sensor. Confirm the engine oil level, inspect the sensor connector and wiring, and scan for diagnostic trouble codes. If the warning persists or the reading suggests genuinely low pressure, measure the actual oil pressure using the correct procedure and compare the result with the manufacturer’s specifications for that engine and operating condition.
The key distinction is whether the engine has normal mechanical oil pressure but an incorrect electrical reading, or whether pressure is genuinely low. Replacing a sensor will not correct a lubrication problem caused by low oil, a blocked pickup, an oil pump fault, or internal engine wear.
Source: i.ytimg.com
Check the oil level and condition
Look for a low level, obvious contamination, or oil that does not meet the engine’s required specification.
Inspect the wiring
Look for damaged insulation, loose terminals, corrosion, or a connector that does not lock securely.
Scan for codes
Record stored and pending diagnostic trouble codes before clearing anything.
Measure actual oil pressure
Use the engine-specific service procedure and pressure specifications to distinguish an electrical fault from a mechanical problem.
What Does Code P0521 Mean on a Silverado?
P0521 generally refers to an engine oil pressure sensor or switch range/performance problem. The control module has detected a signal that does not behave as expected under the conditions it monitors. The code does not establish whether the sensor, wiring, oil pressure, or another part of the system is responsible.
Diagnosis should include checking related codes, inspecting the connector and circuit, and verifying actual pressure when indicated. Consult service information for the exact engine because diagnostic conditions and circuit tests can vary by application.
Do not replace parts based on the code alone
Use the code as a starting point for testing, not as a definitive component diagnosis.
Keep safety first
If the engine may have low actual oil pressure, do not continue running it just to reproduce the code.
What Is the Screen Under the Oil Pressure Sensor?
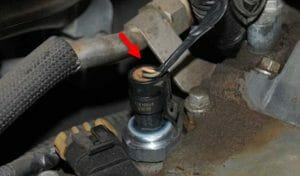
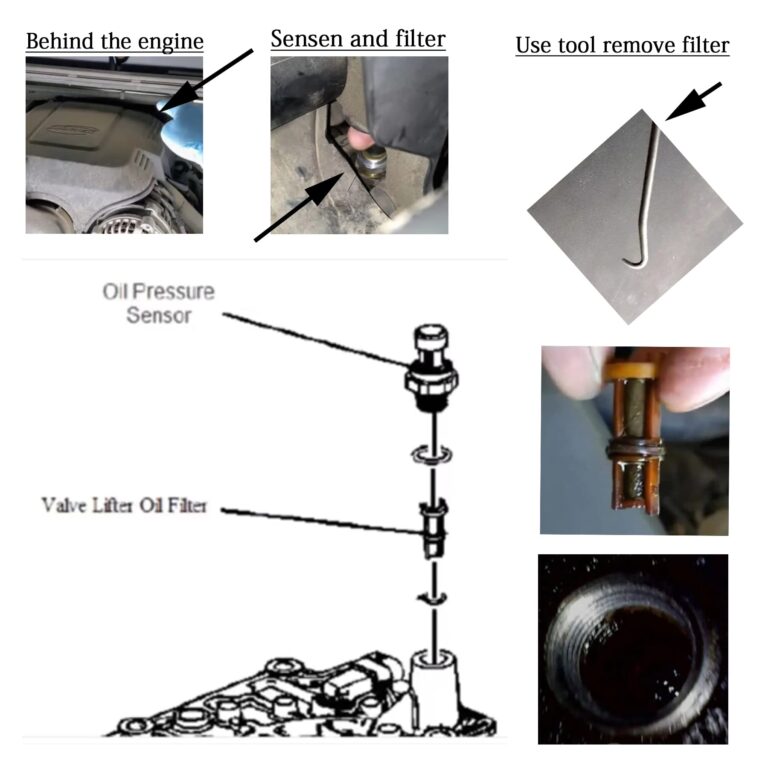
Some GM gasoline engine applications use a small filter screen beneath the oil pressure sensor. The screen helps keep debris from entering the sensor’s pressure passage. Whether a screen is present and the correct service procedure depend on the engine configuration.
A restricted screen may contribute to an inaccurate or delayed sensor reading, but its presence should be confirmed using the correct parts diagram. Do not assume every 2011 Silverado has the same screen or attempt to remove it with an unsuitable tool. Inspect and replace components only as directed by the applicable service information.
Confirm application
Use an engine-specific diagram to verify whether a screen is fitted and whether it is serviceable.
Avoid damaging the passage
Do not push debris into the engine or use a tool that can damage the screen or surrounding bore.
Common Mistakes When Locating the Sensor
The most common mistake is assuming every Silverado uses the same sensor position and access procedure. Model year alone is not enough to identify every engine configuration, especially when comparing a 1500 with a heavy-duty model or a gasoline engine with a diesel.
Another mistake is treating a dashboard reading or trouble code as proof that the sensor itself is defective. A real pressure problem can have the same warning, and running the engine during diagnosis may worsen the damage. Identify the component carefully and confirm pressure whenever the symptoms make a mechanical fault possible.
Source: i.ytimg.com
Confusing the sensor with another component
Verify the part using its connector, threaded mounting point, and the correct engine diagram.
Assuming the sensor is always easy to reach
Rear engine placement can limit access, and required disassembly varies by configuration.
Using an incorrect replacement
Match the sensor to the exact engine and verify thread, connector, and part compatibility.
Ignoring an oil pressure warning
Check for a genuine lubrication problem before deciding the warning is only an electrical issue.
When to Use a Repair Manual or Professional Technician
Use vehicle-specific service information if the sensor is difficult to identify, the connector is inaccessible, or removal requires intake or other major component disassembly. The manual provides the correct procedure, torque specifications, and diagnostic tests for the installed engine.
A professional technician is the safer choice if actual oil pressure is uncertain, the engine makes abnormal noises, wiring tests require specialized equipment, or the sensor is difficult to access without risking damage. Accurate diagnosis can prevent an unnecessary sensor replacement and help avoid engine damage.
Choose professional diagnosis
Seek help when low pressure is suspected or the required testing exceeds your tools and experience.
Use verified specifications
Do not guess at installation torque, electrical test values, or oil pressure limits.
Frequently Asked Questions
Q
Where is the oil pressure sensor on a 2011 Silverado 1500 5.3L?
On the common 5.3L gasoline V8 configuration, the oil pressure sensor is typically mounted at the rear of the engine block near the intake manifold and firewall. Confirm the precise position using the vehicle’s engine-specific service information before removing components.
Q
Can I see the oil pressure sensor without removing the intake manifold?
You may be able to locate or inspect the sensor without removing the intake manifold, but actual access depends on the engine and surrounding components. Inspect the area with a flashlight or mirror and follow the correct repair procedure before deciding whether additional disassembly is necessary.
Q
Is the oil pressure sensor the same as the oil pressure sending unit?
The terms are often used interchangeably for the component that measures or reports engine oil pressure. The exact electrical function and terminology depend on the vehicle’s system, so use the correct part description for your engine when ordering a replacement.
Q
Can a bad oil pressure sensor cause the gauge to read zero?
Yes. A failed sensor, damaged connector, or circuit fault can cause an incorrect zero reading. However, genuine low oil pressure can produce a similar symptom. Shut the engine off if low pressure is suspected and verify actual pressure before continuing to run it.
Q
Does a 2011 Silverado oil pressure sensor have a filter screen?
Some GM engine applications use a small screen beneath the oil pressure sensor, but the exact arrangement depends on the engine. Check an engine-specific parts diagram or service manual to confirm whether your truck has one and how it should be serviced.
Q
What trouble code can indicate an oil pressure sensor problem?
P0521 is a common oil pressure sensor or switch range/performance code. Other codes may relate to the circuit or signal, depending on the vehicle. A code is evidence of a detected problem, not proof that the sensor alone needs replacement.
Q
Can I drive my Silverado with a faulty oil pressure sensor?
Driving may be possible only after actual oil pressure has been verified as safe and the problem is confirmed to be limited to the monitoring system. If the oil pressure warning is active, the gauge drops to zero, or the engine knocks, stop safely and shut off the engine until the cause is diagnosed.
✦ Wrapping Up
Conclusion
On a typical 2011 Chevrolet Silverado with a 5.3L gasoline V8, the oil pressure sensor is located at the rear of the engine block near the intake manifold and firewall. The precise location and access requirements depend on the engine, so identify your configuration before starting repairs.
If you are searching for the sensor because of an erratic gauge, a warning light, or a P0521 code, inspect the connector and wiring and verify actual oil pressure when necessary. A sensor replacement may correct a faulty signal, but it cannot fix a genuine lubrication problem.
💡 Key Takeaway
Confirm your Silverado’s engine size, locate the sensor using the correct service diagram, and inspect the connector before replacing any parts. If the oil pressure warning suggests genuinely low pressure, shut the engine off and verify mechanical oil pressure before driving again.
Ethan Brooks is an automotive writer at Auto News 7, covering car news, vehicle maintenance, new model updates, recalls, and practical buying guides. He focuses on clear, useful information that helps drivers understand their vehicles and make better ownership decisions.
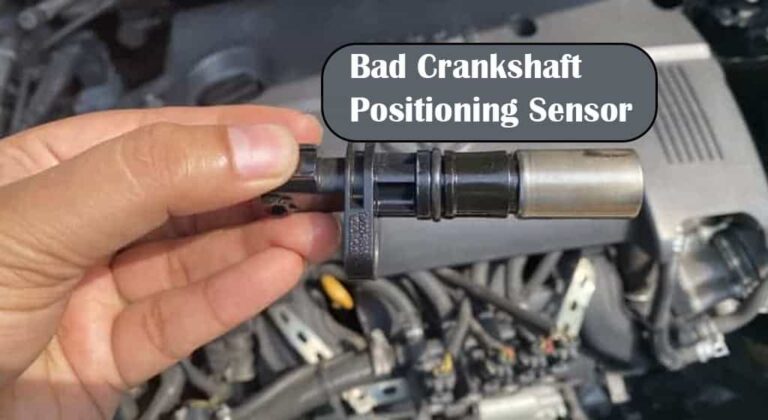
Learn what are symptoms of a bad crankshaft position sensor, including hard starting, stalling, misfires, poor acceleration, and check engine light warnings.
Learn how to unplug an oil pressure sensor safely, identify the electrical connector, release its locking tab, inspect the wiring, and avoid common mistakes.
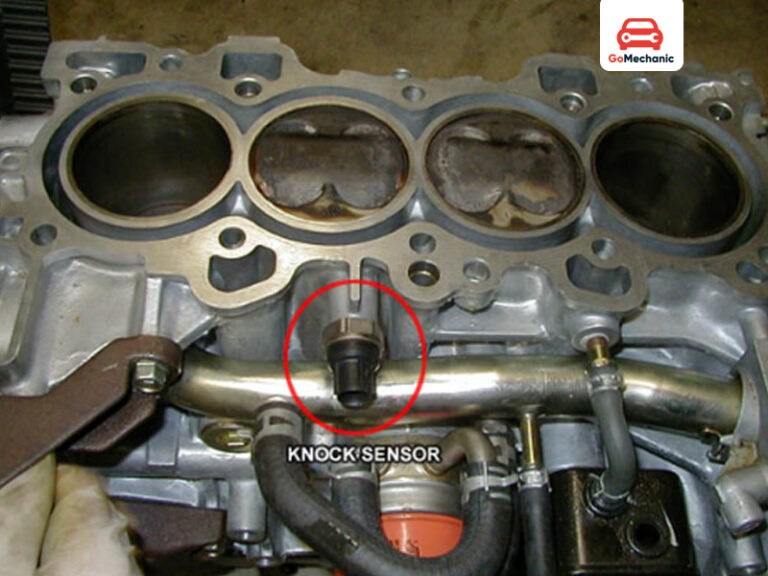
Learn whether a knock sensor can cause a check engine light, which trouble codes may appear, common symptoms, diagnosis steps, and when replacement is necessary.
Can a bad oil pressure sensor cause a misfire? Learn how oil pressure sensors affect engine performance, which symptoms matter, and how to diagnose the real cause.
Learn why bypassing an oil pressure sensor is risky, how the circuit works, and how to test low oil pressure safely without disabling engine protection.