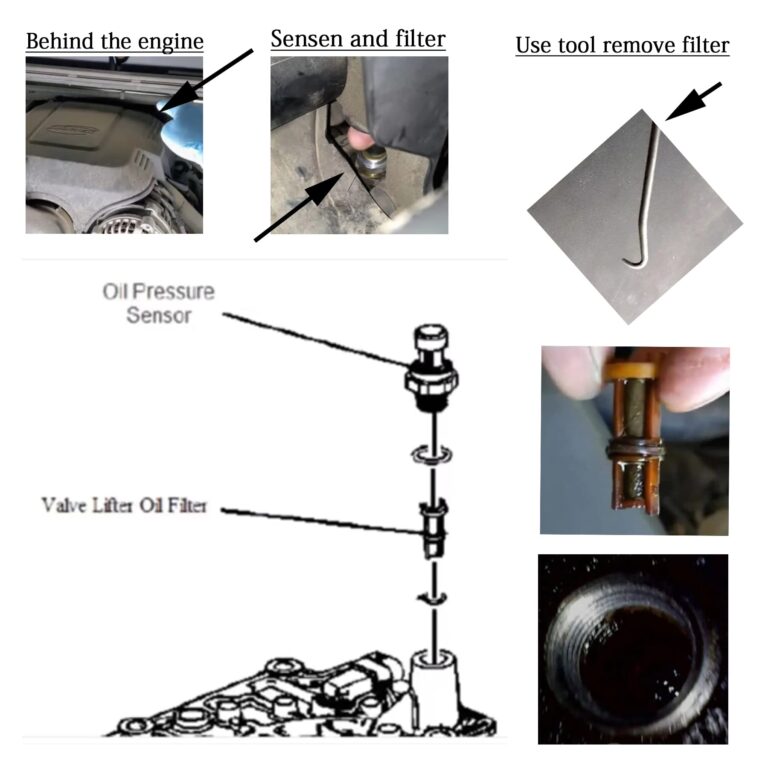
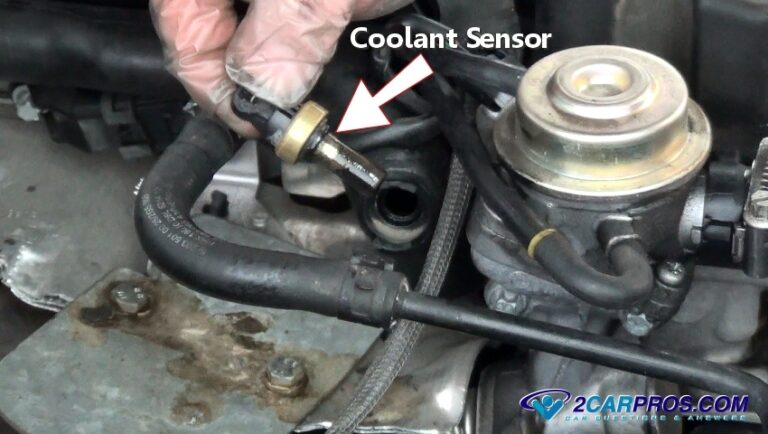
To unplug an oil pressure sensor, switch off the vehicle, let the engine cool, release the connector lock, and pull the plug straight from the sensor.
For drivers and DIY mechanics in the United States, learning how to unplug an oil pressure sensor can help with inspection, wiring diagnosis, or sensor replacement. The oil pressure sensor, also called an oil pressure switch or sender on some vehicles, reports engine oil pressure to the vehicle electronics or dashboard. The exact location and connector design vary by year, make, model, and engine.
Before working near the sensor, park the vehicle on a stable surface, switch the ignition off, and allow hot engine components to cool. Disconnecting only the electrical connector is different from removing the sensor itself. If you remove the sensor from the engine, oil may escape, so that job requires additional preparation. Vehicle-specific repair information should take priority because some models use unusual connector locks or require access through shields and other components.
Source: YouTube > AutOdometer
What Does Unplugging the Oil Pressure Sensor Do?
Unplugging the oil pressure sensor separates the sensor from its electrical circuit. The sensor itself remains installed in the engine unless you also remove it mechanically. Depending on the vehicle, the sensor may send a variable pressure signal to the engine computer, operate a pressure switch, or provide information used by the dashboard.
Disconnecting the connector can be useful when replacing the sensor, inspecting the connector, checking wiring, or following a vehicle-specific diagnostic procedure. It should not be treated as a permanent way to silence an oil pressure warning. A disconnected circuit can create a fault or remove an important warning signal.
The term oil pressure sensor covers several designs. Some vehicles use an oil pressure switch that changes electrical state at a specified pressure. Others use a pressure transducer that sends a changing signal. Because the circuit differs between vehicles, the safest procedure is to identify the exact sensor and connector before unplugging anything.
Source: hitchesguide.com
Sensor
The threaded component installed in an engine oil passage measures or responds to oil pressure.
Electrical connector
The removable plug connects the vehicle wiring harness to the sensor.
Wiring harness
The harness carries electrical signals between the sensor and the vehicle’s control or display system.
Oil Pressure Sensor vs. Oil Pressure Switch
A vehicle may call the component an oil pressure sensor, oil pressure switch, or oil pressure sender. These terms are sometimes used interchangeably in general repair discussions, but the electrical behavior can differ. Always use the terminology and procedure specified for your particular vehicle when diagnosing the circuit.
Sensor
Often produces a pressure-related electrical signal that the vehicle can interpret.
Switch
Typically changes between electrical states when oil pressure crosses a specified threshold.
What You Need Before You Unplug the Sensor
You usually need only basic access and hand tools to unplug the electrical connector. The connector itself is normally released by hand, although limited access can make the job difficult. Do not use a wrench on the sensor just to disconnect its electrical plug.
Read the vehicle’s service information before starting if the sensor is difficult to identify or buried beneath a cover, heat shield, intake component, or other equipment. Model-specific repair guides show that sensor locations and removal procedures vary substantially between engines.
If the goal is sensor replacement rather than connector inspection, prepare for a separate mechanical removal procedure. Removing the sensor can allow engine oil to escape, and the replacement component may require a specified torque or thread-sealing procedure.
Source: hitchesguide.com
Safety glasses
Protect your eyes from dirt, oil, or debris when working around the engine.
Work gloves
Help protect your hands from sharp edges, grime, and residual oil.
Flashlight
Useful when the connector is located behind or below other engine components.
Vehicle-specific information
Use the correct repair procedure for the exact year, make, model, and engine.
Should You Disconnect the Battery?
For a simple sensor-connector inspection, battery disconnection is not universally required. However, the vehicle’s service procedure may specify disconnecting the negative battery terminal before working on the circuit. Follow the manufacturer procedure when available, and remember that disconnecting a battery can reset some vehicle settings or affect stored information.
Follow the service procedure
Use the manufacturer’s instructions when they specify whether the battery should be disconnected.
Avoid accidental shorts
Keep metal tools away from electrical terminals when working around the connector.
How to Unplug Oil Pressure Sensor Step by Step
The basic process is simple: locate the sensor, identify its electrical connector, release the locking mechanism, and remove the connector without pulling on the wires. The connector design determines exactly how the lock releases.
Do not force the plug if it will not move. A connector can have a push tab, lift tab, sliding lock, secondary lock, or another retention mechanism. Trying to pull it apart without releasing the lock can break the connector or damage the sensor terminals.
Source: thecarhow.com
1. Park and switch off
Park securely, switch the ignition off, and remove the key or otherwise prevent accidental engine operation.
2. Let the engine cool
Wait until the surrounding engine components are safe to touch. Avoid reaching around hot exhaust or other high-temperature parts.
3. Locate the sensor
Find the oil pressure sensor using the vehicle-specific service information. The location can differ considerably between engines.
4. Identify the connector
Look for the electrical plug attached directly to the sensor. Do not confuse it with nearby ignition, temperature, or other engine connectors.
5. Release the lock
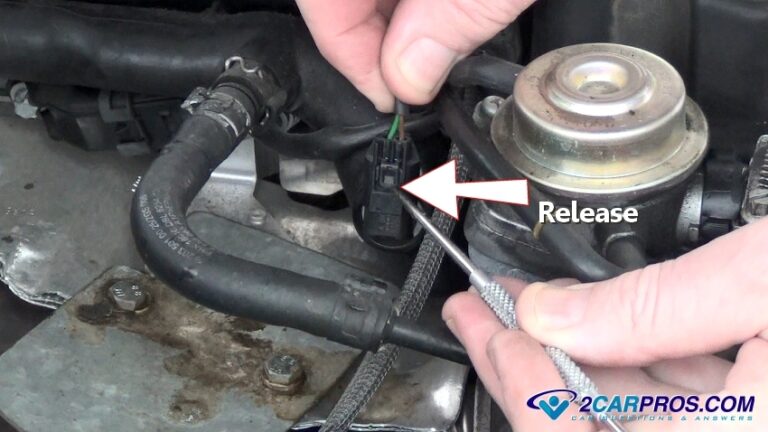
Press, lift, slide, or otherwise release the connector’s locking feature according to its design.
6. Pull the connector housing
With the lock released, pull the plastic connector body straight away from the sensor. Wiggle the housing gently only if necessary.
7. Inspect the connection
Check the connector and visible wiring for corrosion, oil contamination, broken plastic, loose terminals, or damaged insulation.
8. Reconnect or continue diagnosis
If you were only inspecting the connection, reinstall it until the lock engages. If replacing the sensor, continue with the vehicle-specific removal procedure.
How to Release a Push-Tab Connector
Many automotive connectors use a spring-loaded plastic tab. Press the tab while pulling the connector housing away from the sensor. If the connector is difficult to release, relieve tension by pushing the connector slightly toward the sensor before pressing the tab, then pull it straight back.
Press the tab
Use a finger or suitable non-damaging tool to depress the release tab.
Pull the housing
Grip the connector body rather than the wires and pull it away from the sensor.
What If the Connector Has a Secondary Lock?
Some connectors include a secondary locking device that must be moved before the main release tab works. The secondary lock may slide, lift, or change position. Do not pry aggressively because the plastic can become brittle with age and heat exposure.
Look closely
Use a flashlight to identify a separate colored or movable locking piece.
Move it only as designed
Follow the connector’s release direction instead of forcing the lock sideways or upward.
How to Inspect the Oil Pressure Sensor Connector After Unplugging It
After unplugging the oil pressure sensor, inspect the connector before reconnecting it or replacing the sensor. A damaged connector or wiring harness can produce symptoms that look like a failed sensor. Corrosion, oil contamination, broken terminals, and damaged insulation are useful clues during diagnosis.
Look at the connector from the front and back without inserting tools into the terminals. The terminals should remain properly positioned and should not appear pushed backward, spread apart, heavily corroded, or contaminated. If the connector is visibly damaged, replacing or repairing the connector may be necessary.
If oil is present inside the electrical connector, do not assume that cleaning alone will solve the problem. Oil entering the connector can indicate a sensor or sealing problem, depending on the sensor design. Continued contamination may require sensor replacement and connector repair.
Source: carsensorhub.com
Corrosion
Green, white, or otherwise abnormal deposits on terminals can interfere with electrical contact.
Broken lock
A connector that cannot lock securely may disconnect from vibration.
Damaged wires
Look for stretched, cut, melted, frayed, or exposed conductors near the connector.
Oil contamination
Oil inside the connector can indicate a problem that needs more than a simple reconnection.
How to Handle a Stuck Connector
A stuck oil pressure sensor connector should be released carefully rather than pulled harder. Dirt, heat, corrosion, and brittle plastic can make old connectors difficult to separate. Clean around the connector first, identify the lock, and use a connector-safe technique recommended for the vehicle.
Do not pull the wires
Wire tension can separate a terminal from the connector or damage the harness.
Do not pry against the sensor
Excessive leverage can damage the connector, sensor, or surrounding components.
What Happens When You Unplug an Oil Pressure Sensor?
The result depends on the vehicle’s electrical design. Unplugging the sensor can create an open circuit that the engine computer detects as a fault. A dashboard oil pressure warning may also remain illuminated or behave differently because the vehicle is no longer receiving the expected signal.
You should not drive normally with a disconnected oil pressure sensor when the disconnection has disabled an important warning system. A warning caused by a disconnected sensor can look similar to a warning caused by an actual oil pressure problem. The engine’s true oil pressure must be verified when symptoms indicate a possible lubrication problem.
If an oil pressure warning appears while the engine is running, do not assume the sensor is faulty. Low oil level, wiring problems, a failed switch or sensor, an oil passage problem, an oil pump issue, or internal engine wear can produce related symptoms. A mechanical oil pressure test can help distinguish an electrical fault from an actual pressure problem.
Source: namibian.com.na
Warning light
The oil pressure warning may illuminate or remain active when the expected sensor signal is missing.
Diagnostic trouble code
The vehicle may store an oil pressure sensor or circuit-related fault code.
Loss of pressure information
The dashboard or control module may no longer receive reliable oil pressure information.
Do Not Use Unplugging as a Fix for an Oil Pressure Warning
Unplugging the oil pressure sensor can help with diagnosis or replacement, but it does not correct low oil pressure. If the oil pressure warning is active, first check the engine oil level and follow the manufacturer’s diagnostic procedure. If low pressure is suspected, continuing to run the engine can cause serious damage.
Check oil level
Confirm the engine has the correct oil level before deeper diagnosis.
Check the circuit
Inspect the connector and harness for damage or contamination.
Measure actual pressure
Use an appropriate mechanical oil pressure test when the diagnosis requires confirmation of actual engine pressure.
Common Mistakes When Unplugging an Oil Pressure Sensor
Most connector damage occurs when someone pulls before releasing the lock or grabs the wires instead of the connector housing. Oil pressure sensors are often installed in tight engine compartments, which can make the connector difficult to see and reach.
A second common mistake is assuming every oil pressure sensor connector releases in the same way. Connector designs vary by vehicle. A procedure that works on one American-market vehicle may not apply to another model, even when both use an oil pressure sensor.
Source: sellaband.com
Pulling the wires
This can damage terminals or detach wires from the connector.
Skipping the lock
Pulling a locked connector can break the retaining tab or connector body.
Working on a hot engine
Hot components can cause burns and make access more difficult.
Confusing connectors
Nearby sensors may look similar, especially in crowded engine compartments.
Removing the sensor accidentally
Disconnecting the plug does not require loosening the threaded sensor body.
Ignoring an oil pressure warning
A sensor fault should not be assumed when the engine may actually have low oil pressure.
When You Should Stop and Get Professional Help
Stop the procedure if the connector is breaking, the sensor body begins to loosen, wiring is severely damaged, or you cannot identify the correct component. Professional diagnosis is also appropriate when an oil pressure warning remains active, the engine develops unusual mechanical noise, or actual oil pressure may be below the manufacturer’s specification.
Persistent warning
A continuing oil pressure warning needs proper diagnosis rather than repeated sensor disconnection.
Suspected low pressure
A confirmed or suspected low-pressure condition can indicate a serious engine lubrication problem.
Severely damaged wiring
Harness repairs may require proper terminals, wiring procedures, and electrical testing.
How to Know the Connector Is Properly Reconnected
A properly reconnected oil pressure sensor plug should be fully seated and securely retained by its locking mechanism. Do not judge the connection only by appearance. Confirm that the connector cannot easily separate when gently checked by the housing.
After reconnection, follow the vehicle’s normal diagnostic or starting procedure. If a warning light or fault code remains, do not assume the connector was the only problem. Scan for diagnostic trouble codes and inspect the sensor circuit according to the applicable service information.
Source: storage.googleapis.com
Fully seated
The connector should sit completely against the sensor connection point.
Lock engaged
The retaining mechanism should return to its locked position.
No visible damage
The housing, terminals, and nearby wiring should remain intact.
Normal vehicle operation
Any warning or fault should be evaluated according to the vehicle-specific diagnostic procedure.
Frequently Asked Questions
Q
Can I unplug the oil pressure sensor with the engine running?
It is safer to switch the vehicle off before disconnecting the oil pressure sensor. Working around a running engine creates additional risks from moving parts, hot components, and unexpected electrical or mechanical conditions.
If a specific diagnostic procedure requires the engine to run while testing the circuit, follow the manufacturer’s procedure and use appropriate precautions instead of casually unplugging the connector.
Q
Will unplugging the oil pressure sensor damage the engine?
Simply unplugging the electrical connector does not normally cause immediate mechanical damage by itself. However, the vehicle may lose oil pressure information or record a fault, and a warning system may no longer provide the expected indication.
The bigger risk is ignoring a genuine low-oil-pressure condition because the sensor has been disconnected. If low pressure is suspected, stop unnecessary engine operation and diagnose the actual pressure.
Q
How do I remove an oil pressure sensor electrical connector that is stuck?
First identify the connector’s locking mechanism and make sure it is fully released. Hold the connector housing and gently work it away from the sensor rather than pulling the wires.
If the plastic is brittle, corroded, or damaged, avoid excessive force. A broken connector may require replacement, and vehicle-specific service information can show the correct release method.
Q
Does unplugging the oil pressure sensor reset the warning light?
No. Disconnecting the sensor does not reliably reset an oil pressure warning. It can instead create or preserve an electrical fault because the vehicle no longer receives the expected sensor signal.
If a warning remains after a repair, scan the vehicle for diagnostic trouble codes and follow the appropriate diagnostic procedure.
Q
Can I drive with the oil pressure sensor unplugged?
Driving with the sensor disconnected is generally not a good diagnostic workaround because the vehicle may lose an important oil pressure warning or monitoring function. The exact consequences depend on the vehicle’s design.
If the oil pressure warning is active, verify oil level and investigate the cause before continuing to drive. Actual low oil pressure can cause severe engine damage.
Q
What should I do if oil is inside the oil pressure sensor connector?
Oil inside the connector deserves further inspection because it can indicate a leaking sensor or another sealing problem, depending on the vehicle design. Cleaning the connector may not address the underlying cause.
Inspect the sensor, connector, and wiring and use the vehicle-specific repair procedure to determine whether the sensor or connector needs replacement.
✦ Wrapping Up
Conclusion
Learning how to unplug an oil pressure sensor is mainly a matter of identifying the correct connector and releasing its locking mechanism before pulling the plug from the sensor. Work with the engine switched off and cool, protect the connector from damage, and pull on the housing rather than the wires.
Unplugging the connector is useful for inspection, diagnosis, or sensor replacement, but it does not fix low engine oil pressure. If an oil pressure warning is present, treat the warning as a possible engine problem until the oil level, electrical circuit, sensor, and actual oil pressure have been properly checked.
💡 Key Takeaway
Before unplugging the oil pressure sensor, confirm the correct component, let the engine cool, release the connector lock, and inspect the wiring after removal. If an oil pressure warning remains, diagnose the underlying pressure or circuit problem rather than leaving the sensor disconnected.
Ethan Brooks is an automotive writer at Auto News 7, covering car news, vehicle maintenance, new model updates, recalls, and practical buying guides. He focuses on clear, useful information that helps drivers understand their vehicles and make better ownership decisions.
Learn how to install crankshaft position sensor correctly with step-by-step instructions, tools, safety tips, troubleshooting advice, and signs of a successful installation.
Learn how to wire a crankshaft position sensor safely, identify sensor wires, connect 2-wire and 3-wire sensors, test circuits, and fix common wiring faults.
Learn how to install a coolant temperature sensor safely. Follow this step-by-step guide for removal, installation, coolant refill, leak checks, and troubleshooting.
Learn how to remove a coolant temperature sensor safely. Follow this step-by-step guide for locating the sensor, disconnecting the wiring, draining coolant, removing the sensor, and checking for leaks.
Learn how to disconnect an oil pressure sensor safely, identify the connector, release the locking tab, avoid damage, and troubleshoot common problems.
Is a coolant temperature sensor easy to replace? Learn how difficult the repair is, what tools you need, replacement steps, safety precautions, and when to call a mechanic.