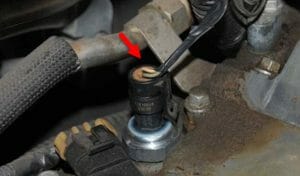
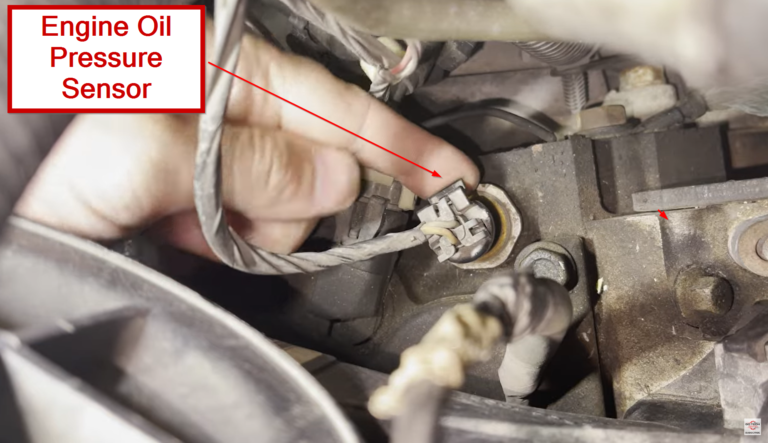
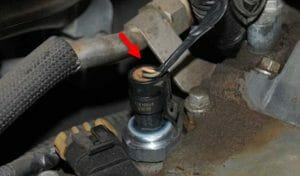
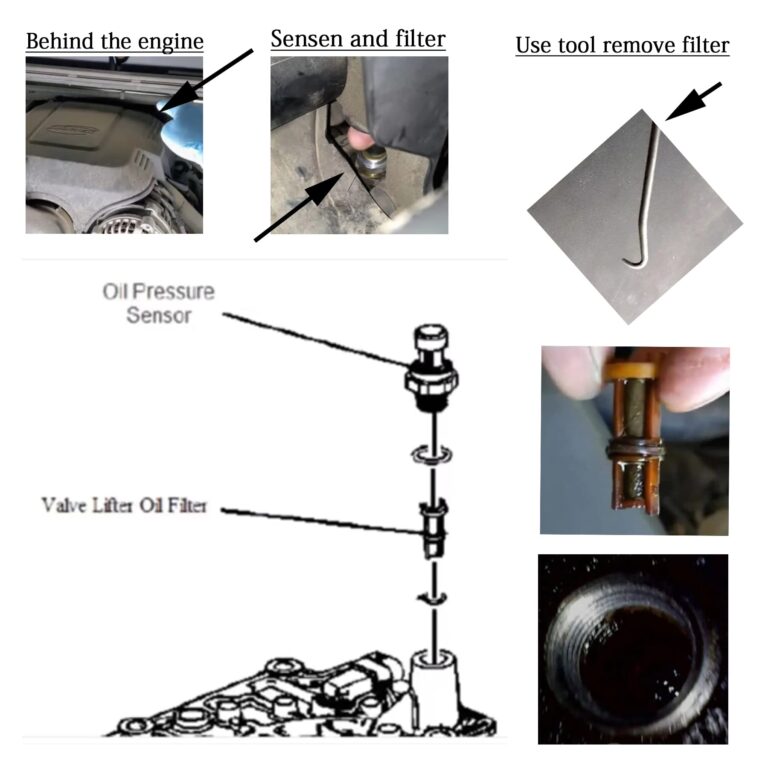
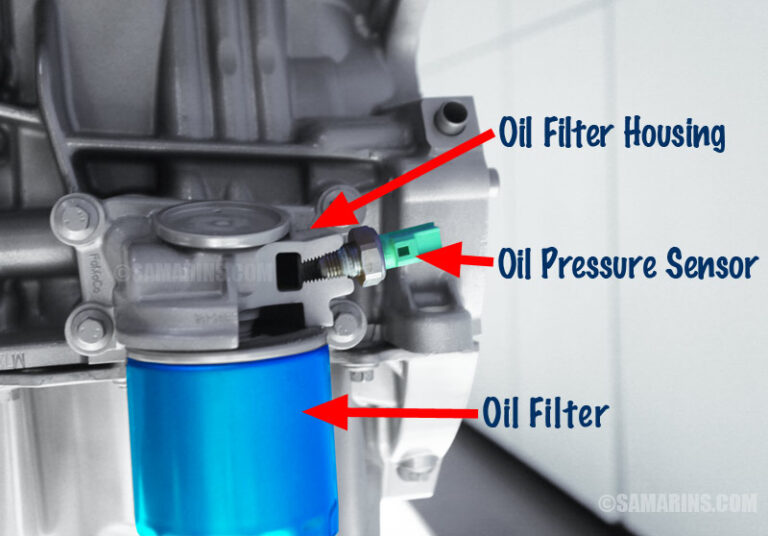
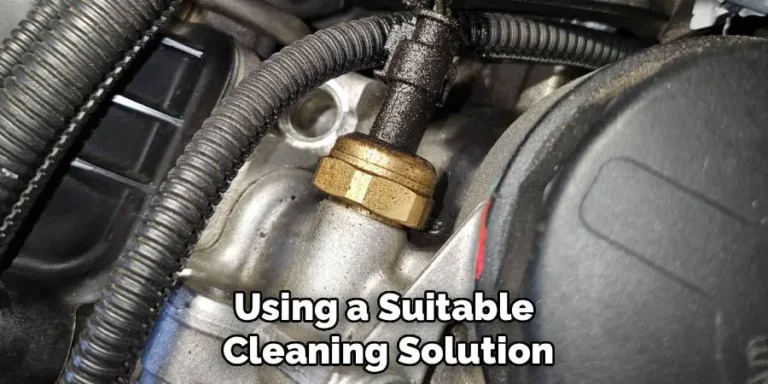
Remove the oil pressure sensor first, then carefully extract the small filter screen from the sensor port with a suitable pick or extraction tool.
For many GM vehicles sold in the United States, especially certain 4.8L, 5.3L, 6.0L, and 6.2L engines, a small mesh filter screen sits beneath the oil pressure sensor. The screen helps keep debris away from the sensor, but contamination can restrict oil reaching the sensor and contribute to inaccurate pressure readings.
The exact design varies by engine and model year, so confirm that your vehicle uses this screen before attempting removal. On applicable GM applications, the sensor is commonly located toward the rear of the engine, and access can be tight. A deep oil-pressure-sensor socket, extension, ratchet, and small pick are commonly used for the job.
Source: sellaband.com
What Is the Oil Pressure Sensor Filter?
The oil pressure sensor filter is a small mesh screen positioned in the oil passage beneath the pressure sensor on certain engines. It is sometimes called an oil pressure sensor screen or oil pressure switch filter.
Its purpose is to help prevent sludge and other debris from reaching the sensor. The screen is not the same as the engine oil filter. It is a much smaller component located directly at or below the pressure sensor mounting passage.
This design is found on some GM engine applications, but it is not universal. Always check the service information for the exact engine before assuming a filter is present.
Source: storage.googleapis.com
Sensor
The pressure sensor converts oil pressure into an electrical signal used by the vehicle’s control system, gauge, or warning system.
Filter screen
The small screen helps keep contamination away from the sensor and can become restricted by sludge or debris.
Engine oil passage
The screen sits in the pressure-sensing oil passage, so careless extraction can introduce debris or damage the passage.
When Should You Remove the Oil Pressure Sensor Filter?
Remove the screen when inspection or replacement is part of a confirmed oil-pressure diagnosis or when service information specifically directs you to inspect it. A dirty screen can be relevant when an oil pressure sensor reports abnormally low pressure even though actual mechanical pressure is normal.
Do not treat a low oil-pressure warning as proof that the screen is clogged. Low engine oil, a failing oil pump, worn internal engine components, a restricted pickup, wiring faults, or a defective sensor can produce similar symptoms.
If the vehicle has a low oil-pressure warning, verify actual oil pressure with the appropriate mechanical test procedure before assuming the sensor or screen is responsible. Continuing to operate an engine with genuinely low oil pressure can cause severe damage.
Source: YouTube > Dean VanWormer Automotive Professor
Useful symptom
A pressure gauge or electronic reading may show an implausibly low or inconsistent value while actual mechanical pressure remains normal.
Inspect before replacing parts
Check oil level, wiring, sensor condition, and actual mechanical pressure before replacing components based only on a dashboard reading.
Know the engine
Confirm the exact engine and model-year application because the sensor location and filter arrangement can differ.
Tools and Preparation
Prepare the correct tools before starting. Access is often the hardest part of this repair, especially on GM trucks and SUVs where the sensor can sit in a cramped area near the rear of the engine.
Let the engine cool before working around the sensor. Park on a stable surface, set the parking brake, and follow the vehicle manufacturer’s precautions for working in the engine compartment.
Use clean tools and keep dirt away from the sensor opening. The oil passage is small, and dropped debris can create another problem after the repair.
Source: cbgbfest.com
Oil pressure sensor socket
Many GM applications use a deep 1-1/16-inch oil pressure sensor socket. Confirm the required socket size for your exact vehicle before starting.
Ratchet and extension
An extension can help reach a sensor positioned deep behind or near the intake assembly.
Pick or extraction tool
A small hook pick can be used to catch the filter screen after the sensor is removed.
Safety equipment
Wear safety glasses and suitable gloves, and keep loose clothing away from moving engine components.
How to Remove Oil Pressure Sensor Filter
The basic procedure is to expose the sensor, disconnect its electrical connector, remove the sensor, and then extract the filter screen from the now-open sensor port. The exact access steps depend on the vehicle.
Source: www.youtube.com > TRQ
1. Confirm the filter location
Use the vehicle-specific service information to verify the sensor location and whether a removable filter screen is installed beneath it.
2. Prepare the engine
Park securely, switch the engine off, allow hot components to cool, and clean dirt from the area around the sensor.
3. Gain access to the sensor
Remove only the intake ducting, engine cover, hoses, or other components required by your vehicle’s service procedure.
4. Disconnect the electrical connector
Release the connector lock carefully and pull the connector straight from the sensor without pulling on the wiring.
5. Remove the pressure sensor
Fit the correct deep sensor socket fully over the sensor and loosen it with a suitable ratchet and extension.
6. Locate the screen
With the sensor removed, look into the mounting passage. On applicable engines, the small filter basket is positioned inside the passage below the sensor.
7. Catch the screen with a pick
Insert a clean, narrow hook pick carefully into the opening and catch the filter’s plastic edge or suitable extraction point.
8. Pull the screen upward
Apply steady, controlled upward force. Avoid levering aggressively against the engine block or scraping the sides of the oil passage.
9. Inspect the removed filter
Check the mesh and plastic body for sludge, varnish, metal particles, tears, deformation, or other contamination.
10. Clean the opening
Keep debris out of the oil passage. Do not push contamination deeper into the engine.
How to Remove a Stubborn Filter Screen
A screen that has been in service for a long time can be difficult to grip. Do not force a large screwdriver or other tool into the passage because it can damage the screen, sealing surface, or surrounding components.
If the screen will not come out with a suitable pick, stop and confirm the extraction method specified for the exact engine. Some repair procedures use a carefully selected extraction method, while others call for replacing the screen rather than attempting to preserve a contaminated component.
Use controlled force
Pull upward rather than prying sideways against the engine block.
Protect the passage
Keep the tool centered and avoid scratching the bore or dropping pieces into the engine.
Stop if the screen breaks
Recover all pieces before installing another component. Do not leave broken plastic or mesh inside the oil passage.
What to Do After Removing the Filter
After removal, compare the old screen with the replacement specified for the vehicle. If the mesh is heavily contaminated, damaged, or distorted, replacement is generally preferable to reinstalling a questionable screen.
Before installing a new screen, make sure the sensor port is clean and free of loose debris. Seat the replacement screen exactly as specified by the service procedure. Do not guess its depth or orientation.
The pressure sensor should also be inspected. If the sensor is being replaced, use the correct part for the engine and follow the manufacturer’s installation and torque specification. Torque values vary by application, so a generic value should not be substituted for the vehicle-specific specification.
Source: storage.googleapis.com
Replace damaged screens
A torn, crushed, or distorted screen should not be reused.
Keep the passage clean
Prevent lint, dirt, plastic fragments, and metal particles from entering the oil passage.
Use the correct sensor
Match the replacement sensor to the exact engine and vehicle application.
Follow the specified torque
Use the factory service information for the sensor torque and any required thread sealant or installation procedure.
How to Tell If the Filter Was Actually the Problem
Removing a dirty screen does not by itself prove that the screen caused the original oil-pressure problem. The strongest confirmation comes from comparing the vehicle’s sensor reading with actual mechanical oil pressure and checking the related electrical circuit.
If mechanical pressure is normal but the electronic reading remains incorrect after the screen and sensor have been serviced, continue diagnosis instead of repeatedly replacing parts. Wiring, the connector, the sensor, and the vehicle’s control system may require testing.
If mechanical pressure is genuinely low, replacing the sensor filter will not repair the underlying lubrication problem. The engine may need further inspection for oil-pump, pickup, bearing, leakage, or other internal causes.
Source: namibian.com.na
Normal mechanical pressure
A normal mechanical measurement shifts attention toward the sensor, filter screen, wiring, or related electrical components.
Low mechanical pressure
Genuinely low pressure requires diagnosis of the engine lubrication system rather than relying on a sensor-screen replacement.
Debris or metal present
Metallic particles or unusual contamination can indicate a broader engine problem and should not be dismissed as ordinary screen blockage.
Common Mistakes to Avoid
The most common mistake is assuming every oil-pressure problem is caused by the sensor filter. The filter is only one part of the diagnostic chain, and some vehicles do not use the same screen design at all.
Another mistake is using excessive force during extraction. The screen is small and sits inside an oil passage, so broken pieces can make the repair harder and create a contamination risk.
Do not use a generic sensor torque specification just because it appears in an online discussion. Use the specification for the exact engine and model because sensor design, sealing method, and installation requirements can differ.
Source: www.youtube.com > Danny Johnson’s Garage
Do not skip pressure verification
A warning for genuinely low oil pressure should be treated as a lubrication-system problem until actual pressure has been checked.
Do not pry aggressively
Avoid damaging the sensor port while trying to remove a stubborn screen.
Do not push debris inward
Keep extracted sludge and broken screen material out of the engine’s oil passage.
Do not guess the torque
Check the factory service information for the exact vehicle and engine before tightening the replacement sensor.
When Professional Service Is the Better Choice
Professional service is sensible when the sensor is inaccessible, the filter cannot be extracted without excessive force, or the vehicle has a serious low-pressure warning. The sensor may sit in a confined area where incorrect tool use can damage surrounding components.
A professional diagnosis is especially appropriate when the mechanical oil-pressure reading is low, metal is found in the screen, the engine makes abnormal mechanical noise, or the oil-pressure warning remains after sensor-system repairs.
The goal is not simply to remove the filter. The goal is to restore reliable oil-pressure measurement while making sure the engine actually has adequate lubrication.
Source: cbgbfest.com
Persistent low pressure
Stop driving and obtain an appropriate diagnosis when actual oil pressure remains below the manufacturer’s specification.
Severe access problems
A shop can use vehicle-specific procedures and equipment when normal access is impractical.
Internal contamination
Metal particles or extensive sludge can require broader engine and lubrication-system inspection.
Frequently Asked Questions
Q
Where is the oil pressure sensor filter located?
On applicable GM engines, the small filter screen is located inside the oil passage directly beneath the oil pressure sensor. The sensor is commonly positioned toward the rear of the engine, although the exact location varies by vehicle and engine.
Confirm the location in the service information for the exact application before inserting a tool into the passage.
Q
Can I remove the oil pressure sensor filter without removing the sensor?
Normally, no. The filter is positioned beneath the sensor, so the sensor generally must be removed first to expose the filter screen.
Trying to extract the screen through an installed sensor is not a normal service procedure and can damage the sensor or extraction tool.
Q
What tool is used to remove an oil pressure sensor filter?
A small hook-style pick is commonly used to catch the edge of the filter screen after the sensor has been removed. Some applications may use another specified extraction method.
Use the method appropriate for the exact engine. Avoid forcing a large screwdriver or other tool into the oil passage.
Q
Can a clogged oil pressure sensor filter cause a low reading?
Yes, a restricted screen can interfere with the oil reaching the pressure sensor on applications that use this design. That can contribute to an incorrect low pressure indication.
However, a low reading can also result from an electrical fault, failed sensor, low oil level, genuinely low mechanical pressure, or another engine problem. Actual oil pressure should be verified when the warning is significant.
Q
Should I clean or replace the oil pressure sensor filter?
A damaged, distorted, or heavily contaminated screen should generally be replaced with the correct part. Some service situations may allow a reusable screen to be cleaned, but the vehicle-specific service procedure should determine whether reuse is acceptable.
Because the component is inexpensive compared with the labor involved in accessing it, replacing a questionable screen can be preferable when the correct replacement is available.
Q
Does every vehicle have an oil pressure sensor filter?
No. The small screen described in this guide is associated with particular engine designs and is especially discussed for certain GM applications.
Do not assume that a filter exists on another make, engine, or model year. Verify the component before attempting removal.
Q
What should I do if the oil pressure is still low after replacing the screen?
If mechanical oil pressure remains low, the filter was not the root cause or there is another problem in the lubrication system. Further diagnosis may be required for the oil pump, pickup, internal oil leakage, engine wear, or another cause.
Do not continue driving solely because the sensor and screen have been replaced. A genuinely low oil-pressure condition can damage an engine.
✦ Wrapping Up
Conclusion
Learning how to remove oil pressure sensor filter components is mainly a matter of gaining safe access to the pressure sensor, removing the sensor with the correct socket, and extracting the small screen carefully from the oil passage. On applicable GM engines, a clean pick and controlled upward force can remove the screen without unnecessary damage.
The filter should be treated as part of a complete oil-pressure diagnosis rather than as an automatic explanation for a warning or fault code. Verify the vehicle’s exact engine, inspect the screen, follow the factory installation specifications, and confirm actual oil pressure when the symptoms could indicate a serious lubrication problem.
💡 Key Takeaway
Before removing the screen, verify that your exact engine uses one; then remove the sensor, extract the filter carefully, inspect for contamination, and verify actual oil pressure before declaring the repair complete.
Ethan Brooks is an automotive writer at Auto News 7, covering car news, vehicle maintenance, new model updates, recalls, and practical buying guides. He focuses on clear, useful information that helps drivers understand their vehicles and make better ownership decisions.
Learn how to remove oil pressure sensor connector safely, identify common locking tabs, avoid wire damage, and inspect the connector before reassembly.
Learn how to unplug an oil pressure sensor safely, identify the electrical connector, release its locking tab, inspect the wiring, and avoid common mistakes.
Learn how to disconnect an oil pressure sensor safely, identify the connector, release the locking tab, avoid damage, and troubleshoot common problems.
Learn why bypassing an oil pressure sensor is risky, how the circuit works, and how to test low oil pressure safely without disabling engine protection.