To test a GM knock sensor, check for fault codes, inspect wiring, measure sensor resistance, and verify sensor response with a scan tool or multimeter.
In the United States, GM vehicles such as the Chevrolet Silverado, GMC Sierra, Tahoe, Yukon, and Suburban commonly use knock sensors to help protect the engine from damaging detonation. When a knock sensor fails, the engine control module may reduce ignition timing, resulting in poor performance and reduced fuel economy.
Understanding how to test a GM knock sensor can help you determine whether the sensor itself, the wiring, or a related engine issue is causing diagnostic trouble codes. A systematic testing process prevents unnecessary parts replacement and improves repair accuracy.
Source: toolsweek.com
What Does a GM Knock Sensor Do?
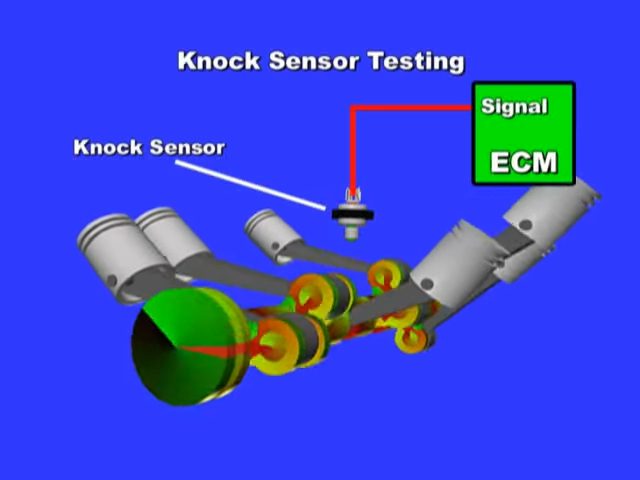
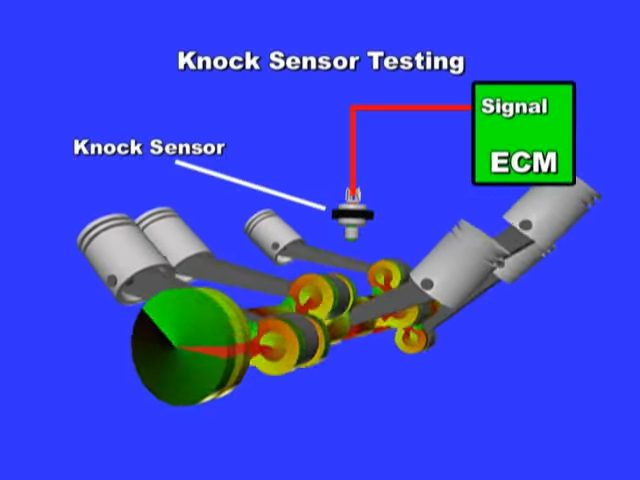
A GM knock sensor detects abnormal combustion vibrations commonly called engine knock or spark knock. The sensor converts these vibrations into an electrical signal and sends the information to the engine control module.
When knock is detected, the control module adjusts ignition timing to protect engine components. If the sensor fails, the computer may not accurately detect detonation, or it may default to a protective strategy that reduces engine performance.
Source: YouTube > South Main Auto LLC
Primary Function
Detects engine knock and sends vibration data to the control module.
Engine Protection
Helps prevent piston, bearing, and cylinder damage caused by detonation.
Performance Impact
Supports optimal ignition timing for power and fuel efficiency.
Common GM Knock Sensor Trouble Codes
GM vehicles frequently store codes such as P0325, P0327, P0330, and P0332 when the knock sensor circuit experiences a fault. These codes may indicate low voltage, signal problems, damaged wiring, corrosion, or a failed sensor.
P0327
Knock Sensor 1 Circuit Low Input.
P0332
Knock Sensor 2 Circuit Low Input.
Tools Needed to Test a GM Knock Sensor
Before beginning diagnosis, gather the proper tools. Having the right equipment improves accuracy and reduces the risk of misdiagnosis.
Some tests require access to the sensor connector, while others use live data through the vehicle diagnostic port.
Source: www.youtube.com > Adam Mechanic
OBD-II Scan Tool
Reads fault codes and monitors live sensor data.
Digital Multimeter
Measures resistance and circuit continuity.
Basic Hand Tools
Provide access to the sensor and wiring harness.
How to Test a GM Knock Sensor Step by Step
The most reliable approach combines code retrieval, visual inspection, electrical testing, and live data analysis. Follow the steps in order to eliminate simple causes before replacing components.
Always consult the service information for your specific GM model because sensor locations and specifications vary.
Source: YouTube > Auto Repair Guys
Step 1
Scan for diagnostic trouble codes.
Step 2
Inspect connectors, harnesses, and mounting areas.
Step 3
Measure resistance according to manufacturer specifications.
Step 4
Verify sensor activity using live data.
Inspect the Wiring and Connector
Check for damaged insulation, corrosion, loose terminals, oil contamination, or water intrusion. Many GM V8 engines experience moisture-related knock sensor issues beneath the intake manifold.
Corrosion
Look for green or white deposits inside connectors.
Test Resistance with a Multimeter
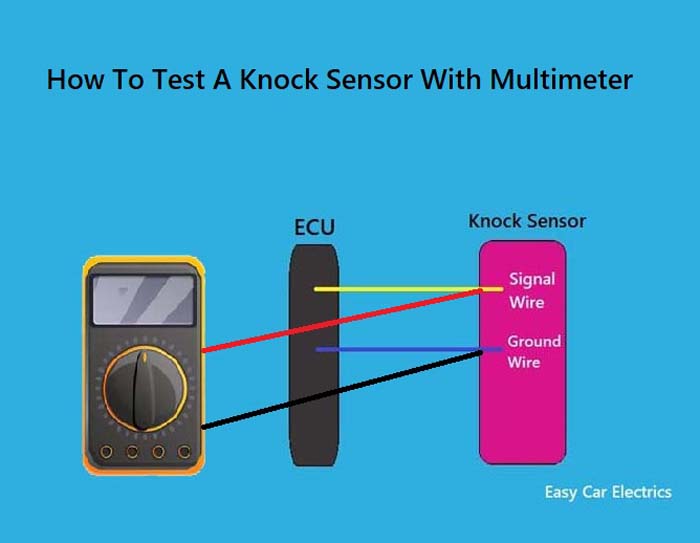
Disconnect the sensor and measure resistance between the specified terminals. Compare the reading with factory specifications. An open circuit or extreme reading often indicates a failed sensor.
Important
Use model-specific specifications because values differ between engines.
Check Live Sensor Response
Using a scan tool, monitor knock sensor data while the engine runs. A properly functioning sensor should react to changes in engine vibration and load conditions.
Scan Tool Verification
Observe knock retard and sensor activity values.
Signs That a GM Knock Sensor May Be Bad
A faulty knock sensor does not always create noticeable drivability problems. In many cases, the check engine light is the first warning sign.
Some symptoms can also be caused by wiring faults, engine mechanical issues, or actual detonation events, so diagnosis should not rely on symptoms alone.
Source: YouTube > Backyard Chevy
Check Engine Light
One of the most common indicators.
Reduced Power
The computer may retard ignition timing as a protective measure.
Poor Fuel Economy
Incorrect timing adjustments can reduce efficiency.
Stored Fault Codes
Codes such as P0327 or P0332 may appear.
Common Testing Mistakes to Avoid
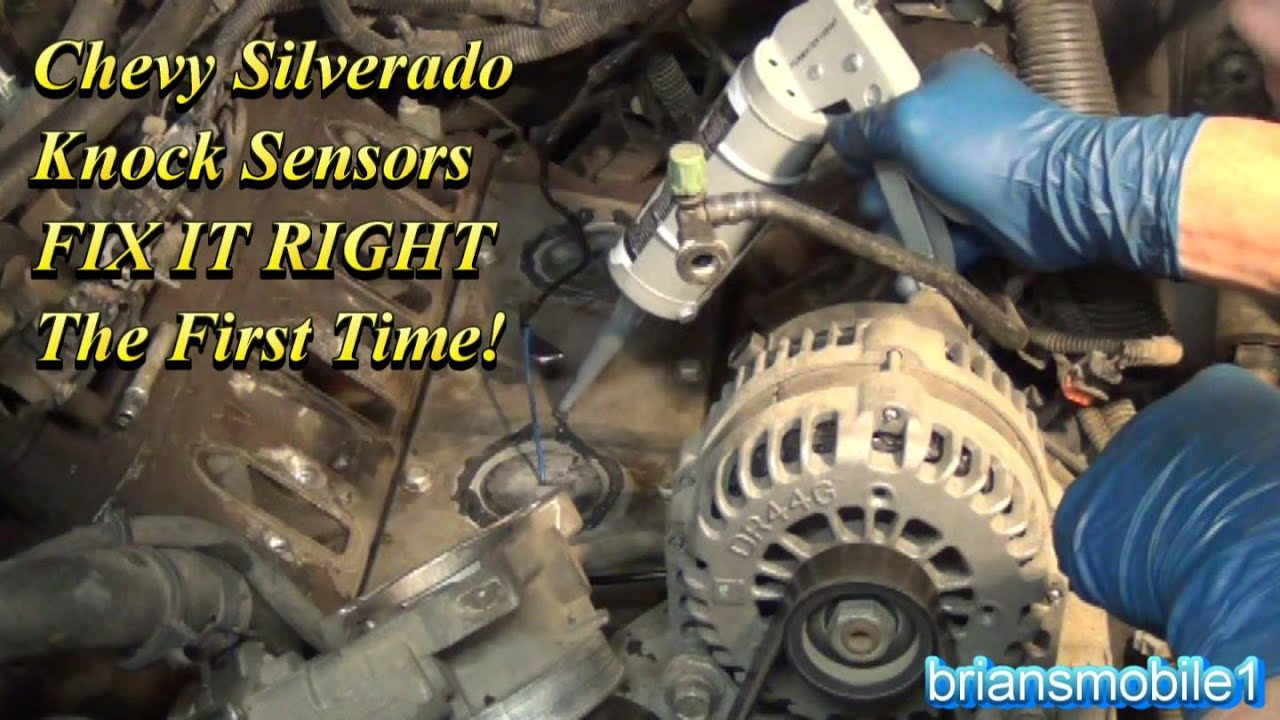
Many technicians replace the sensor immediately after seeing a fault code. However, wiring damage and connector corrosion are often responsible for the same symptoms.
Testing should always include a visual inspection and circuit verification before replacing parts.
Source: YouTube > briansmobile1
Ignoring Wiring
Circuit faults can mimic a failed sensor.
Skipping Scan Data
Live data can reveal intermittent problems.
Using Generic Specifications
Different GM engines may require different test values.
When Professional Diagnosis Is Recommended
If testing reveals inconsistent results or if multiple engine performance codes are present, professional diagnostic equipment may be needed to isolate the fault accurately.
Advanced Diagnostics
Useful for intermittent electrical faults and control module testing.
What to Do If the Test Fails
If the sensor does not meet resistance specifications or fails to produce a valid signal, replacement is usually required. Always inspect the harness and connector before installing a new component.
After repairs, clear diagnostic codes and perform a road test to verify that the problem has been resolved.
Source: YouTube > The General Expert
Replace Failed Components
Install a quality replacement sensor when testing confirms failure.
Clear Codes
Reset diagnostic trouble codes after repairs.
Verify Repair
Perform a road test and rescan the vehicle.
Frequently Asked Questions
Q
Can a GM knock sensor fail without causing engine knock?
Yes. Many failed knock sensors trigger a diagnostic code without producing audible engine knock. The control module may detect a circuit problem before any noticeable symptoms appear.
Q
Can I drive with a bad GM knock sensor?
Short trips may be possible, but driving with a faulty knock sensor can reduce engine performance and potentially leave the engine less protected from detonation under certain conditions.
Q
Will a bad knock sensor affect fuel economy?
Yes. If the engine control module reduces ignition timing because of a sensor fault, fuel efficiency and power output can decrease.
Q
Do all GM engines use two knock sensors?
No. Some GM engines use a single sensor, while others use dual sensors. The configuration depends on the engine design and model year.
Q
Can water damage a GM knock sensor?
Yes. Water intrusion is a known issue on certain GM V8 engines where the sensors are mounted beneath the intake manifold. Moisture can corrode the sensor and connector.
✦ Wrapping Up
Conclusion
Learning how to test a GM knock sensor involves more than simply reading a fault code. A complete diagnosis includes code retrieval, visual inspection, electrical testing, and live data verification.
Following a structured process helps identify whether the problem is the sensor itself, the wiring, or another engine-related issue. Accurate testing reduces unnecessary repairs and improves long-term reliability.
💡 Key Takeaway
Scan for trouble codes first, inspect the wiring carefully, test the sensor against factory specifications, and verify operation with live data before replacing any parts.
Ethan Brooks is an automotive writer at Auto News 7, covering car news, vehicle maintenance, new model updates, recalls, and practical buying guides. He focuses on clear, useful information that helps drivers understand their vehicles and make better ownership decisions.
Learn whether camshaft and crankshaft sensors are interchangeable, how they differ, common symptoms of failure, compatibility concerns, and the correct replacement approach.