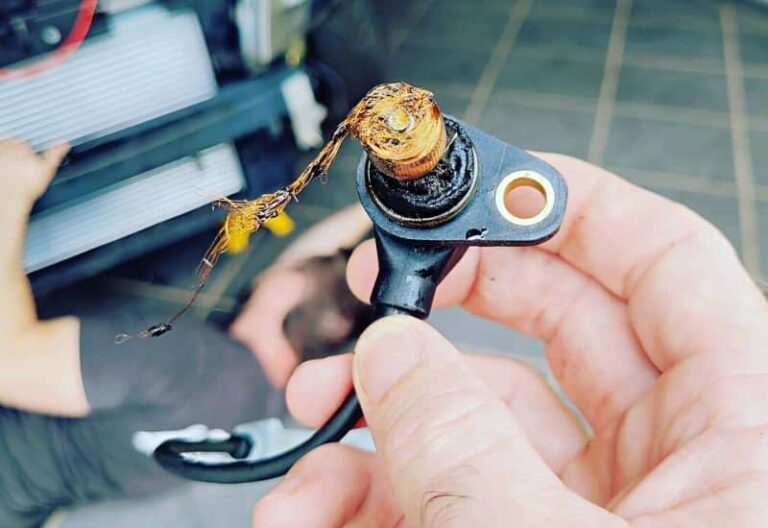
To check knock sensor voltage, identify the correct terminals, use the voltage mode specified by the vehicle service information, and compare the measured signal with the manufacturer’s specification.
For drivers and DIY mechanics in the United States, checking a knock sensor can help diagnose a check engine light, poor engine performance, or trouble codes such as P0325, P0327, and P0328. The basic test uses a digital multimeter, but the correct voltage depends heavily on the vehicle’s engine, sensor design, wiring, and electronic control system.
A knock sensor normally uses a piezoelectric element to convert engine vibration into an electrical signal. That means there is no single voltage value that applies to every car, truck, or SUV sold in the U.S. Some systems have a bias voltage supplied by the engine computer, while the sensor itself can generate a changing voltage when exposed to vibration. Always use the service information for the exact year, make, model, engine, and sensor circuit before deciding whether a reading is good or bad.
Source: toolsweek.com
What Is a Knock Sensor and What Voltage Does It Produce?
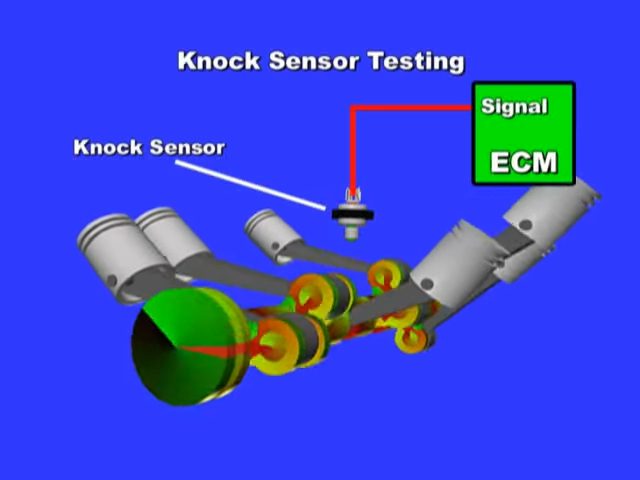
A knock sensor detects vibration associated with combustion knock and sends an electrical signal to the engine control module. The sensor is commonly mounted directly to the engine block so it can detect the vibrations that travel through the engine structure.
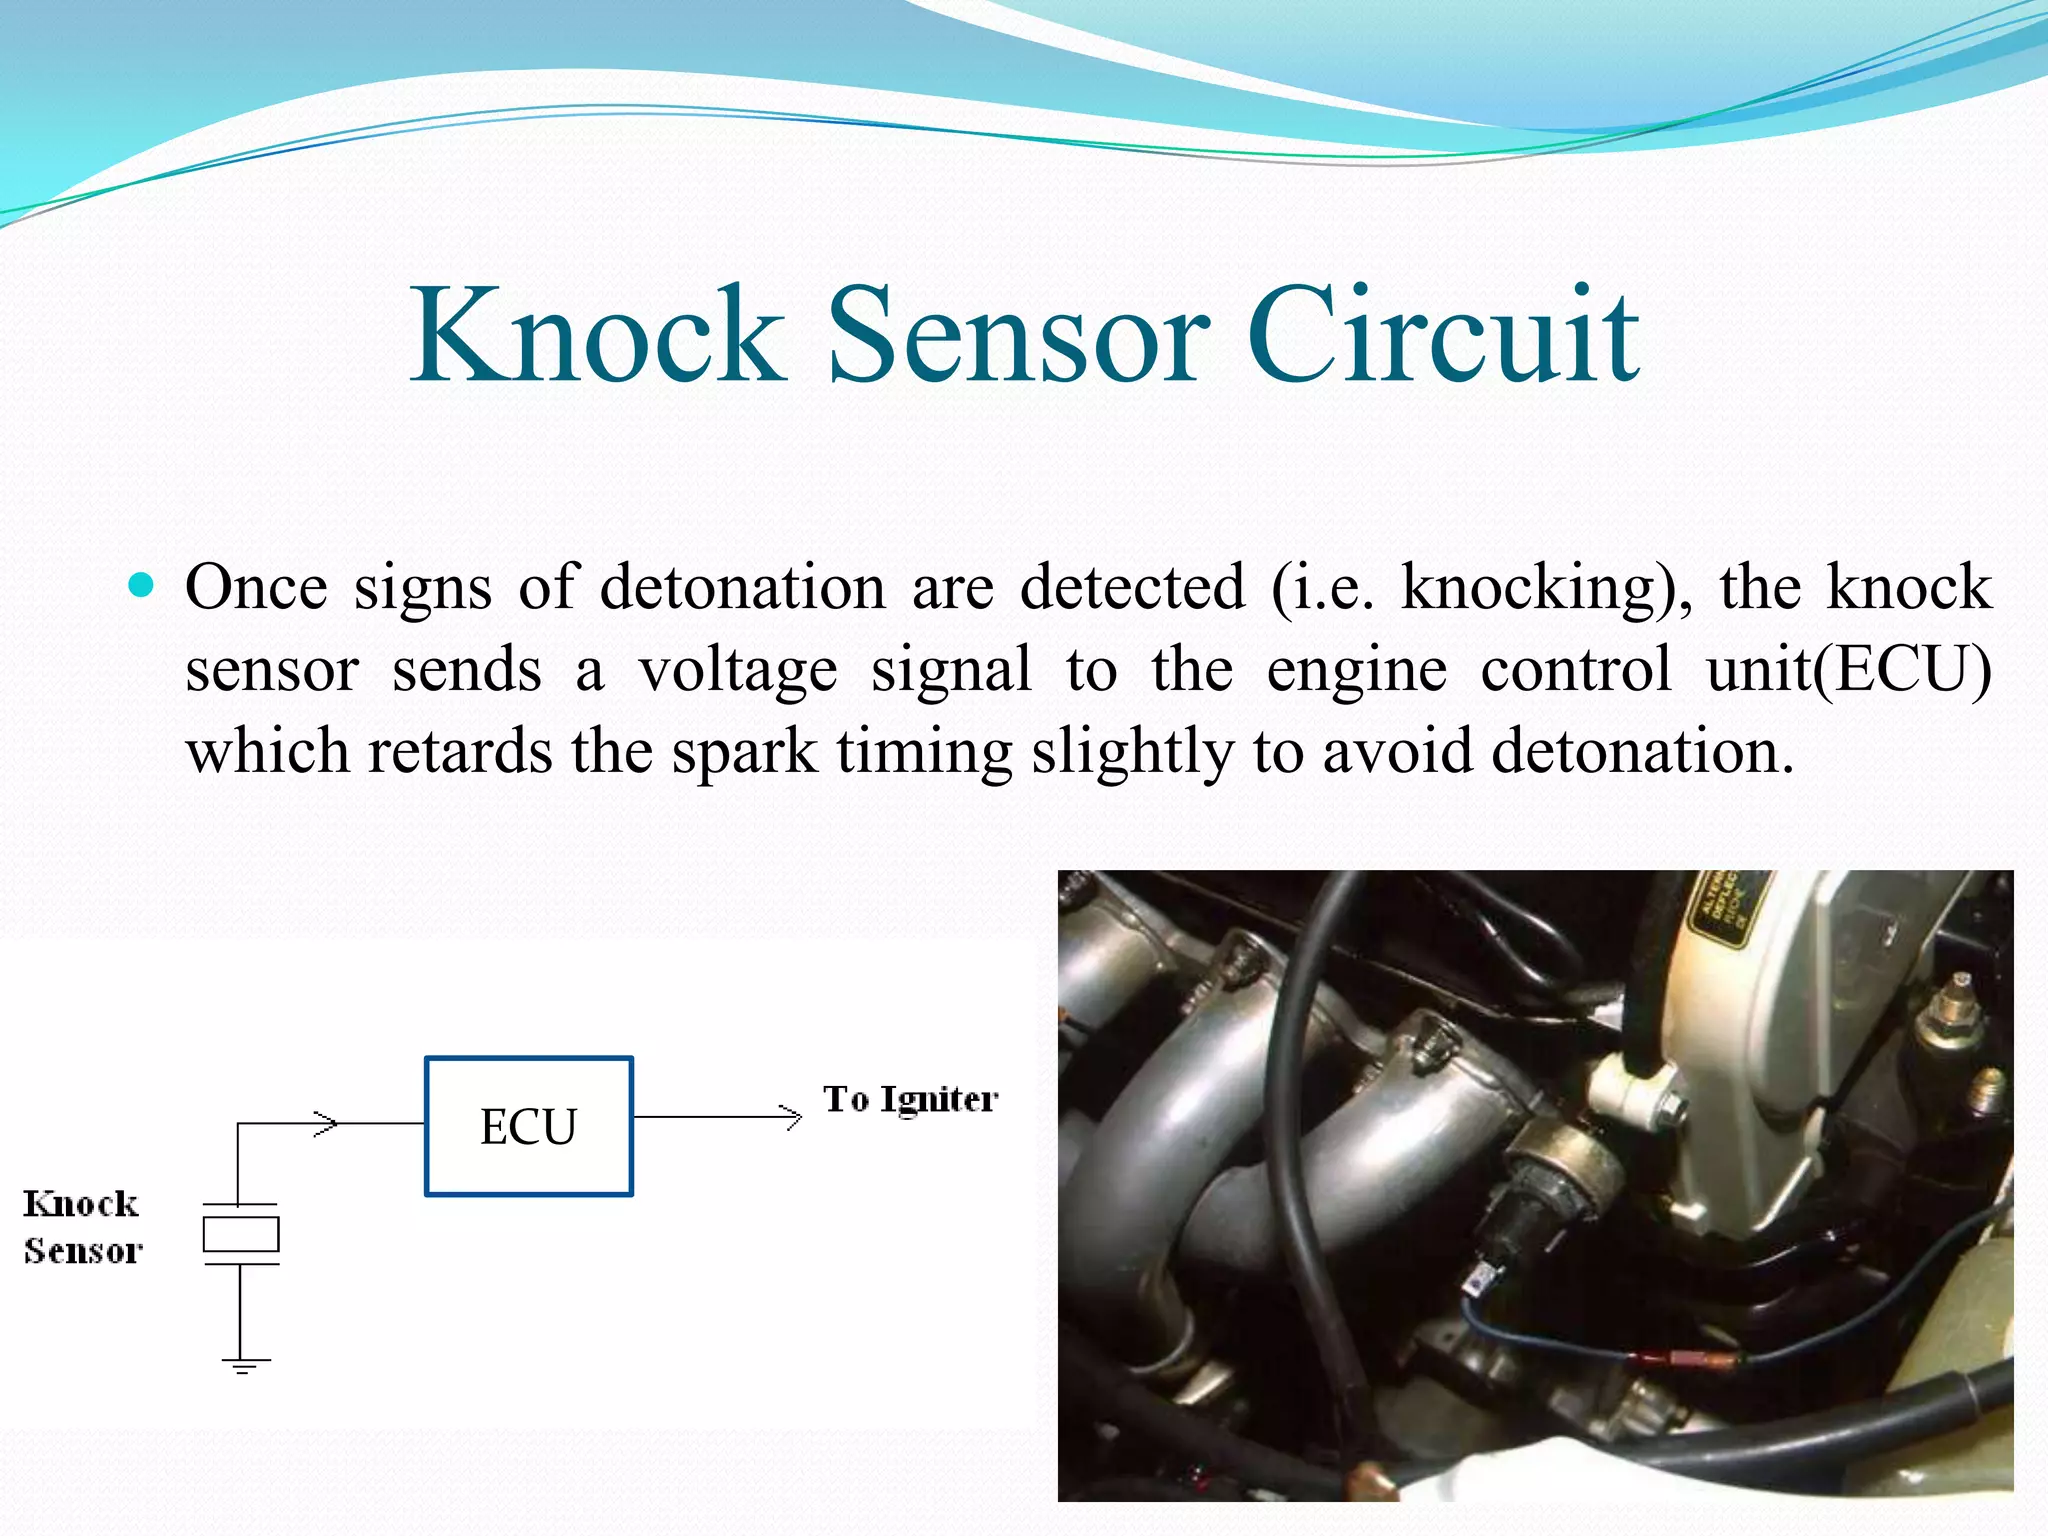
Many automotive knock sensors use a piezoelectric element. When the element experiences mechanical vibration, it generates an electrical signal. The engine computer evaluates that signal and can adjust ignition timing when the system detects conditions associated with knock.
The voltage you should expect depends on the circuit. Some vehicles provide a bias voltage through the control module and monitor changes in that circuit. Other systems are designed around the sensor’s generated signal. Because these designs differ, a generic statement such as every knock sensor should read 5 volts is not reliable.
Source: apogeeweb.net
Sensor signal
A piezoelectric knock sensor can generate a changing voltage in response to vibration. The exact signal characteristics depend on the sensor and engine management system.
Bias voltage
Some electronic control systems place a reference or bias voltage on the knock sensor circuit. A measured voltage may therefore represent the circuit’s operating condition rather than a voltage generated solely by the sensor.
Vehicle specification
The service manual determines the correct terminals, meter setting, test conditions, and acceptable voltage range for a particular vehicle.
Why There Is No Universal Knock Sensor Voltage
Knock sensor circuits vary between manufacturers and engine generations. For example, one service procedure may specify a 4.5 to 5.5 volt circuit check with the sensor disconnected, while another system may use a different bias voltage or evaluate a dynamic signal instead.
Some factory procedures also specify resistance, capacitance, continuity, or oscilloscope testing instead of relying on one multimeter voltage number. A reading outside a generic internet value should not automatically be used as proof that the sensor is defective.
Check the engine code
A model can use different engines and knock sensor circuits, so identify the exact engine before looking up the specification.
Check the connector pinout
Never assume terminal numbers or wire colors are the same across vehicles.
Tools You Need Before Testing a Knock Sensor
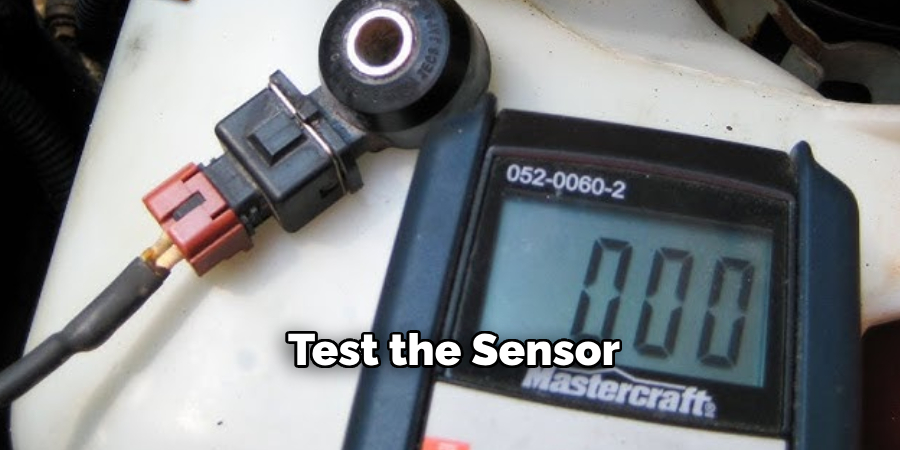
A basic electrical diagnosis usually requires a digital multimeter and the correct vehicle wiring information. Depending on the vehicle, you may also need back-probe leads, an automotive scan tool, and an oscilloscope for a more detailed signal test.
Before connecting the meter, determine whether the manufacturer’s procedure calls for DC voltage, AC voltage, millivolts, resistance, or another measurement. Using the wrong meter mode can produce a misleading result and can create unnecessary diagnostic work.
Source: toolsweek.com
Digital multimeter
Use a quality meter capable of measuring the voltage or resistance range specified for the vehicle.
Vehicle service information
Use the wiring diagram, connector pinout, test conditions, and specification for the exact vehicle and engine.
Back-probe leads
These can help measure an energized circuit without damaging the connector when used correctly.
Scan tool
A scan tool can identify stored diagnostic trouble codes and provide useful freeze-frame or live-data information on vehicles that support it.
Safety Before You Start
Work on a cool engine when access to the sensor requires reaching near hot exhaust components. Keep loose clothing, tools, and test leads away from belts, pulleys, fans, and other moving parts when the engine is running.
Do not deliberately create severe engine knock by striking the engine block or operating the engine outside its normal conditions. Follow the manufacturer’s diagnostic procedure instead. Disconnect the battery only when the applicable service procedure calls for it because doing so can erase diagnostic information on some vehicles.
Avoid short circuits
Do not allow a meter probe to bridge adjacent terminals or accidentally connect a signal circuit to battery voltage.
Protect connectors
Use appropriate back-probing methods rather than forcing oversized probes into small terminals.
Follow the service procedure
If the factory procedure requires a specific temperature, engine speed, ignition state, or connector condition, reproduce those conditions before interpreting the result.
How to Check Knock Sensor Voltage Step by Step
The safest approach is to start with the vehicle-specific diagnostic procedure and then perform the voltage measurement it specifies. The steps below describe the general process, but the exact terminals and expected values must come from the applicable service information.
A voltage measurement can be performed at the sensor, the harness connector, or the control-module side of the circuit. These locations answer different diagnostic questions, so probe placement matters.
Source: safetyfic.com
Step 1: Identify the correct sensor
Locate the knock sensor using the vehicle’s service information. Confirm that you are testing the correct sensor if the engine uses more than one.
Step 2: Inspect the connector
Look for corrosion, loose terminals, damaged insulation, oil contamination, broken wires, or signs of previous repair.
Step 3: Identify the terminals
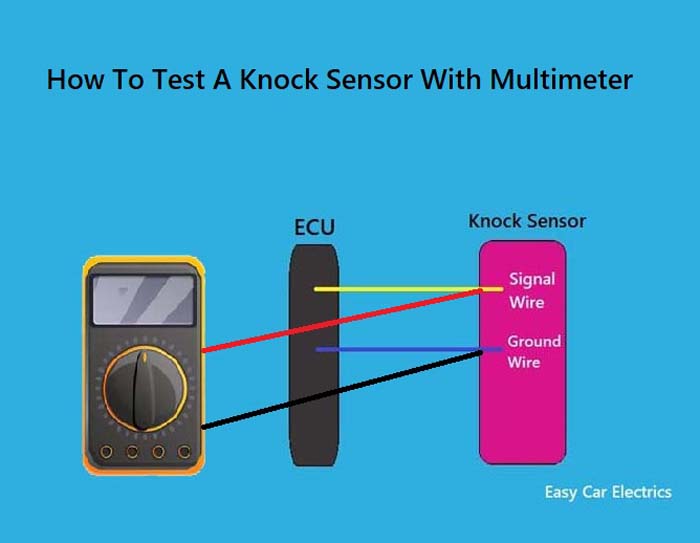
Use the wiring diagram to identify the signal, reference, ground, or shield terminals. Do not rely only on wire color.
Step 4: Select the specified meter mode
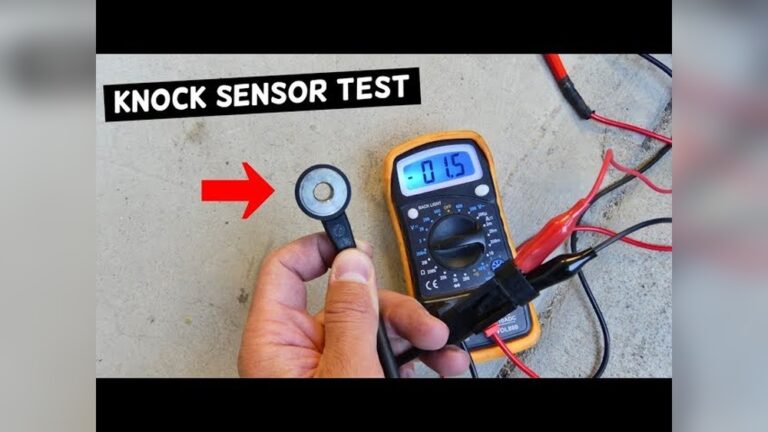
Set the digital multimeter to the voltage type and range required by the service procedure. Some dynamic sensor tests use AC or low-voltage measurement, while circuit checks may require DC voltage.
Step 5: Connect the meter correctly
Connect the meter leads to the specified terminals or circuit points. Use the correct reference ground and keep the probes secure.
Step 6: Apply the specified test condition
Turn the ignition on or start the engine only if the procedure requires it. Observe any requirements for engine temperature, idle speed, or operating condition.
Step 7: Record the reading
Write down the voltage rather than relying on memory. Compare it with the exact specification for the vehicle.
Step 8: Continue the circuit diagnosis if necessary
If the reading is outside specification, inspect wiring, connector integrity, power or bias voltage, ground circuits, and the sensor itself before replacing parts.
Testing a Dynamic Knock Sensor Signal
A dynamic test looks for a changing electrical signal when the sensor experiences an appropriate vibration. Some service procedures specify a controlled tap near the sensor or another controlled method. If the manufacturer provides such a test, follow it exactly.
A changing reading can show that the sensor is responding, but a multimeter may not display the complete waveform. An oscilloscope can provide much more information about signal amplitude and timing when the service procedure calls for waveform analysis.
Look for a response
The relevant question is often whether the signal changes under the specified test condition, not whether it reaches one universal voltage.
Do not force a knock event
Avoid intentionally producing damaging detonation or aggressive impacts to the engine. Use the controlled procedure specified for the vehicle.
Consider the meter’s limitations
A standard multimeter may average or filter rapidly changing signals, so a normal-looking number does not always prove that the waveform is correct.
How to Check the Knock Sensor Circuit With the Sensor Disconnected
If a voltage test points to a circuit problem, test the harness separately from the sensor. With the sensor disconnected, some vehicles specify checking for a reference or bias voltage at the harness connector with the ignition on. The expected value is vehicle-specific.
A disconnected-sensor voltage test can help determine whether the control module and wiring are supplying the expected circuit condition. It does not, by itself, prove that the sensor is healthy.
Source: gomechanic.in
Check for the specified circuit voltage
Measure the designated signal or reference terminal against the specified ground point while following the vehicle’s ignition-state instructions.
Check for unwanted voltage
A voltage that is higher than the service specification can indicate a short to a power source or another circuit.
Check continuity
With the appropriate connectors disconnected and the circuit made safe, verify continuity between the sensor connector and control-module terminal when the service procedure requires it.
Check for shorts
Inspect for unintended continuity to ground or power. The specified resistance limits depend on the vehicle.
Why Wiring Can Mimic a Bad Knock Sensor
A knock sensor can be mechanically sound while its signal never reaches the engine computer correctly. Broken conductors, corroded terminals, poor connector tension, damaged shielding, or a shorted circuit can change the measured voltage and trigger a knock sensor trouble code.
This is why replacing the sensor immediately after seeing a code such as P0327 or P0328 can be premature. The diagnostic procedure should determine whether the fault is in the sensor, wiring, connector, or control module.
Open circuit
A broken conductor can prevent the sensor signal from reaching the control module.
Short to ground
A signal wire contacting ground can pull the circuit away from its expected operating condition.
Short to voltage
A signal circuit contacting an unintended power source can produce an abnormally high reading.
Connector damage
Loose, corroded, or pushed-back terminals can create intermittent faults that are difficult to reproduce.
How to Interpret a Knock Sensor Voltage Reading
Interpret the reading only after identifying the exact test condition. A number that looks reasonable on one vehicle may be incorrect on another because the control strategy and sensor circuit are different.
For example, some Toyota service information specifies approximately 4.5 to 5.5 volts for a particular disconnected knock sensor circuit check. That value should not be applied to another Toyota engine or another manufacturer without confirming the applicable service specification.
Other service procedures focus on resistance, capacitance, or the presence of a changing signal. This is why the measurement method matters as much as the number shown on the meter.
Source: slideshare.net
Voltage matches specification
A correct circuit voltage supports the circuit portion of the diagnosis, but it does not automatically prove that the sensor produces the correct dynamic signal.
Voltage is too low
Possible causes include a short to ground, wiring resistance, an incorrect test point, a missing bias supply, or a sensor or control-module fault depending on the circuit.
Voltage is too high
Possible causes include a short to power, an incorrect reference point, a circuit fault, or an abnormal control-module output.
Voltage does not change during a specified dynamic test
A missing signal can indicate a defective sensor, poor sensor mounting, wiring problems, or an incorrect test method. Continue with the manufacturer’s diagnostic sequence.
Example of Why the Specification Matters
Imagine a vehicle service manual specifies a 4.5 to 5.5 volt check between two knock sensor harness terminals with the sensor disconnected and the ignition switched on. A reading of 5.0 volts would fall within that particular specification.
That example does not establish 5.0 volts as a universal knock sensor value. Another vehicle may specify a different bias voltage, a resistance value, or a dynamic signal test instead. The vehicle-specific test procedure always takes priority.
Correct comparison
Compare the reading with the specification for the same engine, circuit, test condition, and terminal combination.
Incorrect comparison
Do not compare your reading with a generic voltage found for a different vehicle or sensor.
Resistance Testing Can Help Confirm a Knock Sensor Fault
Voltage is only one part of knock sensor diagnosis. Many manufacturers provide a resistance specification for the sensor itself. This test is normally performed with the sensor disconnected so the meter does not measure the rest of the circuit.
Resistance values vary significantly between sensor designs. Factory procedures have documented values ranging from hundreds of kilohms to several megohms on different applications, while some systems use different diagnostic characteristics altogether.
Measure resistance only with the sensor isolated as specified. Never use an ohmmeter on an energized circuit unless the equipment and manufacturer procedure explicitly allow it.
Disconnect the sensor
Separate the sensor from the vehicle harness before measuring its resistance when required by the service procedure.
Use the specified terminals
Connect the meter to the exact sensor terminals identified by the wiring information.
Compare with the specification
Use the specified temperature and resistance range for the exact sensor.
Do not assume an open circuit is always bad
Sensor construction differs, so an apparent open or unusual reading should be interpreted according to the manufacturer’s test procedure.
Why Resistance Alone Does Not Tell the Whole Story
A resistance check can identify an internal electrical problem, but it may not show whether the sensor produces the correct signal under vibration. A sensor can pass one static electrical check and still require further diagnosis.
When a fault remains unclear, the next step may be a wiring test, scan-tool evaluation, or oscilloscope waveform inspection. Follow the diagnostic tree rather than replacing multiple parts based on one measurement.
Static test
Resistance measures an electrical characteristic while the sensor is not being evaluated dynamically.
Dynamic test
A voltage or waveform test evaluates how the sensor responds to vibration under a specified condition.
Common Mistakes When Checking Knock Sensor Voltage
Most incorrect knock sensor diagnoses come from using the wrong specification, measuring the wrong terminals, or confusing a circuit bias voltage with the sensor’s generated signal. A careful diagnostic sequence prevents these errors.
Online guides can be useful for learning the basic concept, but they should not replace the factory wiring diagram and test specifications for a specific vehicle.
Source: pinterest.com
Using a generic 5-volt rule
Some systems use approximately 5 volts, but that does not make 5 volts a universal knock sensor specification.
Testing the wrong terminals
A connector may contain signal, ground, reference, or shield circuits. Verify each terminal before probing.
Using AC mode for every vehicle
Some dynamic tests can involve an AC or low-voltage signal, but other factory procedures require DC voltage or another measurement method.
Replacing the sensor immediately
A trouble code does not necessarily identify the failed component. Wiring, connectors, mounting, and control-module circuits can produce similar symptoms.
Hammering the engine block
Aggressive impacts are not a safe universal diagnostic method. Use only the controlled stimulation method specified for the vehicle.
Testing an energized circuit with resistance mode
Resistance testing normally requires the circuit to be de-energized. Applying an ohmmeter to a live circuit can damage the meter or vehicle electronics.
What to Do If the Knock Sensor Voltage Is Wrong
If your measurement is outside the specified range, do not replace the sensor immediately. First confirm that the meter is working, the probes are connected to the correct terminals, and the vehicle is in the exact test condition described by the service procedure.
Next, inspect the connector and wiring. Check for opens, shorts, corrosion, damaged insulation, poor terminal contact, and other faults identified in the vehicle’s diagnostic procedure. If the harness passes its checks, perform the specified sensor test.
If the sensor passes but the circuit still fails, the diagnostic procedure may require checking the engine control module or another related circuit. Module replacement should be considered only after the applicable wiring and component tests have been completed.
Verify the test
Repeat the measurement using the correct terminals, meter setting, reference point, and ignition or engine condition.
Inspect the connector
Look for corrosion, loose terminals, broken locks, water intrusion, or terminals that have been pushed backward.
Test the wiring
Use the wiring diagram to check continuity and unwanted shorts according to the manufacturer’s procedure.
Test the sensor
Perform the specified resistance, voltage, capacitance, or dynamic signal test.
Escalate when needed
Use an oscilloscope or qualified diagnostic technician when the signal is too complex for a basic multimeter test or when the service procedure requires equipment you do not have.
When You Should Stop the DIY Test
Stop if accessing the sensor requires working around unsafe moving or hot components, if the wiring diagram is unclear, or if you cannot identify the correct terminals with confidence. Incorrect probing can create a new electrical fault.
Professional diagnosis is also appropriate when an engine has persistent detonation, severe drivability problems, repeated knock-related trouble codes, or a fault that remains after the basic electrical checks pass.
Unsafe access
Do not reach near moving belts, fans, or hot exhaust components while performing a live test.
Unclear wiring
Do not guess which connector terminal is the knock sensor signal.
Advanced waveform diagnosis
Use appropriate diagnostic equipment or qualified assistance when the service procedure requires oscilloscope analysis.
Frequently Asked Questions
Q
What voltage should a knock sensor have?
There is no single voltage specification for every knock sensor. The correct value depends on the vehicle’s sensor design and control circuit. Some vehicles specify a bias voltage around 5 volts, while others use different values or require a dynamic signal test.
Always compare your measurement with the specification for the exact year, make, model, engine, and circuit.
Q
Can I test a knock sensor with a multimeter?
Yes, a digital multimeter can perform several knock sensor checks when the vehicle’s service procedure supports them. Depending on the system, the meter may be used for voltage, resistance, continuity, or a changing signal.
A multimeter may not capture the full shape of a rapidly changing knock sensor waveform, so an oscilloscope can be necessary for advanced diagnosis.
Q
Should I use AC or DC voltage to test a knock sensor?
Use the voltage mode specified by the vehicle manufacturer. A piezoelectric sensor can produce a changing signal, but some vehicles also place a DC bias voltage on the circuit.
Choosing AC or DC based only on a generic rule can produce a misleading result. Check the wiring diagram and factory diagnostic procedure first.
Q
How do I know if a knock sensor is bad?
A knock sensor may be faulty when it fails the manufacturer’s resistance, voltage, capacitance, or dynamic signal test after the wiring and connector have been verified. Trouble codes such as P0325, P0327, or P0328 can provide a diagnostic starting point, but the code alone does not prove that the sensor itself has failed.
A complete diagnosis should separate sensor faults from wiring, connector, mounting, and control-module faults.
Q
Can a bad knock sensor cause a check engine light?
Yes. A fault in the knock sensor circuit can cause the engine control system to store a diagnostic trouble code and illuminate the check engine light. The exact code and detection strategy depend on the vehicle.
The light can also be caused by wiring or circuit problems, so the code should be followed by the applicable diagnostic procedure.
Q
Can I test a knock sensor without removing it?
Often, yes. Many circuit and dynamic tests can be performed with the sensor installed, provided the service procedure allows it. Access may be possible at the sensor connector or through the harness.
Some resistance or physical inspection procedures require the sensor to be disconnected or removed. Follow the vehicle-specific instructions rather than forcing a particular test method.
✦ Wrapping Up
Conclusion
Learning how to check knock sensor voltage starts with understanding that there is no universal number that proves a knock sensor is good. The correct voltage, terminals, meter mode, and test conditions vary by vehicle and engine management system.
For a reliable diagnosis, identify the exact sensor and circuit, inspect the wiring, perform the specified voltage test, and compare the result with the manufacturer’s data. If the voltage is abnormal, continue with resistance and wiring checks before replacing the sensor. When a basic multimeter cannot resolve the fault, an oscilloscope or professional diagnostic equipment may be the appropriate next step.
💡 Key Takeaway
Use the exact factory specification for your vehicle, verify the wiring and connector before replacing parts, and never treat a generic knock sensor voltage as a universal pass-or-fail value.
Ethan Brooks is an automotive writer at Auto News 7, covering car news, vehicle maintenance, new model updates, recalls, and practical buying guides. He focuses on clear, useful information that helps drivers understand their vehicles and make better ownership decisions.
Can a car start without a crankshaft sensor? Learn whether the engine can start, what happens when the sensor fails, symptoms to check, and safe troubleshooting steps.