Potting Mix vs Potting Soil: The Real Difference and Which to Buy
Potting mix is usually a lightweight, soilless blend for containers, while potting soil is a broader label that may include actual mineral soil. The bag’s ingredients and your plant’s needs matter more than the name on the front.
Have you brought home a bag marked “potting soil” and wondered why it feels heavy and stays soggy? Or picked a fluffy mix that dries out before your thirsty plants get through the week?
I once grabbed a bargain bag for a few patio pots because the label promised an all-purpose growing medium. The mix packed down around the roots and drained poorly, and I had to repot the plants sooner than I’d planned. That’s a common mistake, not a dumb one.
I wrote this to make the bag labels easier to read and the buying choice less of a guess. If you’re filling containers, starting seeds, or refreshing a houseplant’s pot, you’ll get a practical way to match the growing medium to the job.
Choose well and you can avoid waterlogged roots, needless repotting, and wasted money on amendments you don’t need. Choose poorly, and even a healthy plant can struggle in a container that holds too much water or dries too fast.
This takes about 16 minutes to read. By the end, you’ll know how to:
- Tell potting mix and potting soil apart by checking the ingredients.
- Pick a suitable bag for houseplants, vegetables, seeds, and outdoor pots.
- Fix common drainage and watering problems without guessing.
Potting Mix vs Potting Soil: What’S Actually Different?
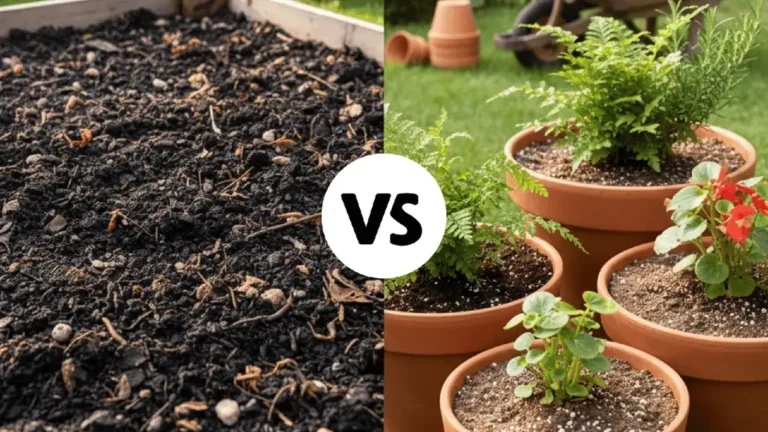
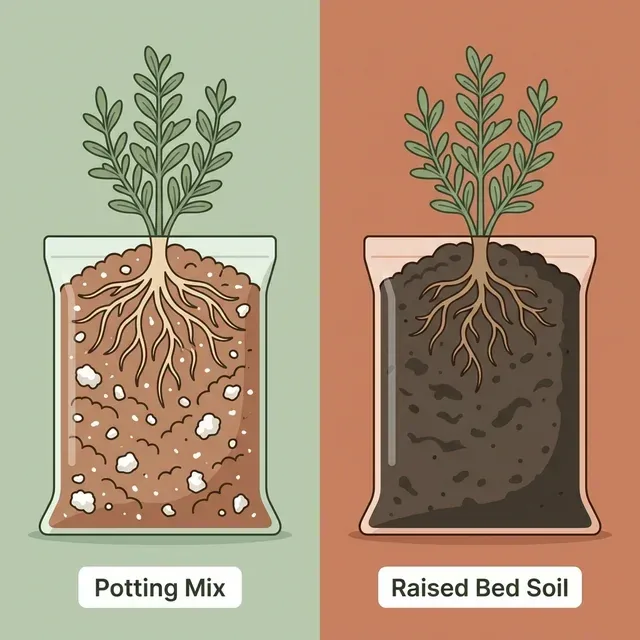
Potting mix is generally a lightweight blend made for containers, often with no mineral soil, while potting soil can contain mineral soil and varies by product. For a typical houseplant in a pot with drainage holes, choose a container mix whose texture and ingredients suit that plant, rather than buying by label alone.
The words on the bag aren’t a strict guarantee of what’s inside. Some manufacturers use “potting soil” for a soilless product, while others use “potting mix” for blends containing compost or other heavier ingredients, so read the ingredient list and product directions.
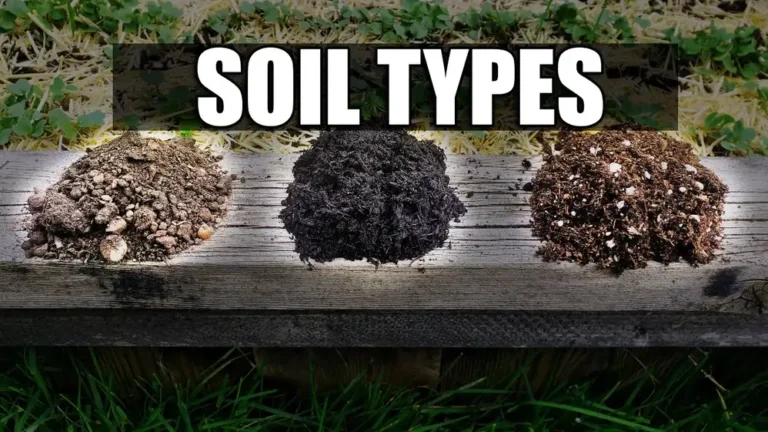
Potting mix usually combines materials that hold some moisture while leaving air spaces around the roots. Common ingredients include peat moss or coconut coir, composted bark, perlite, and vermiculite; some products also include compost, fertilizer, or a wetting agent.
Potting soil may include mineral soil, which is the weathered material found in the ground, or it may be a bagged blend that uses “soil” as a general retail term. Mineral soil can add weight and hold water differently from a soilless blend, and a high proportion can make a container medium compact more readily.
That difference matters because container roots don’t have the same room to spread that garden roots do. In a pot, limited space and drainage holes determine how quickly excess water can leave and how much air stays among the roots.
If you’re looking for a fuller explanation of the ingredients and uses, what potting soil contains helps you make sense of those labels. A bag’s front label is a starting point, not a recipe.
| Bag label or ingredient | What it often means | What to check |
|---|---|---|
| Potting mix | A container blend, often soilless | Whether the blend suits the plant and pot |
| Potting soil | A variable bagged growing medium | Whether mineral soil or compost appears in the ingredients |
| Seed-starting mix | A fine-textured medium for starting seeds | Whether it has little or no added fertilizer |
| Garden soil | A product intended for in-ground use or soil improvement | Whether the label specifically permits container use |
| Perlite | Lightweight white particles that create air spaces | Whether the mix feels too coarse for tiny seeds |
| Peat moss or coir | Materials that help retain moisture | How quickly the blend dries in your climate |
The ingredient list tells you more than a “premium” or “all-purpose” claim. If the first ingredients are peat or coir, bark, and perlite, you’re likely looking at a light container blend; if mineral soil appears prominently, expect more weight and a different watering pattern.
A quick comparison with garden soil and potting soil can also help if you’re deciding whether to move dirt from a yard bed into a planter. Yard soil may seem free and familiar, but it can settle tightly in a pot and drain poorly.
Pro Tip: Check the bag for a container-use direction, not just the word “potting.” A blend made for raised beds or in-ground planting may behave differently in a small flowerpot.
Why containers need a different medium
A container is a small, enclosed growing space, so the growing medium needs to hold roots upright, supply water, and leave air pockets after watering. In open ground, excess water can move into surrounding soil; in a pot, the mix and drainage holes have to do the work within that limited space.
Roots need oxygen as well as water. When a medium stays saturated, air-filled spaces shrink, roots may struggle, and the plant can show drooping or yellow leaves even though the pot feels wet.
A fluffy texture isn’t automatically better, either. A very coarse blend can drain so fast that water runs through before roots absorb enough, particularly in a small pot or a warm, breezy spot.
The goal is a balance: enough water stays available between drinks, but the mix doesn’t remain soggy. That balance changes with pot size, plant type, indoor heat, outdoor sun, and how often you water.
What the ingredients do
Peat moss holds water and gives many mixes a light, fibrous texture. Dry peat can resist wetting, so a neglected pot may need slow, thorough watering to take up moisture again.
Coconut coir, made from coconut husk fiber, also holds moisture and is used in many container blends. It can behave differently from peat depending on processing and the rest of the recipe, so the ingredient alone doesn’t tell you exactly how often to water.
Perlite is a lightweight, porous material that helps create air spaces and improve drainage. It doesn’t feed plants, and it can float to the surface during watering, which is messy but normal.
Vermiculite holds water and nutrients, so it’s often used in mixes that need moisture retention. A fine seed-starting blend may use it to help keep newly sown seeds from drying too quickly.
Composted bark adds structure and larger air spaces. Bark-heavy mixes are common for plants that prefer quick drainage, though the blend may need more frequent watering than a finer, denser one.
Compost contributes organic matter and may contain nutrients, but its nutrient level varies. A compost-rich medium can be heavier and hold more water, so it isn’t automatically the right choice for every container plant.
Some mixes include a wetting agent, a substance that helps water spread through dry ingredients. Others include slow-release fertilizer, which supplies nutrients gradually, but the feeding period depends on the product and conditions.
Does the label tell you enough?
The label gives clues, but it may not spell out how the mix will perform in your exact pot. Look for ingredient order, intended use, directions about fertilizer, and any warning against use with particular plants.
A bag can claim to be “all-purpose” and still be too water-retentive for a cactus in a cool room. Another blend might work well for a leafy tropical plant but dry out too quickly in a sunny balcony planter.
When a label gives a pH range, follow the manufacturer’s stated range rather than assuming every plant wants the same acidity. If you’re growing a plant with particular pH needs, check its care requirements and choose a product made for that use.
- The name on the bag isn’t a reliable recipe; check the ingredients and intended use.
- Container growing needs both water retention and air space around roots.
- A suitable medium depends on the plant, pot, and growing conditions.
Choose a Growing Medium for Your Plant and Pot
Choose a medium based on the plant’s water needs, the pot’s drainage, and where the container will sit. A moisture-loving houseplant in a warm room and a cactus on a sunny porch don’t need the same mix, even if both fit in a standard flowerpot.
Start with the plant’s preference, then adjust for your setup. A plastic pot loses less moisture through its sides than an unglazed clay pot, while a small pot can dry faster than a large one because it holds less medium.
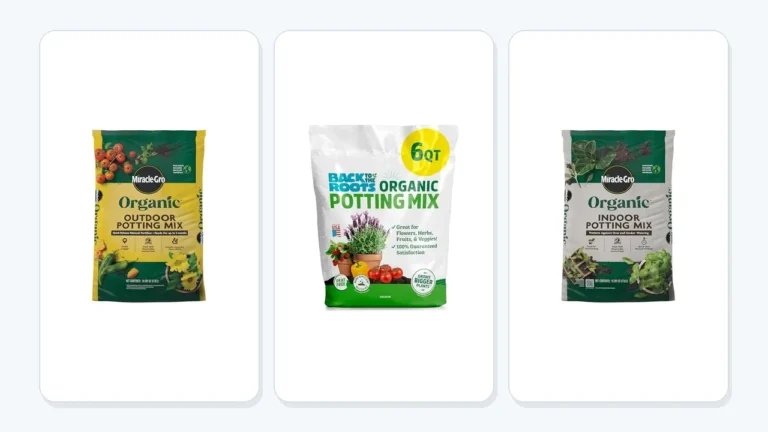
What should you buy for a general houseplant? A basic indoor potting mix is a sensible starting point if the plant doesn’t need special drainage or moisture conditions; check the bag and watch how the pot dries after watering.
For most everyday container plants, use a product labeled for containers and make sure the pot has drainage holes. A cachepot, the decorative outer container that holds a nursery pot, can work too, but empty standing water after the inner pot drains.
| Plant or task | A useful starting point | Adjust if you notice |
|---|---|---|
| Common leafy houseplants | General indoor potting mix | Soggy mix or very fast drying |
| Cacti and many succulents | Fast-draining cactus mix | Water staying around the roots |
| Orchids grown in bark | Coarse orchid mix suited to the species | Mix breaking down or roots staying wet |
| Seed starting | Fine seed-starting mix | Seeds drying out or medium packing down |
| Outdoor flowers in pots | Container mix with suitable moisture retention | Frequent drying in sun and wind |
| Edible plants in containers | Product labeled for containers and the crop | Poor growth or drying between waterings |
| Garden beds | Garden soil or a soil amendment made for beds | A product label that says not for containers |
These are starting points, not fixed recipes. Plant species, local weather, container material, and your watering habits can change what works.
Houseplants and indoor containers
A standard indoor potting mix works for many common houseplants, but “indoor” doesn’t mean one watering schedule fits them all. A pothos in a warm, bright room may use water faster than the same plant in a cool corner, and a pot without drainage can stay wet for much longer.
For a plant that likes evenly moist conditions, choose a mix that holds water without turning into a dense block. For plants that prefer drying between waterings, look for a looser blend or one with more bark and perlite.
Check the roots and mix when repotting. If the medium has collapsed into a dense mass, roots circle the pot, or water sits on the surface, replacing some of the old mix may help; simply adding fertilizer won’t fix poor structure.
I once repotted a leafy plant into a blend that looked rich and dark, then kept watering on my old schedule. The new mix held water longer than the previous one, and I had to slow down and check moisture before watering again; changing the medium can change your routine.
That’s why I prefer to adjust one thing at a time. If you change the pot size, mix, and watering schedule all at once, it’s hard to tell which change helped or caused trouble.
Cacti, succulents, and plants that need quick drainage
Many cacti and succulents need a mix that drains readily and doesn’t stay wet for long. A cactus mix can be a practical starting point, though the texture varies by brand and may still need adjustment for your climate and pot.
A fast-draining blend doesn’t mean the plant needs no water. Water thoroughly when the medium is ready for it, then let excess water leave through the drainage holes; frequent tiny sips can keep the upper layer damp while leaving deeper roots thirsty.
Avoid assuming that adding a handful of sand solves a drainage problem. Fine sand can fill spaces between larger particles and make a mix denser; the result depends on particle size and the rest of the blend.
For succulents in a humid room or a pot that dries slowly, improve air movement around the plant and use a container with drainage. If the mix remains wet for days longer than expected, look at the pot, room conditions, and watering amount before adding more amendments.
Seeds, seedlings, and young roots
Seed-starting mix is usually finer and lighter than a general potting blend, which helps small seeds stay in contact with moisture. It may contain few or no added nutrients, since many seeds carry enough food to begin germination.
A fine texture helps tiny roots, but it can also dry quickly in shallow trays. Keep the medium evenly moist without leaving seedlings sitting in water, and follow the seed packet’s depth and light directions.
If you use a general potting mix for seeds, sift out large bark pieces and check that the texture isn’t lumpy or packed down. Seedlings have delicate roots, so a chunky, dense blend can make their first weeks harder than they need to be.
Some seed-starting products have no fertilizer, while others contain a small amount. Read the label before feeding young plants, because extra fertilizer can damage tender roots, especially when seedlings are small.
Outdoor pots and edible crops
Outdoor containers face sun, wind, and rain, so they can dry or become saturated faster than indoor pots. A light mix that works on a sheltered porch may need more frequent watering on a hot, exposed balcony.
For vegetables in containers, pick a medium labeled for container use and the crop when the product provides that guidance. A large tomato plant has different moisture and root needs from a shallow pot of lettuce, so container depth and watering access matter too.
Raised-bed soil and garden soil are often sold for outdoor growing, but a raised bed is not the same thing as a pot. If you’re sorting out garden, potting, and topsoil, keep the intended growing space in mind before filling a container.
Topsoil usually describes the upper layer of ground or a bagged product sold for soil building; the term doesn’t promise that it’s suitable for a pot. A dense topsoil can weigh down a planter and reduce the air space roots need.
Can you use garden soil in a pot if it looks loose? Sometimes a small amount may work as part of a carefully chosen blend, but plain garden soil is a poor default for most containers because it can compact and drain differently once enclosed.
I’d choose a container-labeled product for a patio vegetable pot rather than hauling soil from a garden bed. It saves the guesswork about how a particular yard soil will behave in a confined space.
When a custom blend makes sense
A custom blend can help when a plant has clear needs or a ready-made product doesn’t behave well in your setup. Mix small batches first, change one ingredient at a time, and keep notes on how quickly the pot dries after watering.
Possible adjustments include:
- Add more coarse bark or perlite if the medium stays wet too long.
- Add a moisture-retaining ingredient if the pot dries too quickly.
- Use a finer blend for small seeds and young roots.
- Keep the mix close to the plant’s preferred moisture range rather than chasing a universal recipe.
Don’t add amendments just because a plant looks unhappy. Yellow leaves can come from overwatering, underwatering, low light, pests, nutrient issues, or root problems, and changing the mix won’t address every cause.
Important Tip: Wear gloves if you’re handling dusty dry mix, and avoid breathing in dust when opening or pouring a bag. Work outdoors or in a ventilated space, and follow any safety directions printed on the packaging.
Use, Water, and Troubleshoot Potting Medium
Good results come from choosing a suitable mix, setting up drainage, and watering based on how the pot dries. A bag can’t make up for a blocked drainage hole or a watering routine that keeps roots wet all week.
Prepare a container before filling it
Before you add the mix, check the pot and the plant. A pot with no drainage holes needs a different approach than a nursery pot with open holes, and planting directly in a sealed decorative pot makes excess water harder to manage.
- Check the drainage holes. Clear away any plug, tape, or debris that blocks water from leaving.
- Choose a suitable pot size. A pot only a little larger than the root ball usually dries more predictably than an oversized pot filled with unused wet medium.
- Loosen the mix. Break apart compressed clumps with your hands so water can spread through the blend.
- Moisten very dry mix gradually. Add water in small amounts and turn the medium until it feels evenly damp, not dripping.
- Set the plant at the right depth. Keep the root crown near the surface and don’t bury the stem unless the plant’s care directions call for it.
- Water and let the excess drain. Empty any water collected in a saucer or outer pot.
Don’t put gravel or broken pot pieces at the bottom as a fix for poor drainage. A coarse layer doesn’t create extra drainage holes, and it takes up room that roots could use; use an open drainage hole and a suitable mix instead.
Water according to the medium, not the calendar
A potting medium can be dry at the surface while still damp near the roots. Check deeper into the pot with a finger or a wooden skewer, and pay attention to pot weight; a recently watered pot usually feels heavier than a dry one.
Water thoroughly when the plant and medium call for it, then allow excess water to drain. If water runs straight down the sides of a dry mix, the medium may have pulled away from the pot or become hard to wet; slow watering in several passes can help it absorb moisture.
Don’t use a fixed schedule as your only guide. A plant may need water every few days in hot, bright weather and much less often in a cool room, even if the pot and medium stay the same.
Pro Tip: Lift the pot after watering and again when the medium is dry enough to water. That simple weight check can teach you more about moisture than a calendar reminder.
Common problems and practical fixes
| What you notice | Possible cause | A sensible first move |
|---|---|---|
| Mix stays wet for a long time | Oversized pot, low light, dense mix, or too much water | Check drainage, light, and moisture before watering again |
| Water runs off the surface | Dry peat, compacted mix, or water-resistant dry medium | Water slowly in repeated passes |
| Mix dries very quickly | Small pot, warm sun, wind, coarse blend, or root crowding | Check pot size and placement, then adjust the mix if needed |
| Plant wilts while mix is wet | Roots may be stressed, or the medium may lack air | Stop watering and inspect drainage and root condition |
| Water pools on top | Compacted surface, poor structure, or blocked holes | Check the drainage holes and consider replacing collapsed mix |
| White crust appears on the surface | Mineral or fertilizer salts may have collected | Review fertilizer use and water quality; flush only if drainage is good |
| Leaves yellow while the pot stays soggy | Roots may be under stress from excess moisture | Let the medium dry to the plant’s preference and check roots |
A symptom can have more than one cause, so start with the easiest check. If the pot is wet, don’t add water just because the leaves droop; check drainage and roots first.
If the mix is old but still loose, drains well, and has no pest or disease problem, you may not need to replace it immediately. If it has broken down, smells sour, or stays wet much longer than it used to, refreshing the medium is a better bet than repeatedly trying to correct the same problem.
Fertilizer, reuse, and storage
Some potting products contain fertilizer, and the label may state how long the initial feeding is expected to last. Follow that timing rather than adding more fertilizer right after potting; excess fertilizer can leave salts in the medium and stress roots.
A fertilizer-free mix gives you more control over feeding, but it also means you’ll need to provide nutrients as the plant grows. Use a fertilizer suited to the plant and follow its directions, since different products vary in strength and frequency.
Reusing old potting mix can save money, but check its condition first. Don’t reuse medium from a plant with serious root disease, a pest infestation, or an unexplained decline, since the old material may carry problems into the next pot.
If you do reuse healthy, loose mix, remove old roots and debris, then refresh the structure with new ingredients as needed. Old medium may have lost nutrients or collapsed, so treat it as a starting point, not as fresh mix with a clean slate.
Store unused mix sealed or covered in a dry place, away from standing water and pests. If a bag has been soaked or has an unusual smell, inspect its contents before using it; a musty or sour odor can signal that the medium has stayed too wet.
Buying the right bag without overthinking it
Read the front label for the intended use, then flip the bag and scan the ingredient list. A specialty product is worth choosing when the plant’s needs are clearly different from a standard container plant, but many everyday plants do fine in a general mix.
Think about your routine, too. If you often forget to water, a very fast-draining medium in a tiny pot may be a frustrating match; if you tend to water frequently, a dense, moisture-retentive blend can create a soggy root zone.
Price alone doesn’t tell you how well a mix will perform. A lower-cost product can suit outdoor annuals, while a specialty blend may be a better fit for orchids or seed starting; compare the intended use and texture rather than assuming the most expensive bag wins.
If you’re unsure, buy a small bag and test it with one plant before repotting your whole collection. That gives you a chance to learn how the medium behaves in your home, where temperature, light, and humidity affect drying.
A reliable shopping check looks like this:
- The label permits the intended use.
- The ingredients match the plant’s moisture needs.
- The pot has drainage or a plan for removing excess water.
- The product’s fertilizer directions fit your feeding plan.
- The texture doesn’t feel far denser or coarser than the plant needs.
FAQs About Potting Mix vs Potting Soil
Is potting mix better than potting soil?
Potting mix is often a better starting choice for containers because many mixes are designed to stay light and leave air space around roots. But labels vary, and some potting soils work well in pots. Compare ingredients, intended use, drainage, and the plant’s moisture needs before deciding.
Can I use potting soil for indoor plants?
Yes, if the product is labeled for containers and its texture suits the plant. Check that the pot drains, since a heavy or moisture-retentive medium can remain wet in a low-light room. A general indoor potting mix is an easier starting point for many common houseplants.
Can I mix potting mix with garden soil?
You can combine them in some situations, but the result depends on the garden soil and the proportions. A small amount may add weight or mineral content, while too much can make the pot dense. For a predictable container, a mix made for pots is usually the simpler choice.
Is potting mix safe for vegetables?
Yes, use a product labeled for container growing and suitable for edible plants. Check the ingredient and fertilizer directions, especially if you’re growing food in a small pot. Make sure the container drains and has enough room for the crop’s roots.
Should I replace potting mix every year?
No, not automatically. Replace or refresh the medium when it has broken down, drains poorly, smells sour, or comes from a plant with pests or disease. If the mix remains loose and healthy, the plant may need a larger pot or fresh nutrients rather than a full mix change.
Make the Bag Match the Plant
For most container plants, a suitable potting mix is a safer starting point than soil dug from the yard, but the bag name alone doesn’t settle the question. Read the ingredients, check the product’s intended use, and match the texture to how your plant likes its roots to dry.
In my view, drainage and watering habits deserve as much attention as the mix itself. A good blend in a pot with blocked holes can still leave roots soggy, while a quick-draining blend can frustrate you if the pot sits in hot sun and dries too fast.
Your clearest next step is simple: check the pot’s drainage, identify whether your plant prefers moist or quick-drying conditions, then choose a bag labeled for that job. Start there, watch how the pot dries, and adjust only if the plant gives you a reason.