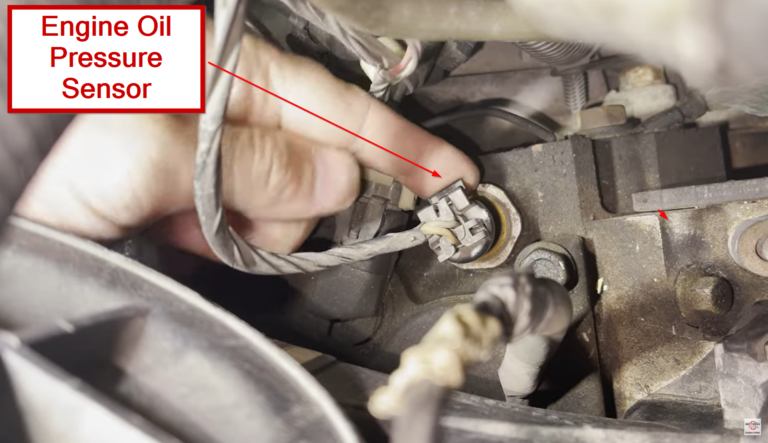
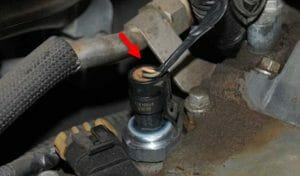
The socket size for an oil pressure sensor depends on the vehicle, engine, and sensor design. Some common replacement applications use a 1 1/16-inch or 1 1/8-inch sensor socket, but these sizes are not universal. Check your vehicle’s service information and measure the sensor’s hex before choosing a socket.
For American drivers working on a domestic or imported vehicle, identifying the correct oil pressure sensor socket is an important first step before replacing a faulty sensor. The sensor may sit in a tight space near the engine block, oil filter, or cylinder head, so the right socket must fit both the sensor and the available clearance.
An oil pressure sensor socket is designed to grip the sensor’s hex-shaped base while providing room for its electrical connector. A conventional socket may work on some designs, but a dedicated sensor socket often provides better clearance and reduces the risk of damaging the connector. The exact tool depends on the installed component, not simply the vehicle’s make or model.
Source: images-na.ssl-images-amazon.com
What Size Socket Fits an Oil Pressure Sensor?
The correct socket size depends on the oil pressure sensor installed in your engine. A 1 1/16-inch socket and a 1 1/8-inch socket are examples of sizes found in oil pressure sensor tool listings, but neither should be treated as a universal fit. Other applications may use different hex dimensions or require a specialized tool.
Before buying a socket, identify the vehicle’s year, make, model, engine size, and engine configuration. Use the factory service manual or a reliable vehicle-specific parts catalog to confirm the sensor part number and removal tool requirements. If the sensor has already been removed, measure the hex across two opposite flat sides rather than measuring the overall diameter of the component.
Source: images-na.ssl-images-amazon.com
1 1/16-inch socket
This size appears in some oil pressure sensor socket listings. Use it only when the installed sensor’s hex and the vehicle’s service information confirm compatibility.
1 1/8-inch socket
Some sensor sockets use this hex size. It is a separate size from 1 1/16 inch, so do not substitute one for the other without checking the fit.
Other sizes
Certain sensors have smaller or differently shaped hex bases. Vehicle-specific designs can require another socket size, a deep socket, or a dedicated sensor tool.
Why Oil Pressure Sensor Socket Sizes Differ
Automakers use different engine designs, sensor suppliers, mounting locations, and electrical connectors. A sensor may also change between engine options or production years within the same vehicle model. Consequently, a socket that fits one Chevrolet, Ford, Toyota, Honda, or other vehicle may not fit another vehicle from the same manufacturer.
The sensor’s threaded portion does not determine the socket size by itself. The tool must match the external hex or the specific drive feature intended for removal. The electrical connector, sensor housing, and surrounding engine components also affect which tool can reach the mounting point.
Engine configuration
Different engines in the same model year may use different oil pressure sensors.
Sensor revision
A replacement part may differ from the original component, so verify the actual part and its fitment.
Access limitations
A correctly sized socket can still be unsuitable if its outside diameter or depth prevents it from reaching the sensor.
How to Find the Correct Oil Pressure Sensor Socket
The most reliable method is to confirm the sensor specification before attempting removal. Start with vehicle identification, check the correct service documentation, and compare the specified tool with the installed sensor. If the documentation does not list a socket size, inspect the sensor and measure its hex carefully.
Do not force a socket over the sensor or use a size that rocks on the flats. A loose fit can round the hex, making an already difficult repair more expensive. If the sensor is still installed and difficult to access, choose a tool that fits the connector clearance and the available space around the mounting point.
Source: otctools.com
Step 1: Identify the vehicle
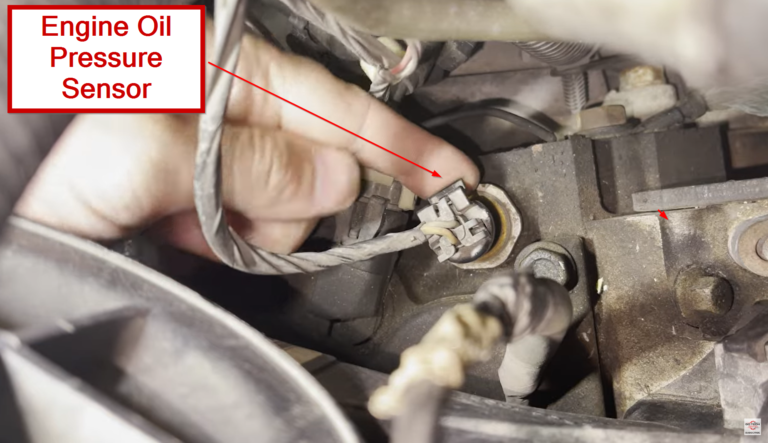
Record the model year, make, model, engine displacement, and engine code if available. Confirm whether the component is an oil pressure sensor, a simple pressure switch, or a combined sender.
Step 2: Check the service information
Look up the sensor replacement procedure, specified tool, part number, torque specification, and sealing instructions for that exact engine.
Step 3: Inspect the sensor
Locate the hex-shaped base and check whether the electrical connector prevents a standard socket from fitting over it.
Step 4: Verify the socket fit
Test the socket gently with the engine off and cool. It should sit squarely on the hex without excessive play or contact with fragile connector parts.
Step 5: Check access and drive size
Make sure the socket reaches the hex fully and leaves enough clearance for a ratchet or extension. The socket’s drive size, such as 3/8 inch, is different from its hex size.
How to Measure the Sensor Hex
If the sensor is removed, use a caliper to measure across two opposite flat faces of the hex. This measurement identifies the nominal wrench or socket size. Avoid measuring across the corners because that produces a larger dimension and can lead to selecting an oversized socket.
If the sensor remains installed, measurement may be difficult because the connector and surrounding components obstruct access. In that situation, a vehicle-specific service manual or a verified replacement-part specification is preferable to guessing.
Measure across flats
Measure from one flat side of the hex directly to the opposite flat side.
Check the tool markings
Confirm whether the socket is labeled in inches or millimeters and whether the stated measurement refers to the hex or drive.
Should You Use a Regular Socket or a Dedicated Sensor Socket?
A regular socket can work if it matches the sensor’s hex, fits fully, and clears the electrical connector. However, a dedicated oil pressure sensor socket is often the better option when the sensor has a projecting terminal, a large connector, or limited access around the engine.
Dedicated sensor sockets are designed for particular sensor shapes and access requirements. Some have a cutout or side opening that accommodates wiring or a connector, while others have a deeper profile to reach the mounting hex. Confirm that the tool is intended for your sensor type; not every tool sold as a sensor socket fits every oil pressure sensor.
Source: m.media-amazon.com
Regular six-point socket
Suitable when the sensor has an accessible hex and the socket clears the connector. A six-point design can provide a secure grip on a compatible hex.
Dedicated oil pressure sensor socket
Useful when the connector or terminal interferes with a conventional socket or when the mounting point is recessed.
Deep socket
May provide extra reach, but only use it if the inner depth and opening accommodate the sensor without striking or crushing the electrical housing.
Socket extension
Can help reach a recessed sensor, provided the extension does not create an awkward angle or prevent secure engagement.
What Do 3/8-Inch and 1/2-Inch Drive Mean?
The drive size describes the square connection between the socket and the ratchet, breaker bar, or torque wrench. It does not describe the size of the sensor hex. For example, a socket may have a 1 1/8-inch hex opening and a 3/8-inch square drive.
Choose a drive compatible with your ratchet and the tool’s intended application. Avoid using excessive leverage on a small sensor because its housing or threaded mounting area can be damaged before the fastener feels unusually tight.
Hex size
The dimension across the sensor’s opposing flat faces, which determines the socket opening.
Drive size
The square interface that connects the socket to the turning tool.
Tools and Supplies Needed to Remove an Oil Pressure Sensor
Gather the correct socket and basic safety equipment before starting. Depending on the vehicle, you may also need a ratchet, extension, replacement seal, torque wrench, and a tool for releasing the electrical connector. Check the service procedure first because some sensors are located in cramped areas or require removal of nearby components.
Oil can escape when the sensor is removed, especially if the engine has recently been running or the sensor sits in a pressurized oil passage. Allow the engine to cool, switch it off, and follow the manufacturer’s precautions. Never loosen the sensor while the engine is running.
Source: i.ebayimg.com
Correct sensor socket
A verified socket size and profile that fit the sensor’s hex and surrounding clearance.
Ratchet and suitable extension
Tools that provide access while keeping the socket aligned with the sensor.
Torque wrench
Needed if the service procedure specifies a torque value for installation.
Protective equipment
Safety glasses and suitable gloves help protect against oil and debris.
Replacement sensor and seal
Use the correct part for the engine and obtain any specified washer, O-ring, or other seal.
Safety Checks Before Loosening the Sensor
Park on a stable, level surface, apply the parking brake, and keep the ignition off. Let hot engine parts cool before working near the sensor. If access requires lifting the vehicle, use properly rated jack stands on suitable support points; never rely on a hydraulic jack alone.
Disconnect the battery only when required or recommended by the manufacturer’s procedure, and follow the correct steps for the vehicle’s electrical system. Identify the sensor connector before removing it, and release its locking tab instead of pulling on the wires.
Prevent burns
Wait until the engine and nearby exhaust components are cool enough to work around safely.
Protect the connector
Release the connector lock and avoid twisting or pulling the wiring harness.
Prepare for oil leakage
Place a suitable catch container or absorbent material beneath the sensor when appropriate.
How to Remove an Oil Pressure Sensor Without Damaging It
After confirming the socket size, remove the sensor with the engine off and cool. Work carefully because many sensors combine a metal mounting base with a plastic electrical connector that can crack if the socket slips or the sensor is twisted by its wiring.
The exact procedure varies by vehicle. Follow the factory instructions for access, connector release, sensor removal, and oil containment. If the sensor is corroded, seized, or positioned where the correct socket cannot engage fully, stop rather than applying uncontrolled force.
Source: m.media-amazon.com
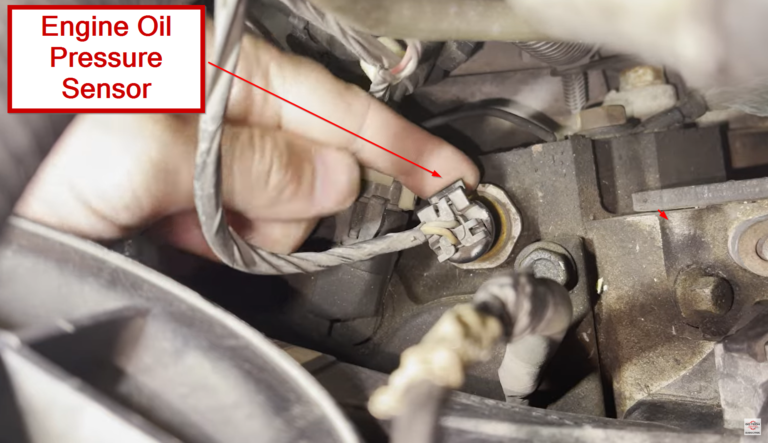
Step 1: Locate the sensor
Use the service manual to identify the correct component and determine whether nearby covers or parts must be removed.
Step 2: Disconnect the electrical connector
Release its locking tab and move the harness aside without stretching or twisting the wires.
Step 3: Seat the socket
Place the correct socket squarely over the sensor hex. Confirm that it engages fully and does not press against the connector.
Step 4: Loosen the sensor
Turn the ratchet gradually in the loosening direction while keeping the tool aligned. Stop if the socket slips or the housing begins to deform.
Step 5: Remove and inspect
Unscrew the sensor carefully and inspect the threads, sealing surface, connector, and any removed seal for damage.
What If the Socket Will Not Fit?
If the socket will not slide over the hex, verify its marked size and check whether a connector, retaining feature, or nearby component is blocking access. Do not hammer an oversized or undersized socket onto the sensor. Recheck the vehicle-specific tool requirement and measure the hex if possible.
If the socket fits but slips during loosening, stop immediately. A rounded hex can make removal much more difficult. A professional technician may need a specialized extraction tool, particularly if the sensor is recessed or its threaded base is damaged.
Wrong opening size
Use the measured hex size or documented service specification to select the correct socket.
Insufficient clearance
Consider a compatible sensor socket or suitable extension rather than forcing a standard socket into the space.
Seized sensor
Follow the manufacturer’s removal procedure and seek professional help if removal force risks damaging the engine or oil passage.
Installing the Replacement Oil Pressure Sensor
Install the replacement sensor with the specified seal and tightening procedure for your exact engine. The socket size helps with removal and installation, but it does not determine the correct torque or sealing method. Some sensors use tapered threads, some use a sealing washer or O-ring, and others have different manufacturer-specified arrangements.
Compare the replacement part with the original before installation. Check the thread, hex, connector, mounting depth, and seal. If the new sensor does not match the application or cannot start threading by hand as directed by the service procedure, stop and verify the part rather than forcing it into the engine.
Source: m.media-amazon.com
Clean the mounting area
Remove loose debris around the opening so contamination does not enter the oil passage. Avoid pushing dirt into the engine.
Use the specified seal
Install the correct washer, O-ring, or thread treatment only as directed by the vehicle or sensor manufacturer.
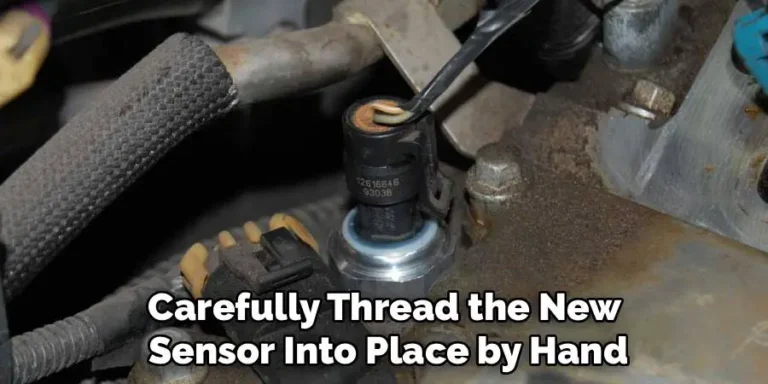
Start the threads carefully
Engage the sensor without cross-threading. If it binds immediately, remove it and check the alignment and thread compatibility.
Tighten to specification
Use the documented torque value and an appropriate tool. Do not guess or overtighten a sensor with a small threaded base.
Reconnect and inspect
Secure the electrical connector and check the area for leaks using the manufacturer’s verification procedure.
How to Confirm the Installation Is Successful
After installation, confirm that the connector is locked, the wiring is routed correctly, and any removed components have been reinstalled. Follow the service manual’s instructions for checking oil level, starting the engine, and inspecting for leaks.
The dashboard oil pressure warning should behave as specified for the vehicle. If the oil pressure warning remains on, the gauge behaves abnormally, or oil leaks from the sensor, shut the engine off when safe and investigate the cause. Do not assume a new sensor has corrected an actual low-oil-pressure condition.
No visible leak
Inspect the sensor base and surrounding area after following the prescribed engine-running or pressure-check procedure.
Normal warning-light behavior
Verify that the warning system responds according to the vehicle’s normal startup and operating behavior.
Persistent oil pressure warning
Check oil level and obtain a proper mechanical oil pressure test if needed. Stop driving if actual low oil pressure is suspected.
Common Mistakes When Choosing an Oil Pressure Sensor Socket
Most socket-related problems result from assuming that every oil pressure sensor uses the same hex size or that any deep socket will fit. Confirming the sensor specification before applying force helps prevent damaged threads, broken connectors, and unnecessary replacement costs.
The other common mistake is confusing socket fit with the sensor’s sealing and tightening requirements. Even a socket that fits perfectly can damage the sensor if it is used at an angle or tightened beyond the manufacturer’s specification.
Source: m.media-amazon.com
Assuming all vehicles use one size
Sensor dimensions vary by application, so confirm fitment using the engine details and service information.
Confusing drive size with hex size
A 3/8-inch drive identifies the ratchet connection, not the size of the socket opening.
Using an ill-fitting socket
A socket that rocks or engages only part of the hex can round the sensor’s flats.
Pulling on the wiring
The connector and wires are not removal handles. Release the connector and turn the sensor using the proper tool.
Guessing torque or sealant
Excessive torque or incompatible thread sealant can damage the mounting point or affect the sensor’s intended grounding and sealing arrangement.
Frequently Asked Questions
Q
Is a 1 1/16-inch socket the same as a 1 1/8-inch socket?
No. A 1 1/16-inch socket has a smaller opening than a 1 1/8-inch socket. The difference is 1/16 inch, or 0.0625 inch. Use the size specified for your sensor or confirmed by measuring its hex; do not force one size onto a sensor intended for the other.
Q
Can I use a regular deep socket to remove an oil pressure sensor?
Yes, if the socket matches the sensor hex, engages fully, and provides enough clearance for the connector and surrounding components. A dedicated oil pressure sensor socket is preferable when a conventional socket cannot clear the electrical terminal or reach the mounting point safely.
Q
Do I need a special oil pressure sensor socket?
Not always. Some sensors are accessible with a standard socket or wrench, while others require a dedicated tool with a side opening or specialized profile. The correct choice depends on the sensor design, mounting location, and service instructions.
Q
Can I remove an oil pressure sensor without draining the engine oil?
Many oil pressure sensors can be replaced without draining the entire engine oil supply, but some oil may escape when the sensor is removed. The amount depends on the sensor’s location and engine design. Check the vehicle-specific service procedure and prepare to catch any oil that leaks out.
Q
Should I use a torque wrench when installing an oil pressure sensor?
Use a torque wrench when the manufacturer’s procedure specifies a torque value. The correct specification depends on the sensor, thread design, and engine. Avoid applying a generic torque value from another vehicle because overtightening can damage the sensor or engine threads.
Q
What should I do if the oil pressure warning light stays on after replacement?
Check the engine oil level and inspect the sensor connector and wiring, but do not assume the replacement sensor is the only possible cause. The engine may have genuinely low oil pressure, a wiring fault, or another problem. If the warning indicates low oil pressure while the engine is running, stop the engine as soon as it is safe and have the actual oil pressure checked before driving.
✦ Wrapping Up
Conclusion
The correct socket size for an oil pressure sensor varies by vehicle and sensor design. Sizes such as 1 1/16 inch and 1 1/8 inch appear in common sensor socket listings, but neither size fits every application. Confirm the exact specification using the vehicle’s service information or a careful measurement across the sensor’s hex flats.
Choose a socket that fits securely, clears the electrical connector, and provides access without placing force on the sensor housing. During replacement, follow the specified sealing method and torque procedure, then check for leaks and correct oil pressure warning behavior.
💡 Key Takeaway
Before starting the repair, identify your vehicle’s year, make, model, and engine, verify the oil pressure sensor part number, and confirm the socket’s hex size and drive size. Use the manufacturer’s removal and installation instructions instead of guessing.
Ethan Brooks is an automotive writer at Auto News 7, covering car news, vehicle maintenance, new model updates, recalls, and practical buying guides. He focuses on clear, useful information that helps drivers understand their vehicles and make better ownership decisions.
Learn how to remove oil pressure sensor connector safely, identify common locking tabs, avoid wire damage, and inspect the connector before reassembly.
Learn how to ground oil pressure sensor circuits safely, identify the correct ground path, test continuity and voltage, and avoid common wiring mistakes.
Learn how to unplug an oil pressure sensor safely, identify the electrical connector, release its locking tab, inspect the wiring, and avoid common mistakes.