You can change an oil pressure sensor by confirming the fault, removing the old sensor, installing the correct replacement, and checking for leaks.
For drivers in the United States, an oil pressure warning deserves attention before replacing any part. The oil pressure sensor, oil pressure switch, or sending unit reports engine oil pressure to the dashboard or engine computer. A warning light or abnormal gauge reading can come from a failed sensor, but it can also indicate genuinely low oil pressure, low oil level, damaged wiring, or another engine problem.
The basic replacement process is usually straightforward once the correct part and access procedure are known. The exact sensor location, thread type, connector, sealing method, and tightening torque vary by vehicle. Always use the repair information for the specific year, make, model, and engine before removing the original component.
Source: i.ytimg.com
What Does an Oil Pressure Sensor Do?
An oil pressure sensor measures or detects engine oil pressure and converts that condition into an electrical signal. Depending on the vehicle, the signal may operate an oil pressure gauge, activate a warning light, or provide information to the engine control module. Older vehicles may use a simple oil pressure switch instead of a variable pressure sensor.
The terms sensor, switch, sender, and sending unit are sometimes used interchangeably in parts listings, but they do not always describe the same electrical device. A switch may simply change state at a specified pressure, while a sensor or sender can provide a variable signal. That difference matters when ordering the replacement.
Source: i.ytimg.com
Oil pressure switch
Usually provides an on-or-off signal for an oil pressure warning circuit.
Oil pressure sensor
May provide a variable electrical signal that the vehicle uses to display or calculate oil pressure.
Oil pressure sender
A common term for a component that converts oil pressure into a signal for a gauge or vehicle electronics.
Where Is the Oil Pressure Sensor Located?
The oil pressure sensor is commonly installed in an engine oil passage, often near the oil filter or oil filter housing. However, some engines place it on another part of the engine block, cylinder head, adapter, or oil passage. The exact location should be confirmed with vehicle-specific service information before beginning the repair.
Look for the wiring connector
Following the oil pressure sensor wiring can help identify the component when several threaded fittings are nearby.
Check access requirements
Some sensors are easy to reach from above, while others require access from underneath or removal of nearby components.
Confirm the Oil Pressure Sensor Is the Problem
Do not replace the oil pressure sensor solely because the oil pressure warning light appeared. A faulty sensor can cause a false warning, but genuinely low oil pressure can damage an engine quickly. Begin by checking the engine oil level and looking for obvious leaks.
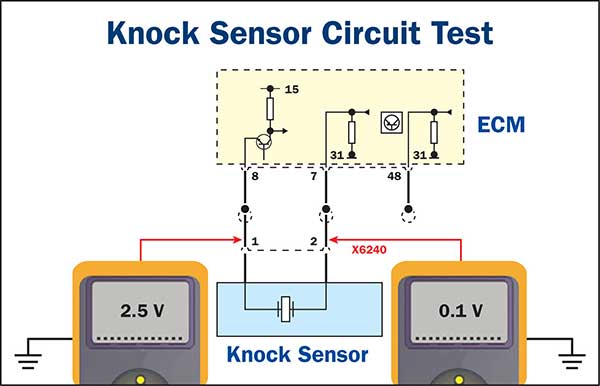
If the oil level is correct and the warning remains, inspect the sensor connector and wiring. Look for broken insulation, corrosion, loose terminals, oil contamination, or a connector that does not lock securely. Diagnostic trouble codes can provide useful clues, but a code related to the oil pressure circuit does not automatically prove that the sensor itself has failed.
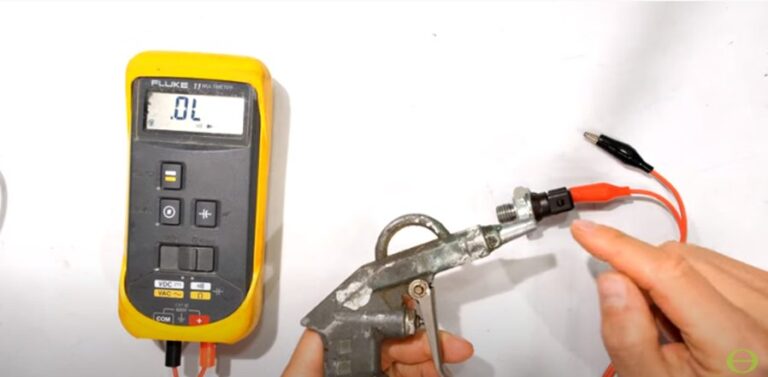
When the diagnosis is uncertain, a mechanical oil pressure test is the safer way to distinguish a sensor problem from a real pressure problem. Compare the measured pressure with the vehicle manufacturer’s specifications under the required operating conditions. If actual pressure is below specification, replacing the sensor will not correct the underlying mechanical problem.
Source: i.ytimg.com
Check the oil level
Verify the engine has the correct oil level before diagnosing an oil pressure warning.
Inspect the connector
Check for corrosion, oil contamination, damaged terminals, broken locks, or loose connections.
Check actual oil pressure
Use a suitable mechanical pressure gauge when the cause of the warning is uncertain or actual pressure needs verification.
Consider wiring faults
A damaged circuit can create the same symptoms as a failed oil pressure sensor.
When Should You Stop Driving?
If the oil pressure warning light stays on while the engine is running, do not assume the sensor is defective. Safely shut the engine off and investigate the oil level and pressure. An engine with genuinely low oil pressure can suffer severe internal damage if it continues running.
Unusual knocking, ticking, rattling, or other sudden engine noises make the situation more urgent. In that case, professional diagnosis or towing is safer than continuing to drive.
Tools and Replacement Parts You Need
Gather the correct replacement part and tools before removing the old oil pressure sensor. The most important item is the sensor itself, matched to the exact vehicle and engine. A sensor that looks similar can still have the wrong thread, connector, electrical output, or pressure specification.
Many oil pressure sensors require a dedicated oil pressure switch socket. These sockets are designed to fit the sensor body while clearing the electrical connector. Depending on access, you may also need a ratchet, extension, small hand tools, shop towels, a drain pan, and a suitable light.
Check whether the replacement includes a sealing washer, O-ring, or pre-applied thread sealant. Do not automatically add sealant to every sensor because some applications rely on the sensor’s threads, sealing washer, or O-ring for the correct electrical and mechanical connection.
Source: i.ytimg.com
Replacement sensor or switch
Match the exact application, engine, connector, thread, and electrical specification.
Oil pressure switch socket
Use a dedicated socket when the sensor’s connector prevents a conventional deep socket from fitting correctly.
Ratchet and extension
Choose the tools required to reach the sensor without stressing nearby wiring or components.
Drain pan and towels
Catch oil that may escape when the sensor is removed and clean the surrounding area.
Correct sealing material
Use only the washer, O-ring, or sealant specified for the particular application.
Check the Replacement Before Installation
Compare the new part with the old one before removing anything. Check the connector shape, number of terminals, thread size and style, sealing arrangement, body length, and overall shape. If the vehicle uses more than one oil pressure switch or sensor, confirm that the replacement is for the correct location.
Thread match
Confirm that the new part uses the correct thread type and size. Never force an incompatible thread into the engine.
Connector match
The plug or terminal arrangement should match the vehicle harness without modification unless the repair procedure specifically calls for a connector repair.
Seal match
Verify whether the application uses a tapered thread, sealing washer, O-ring, or another specified sealing method.
How to Change Oil Pressure Sensor Step by Step
The basic replacement sequence is to prepare the vehicle, locate the sensor, disconnect its wiring, remove the old unit, install the correctly sealed replacement, reconnect the wiring, and verify the repair. The exact procedure can vary significantly by vehicle, so the manufacturer’s service instructions take priority over any generic sequence.
Work only on a safely supported vehicle and allow hot components to cool enough for safe access. If you need to work underneath the vehicle, use properly rated jack stands or a suitable lift. Never rely on a hydraulic jack alone to support a vehicle.
Source: i.ytimg.com
Step 1: Park and secure the vehicle
Park on a stable, level surface when practical, switch off the engine, apply the parking brake, and secure the vehicle according to the manufacturer’s instructions.
Step 2: Let the engine cool as needed
Avoid burns from hot engine components and oil. Use appropriate protective equipment and wait until the work area is safe to touch.
Step 3: Locate the sensor
Use vehicle-specific service information to identify the correct sensor and determine whether any components must be moved for access.
Step 4: Clean the area
Remove dirt and oil around the sensor so contamination does not fall into the opening when the old unit is removed.
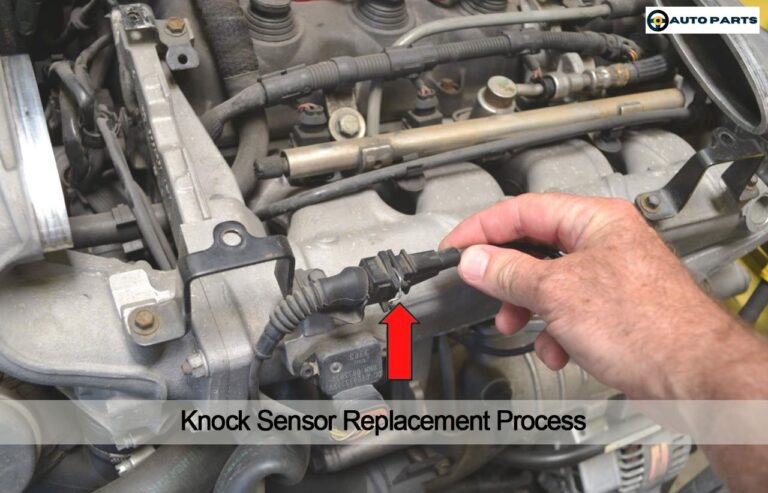
Step 5: Disconnect the electrical connector
Release the connector lock and disconnect the wiring without pulling on the wires.
Step 6: Remove the old sensor
Use the correct socket or wrench and turn the sensor out carefully. Have a drain pan ready because some oil may escape.
Step 7: Prepare the replacement
Install the specified washer, O-ring, or thread sealant only as directed for the vehicle.
Step 8: Install the new sensor
Start the threads by hand to avoid cross-threading, then tighten the sensor to the manufacturer’s specified torque.
Step 9: Reconnect the wiring
Push the connector fully into place until its locking feature engages and make sure the harness is routed away from heat and moving parts.
Step 10: Check the oil level
Inspect the engine oil level and add the correct oil if necessary, accounting for any oil lost during the repair.
Why Torque and Sealing Method Matter
Do not guess the tightening torque. Excessive force can damage threads, crack an aluminum housing, or deform a sealing surface. Too little tightening can allow an oil leak or leave the sensor insufficiently secured.
The correct sealing method also varies. Some applications use a tapered thread, while others use a sealing washer or O-ring. Adding an incorrect sealant can interfere with the required seal or, on some designs, affect the electrical grounding path through the sensor body.
How to Check the Repair After Installation
After installing the new oil pressure sensor, inspect the area before and after starting the engine. The first goal is to confirm that the sensor is sealed and the electrical connector is secure. The second goal is to confirm that the oil pressure warning system or gauge now behaves as expected.
Start the engine and watch the oil pressure warning indicator. Depending on the vehicle, the warning light may remain on briefly during startup while the engine builds pressure, but it should behave according to the vehicle’s normal operation. If the warning remains illuminated, shut the engine off and investigate rather than assuming the new sensor is defective.
Look closely around the sensor for fresh oil. If a leak appears, shut the engine off and determine whether the sensor, washer, O-ring, thread, or nearby component is responsible. Do not simply tighten the sensor further without checking the specified torque and sealing procedure.
Source: i.ytimg.com
No oil leak
The sensor mounting area should remain dry after the engine reaches operating pressure.
Normal warning indicator
The oil pressure warning system should return to its expected behavior for the vehicle.
Normal gauge behavior
If the vehicle has an oil pressure gauge, its reading should respond normally according to the vehicle’s design.
Secure connector
The electrical connector should remain locked and the wiring should not contact moving or excessively hot components.
What If the Oil Pressure Warning Stays On?
If the warning remains on after the replacement, do not keep driving simply because a new sensor was installed. Recheck the oil level, connector, wiring, replacement part, and installation. If the vehicle has not had actual oil pressure verified, a mechanical pressure test may be necessary.
A persistent warning can indicate real low oil pressure caused by problems such as insufficient oil, an oil supply issue, a clogged passage or filter, an oil pump problem, excessive engine bearing clearance, or another mechanical fault. The correct repair depends on the actual diagnosis.
Common Mistakes When Replacing an Oil Pressure Sensor
Most problems during oil pressure sensor replacement come from incorrect diagnosis, incorrect parts, damaged threads, improper sealing, or neglected wiring. Avoiding these mistakes is often more important than completing the physical replacement quickly.
A new sensor cannot repair an engine that genuinely has low oil pressure. Likewise, a damaged connector can make a good replacement sensor appear defective. Treat the sensor as one part of the oil pressure monitoring system rather than automatically assuming it is the source of every warning.
Source: i.ytimg.com
Replacing the sensor without checking oil pressure
This can hide a serious engine lubrication problem and delay necessary repairs.
Ordering by appearance alone
Similar-looking sensors can have different threads, connectors, pressure specifications, and electrical outputs.
Forcing the threads
Cross-threading can damage the engine’s threaded port and turn a simple repair into a larger repair.
Using the wrong sealant
Not every oil pressure sensor should receive additional thread sealant, and excessive sealant can create problems.
Overtightening
Excessive torque can damage the sensor, threads, housing, or sealing surface.
Ignoring the connector
Corroded, oil-soaked, loose, or damaged wiring can reproduce the original symptom after the sensor is replaced.
Driving with a persistent warning
A continuing oil pressure warning may indicate actual low oil pressure and should be treated as a potential engine-protection issue.
When Professional Repair Makes More Sense
Consider professional diagnosis when the sensor is difficult to access, the engine has abnormal noises, actual oil pressure is below specification, the sensor port or threads are damaged, or the repair requires removing major components. A professional technician can also perform a mechanical oil pressure test and trace electrical faults when the diagnosis is unclear.
Professional help is especially appropriate when the repair requires working beneath a vehicle without proper lifting equipment or when access involves fuel, electrical, exhaust, or other systems that create additional hazards.
Oil Pressure Sensor Replacement Checklist
Use this checklist before considering the repair complete. It helps separate a successful sensor replacement from a replacement that merely changes the part without confirming the underlying problem.
The most important result is not simply having a new sensor installed. The repair should leave the oil passage properly sealed, the electrical connection secure, the oil level correct, and the oil pressure warning system operating normally.
Source: i.ytimg.com
Diagnosis confirmed
The available evidence supports a faulty sensor or switch rather than genuine low oil pressure.
Correct replacement installed
The replacement matches the exact vehicle and engine application.
Threads installed correctly
The sensor started by hand and was tightened using the specified procedure.
Correct sealing method used
The required washer, O-ring, or approved sealant was installed according to vehicle-specific instructions.
Connector secured
The wiring connector is fully seated and the harness is safely routed.
Oil level checked
The engine has the correct oil level after accounting for any oil lost during the repair.
Leak inspection completed
The sensor and surrounding area remain dry while the engine is running.
Warning system verified
The oil pressure light or gauge behaves normally after the repair.
How Long Does It Take to Change an Oil Pressure Sensor?
The hands-on replacement can be relatively quick when the sensor is easy to reach, but there is no universal time for every vehicle. Access can range from a straightforward connection near the oil filter to a difficult location behind or beneath other components.
The diagnostic work can take longer than the physical replacement. Confirming actual oil pressure, checking wiring, and identifying the correct replacement part are worthwhile when the warning could indicate a more serious problem.
Frequently Asked Questions
Q
Can I change an oil pressure sensor myself?
Yes, many oil pressure sensor replacements are suitable for experienced DIYers when the sensor is accessible and the correct tools are available. The job becomes more complicated when access is restricted or when the warning may be caused by genuinely low oil pressure.
Before replacing the part, check the oil level and inspect the wiring. If actual oil pressure has not been established and the warning is persistent, professional diagnosis may be the safer choice.
Q
Do I need to drain the oil to change an oil pressure sensor?
Not always. Because the sensor is installed in a pressurized oil passage, some oil may escape when it is removed, but the amount and whether draining is practical depend on the vehicle and sensor location.
Follow the vehicle-specific repair procedure. Keep a drain pan ready and check the oil level after the replacement.
Q
How do I know if the oil pressure sensor or the oil pump is bad?
A warning light alone cannot reliably distinguish a faulty sensor from a mechanical oil pressure problem. Checking oil level, inspecting the wiring, and measuring actual oil pressure with a suitable mechanical gauge can help separate an electrical sensor fault from genuine low pressure.
If measured oil pressure is below the manufacturer’s specification, investigate the lubrication system rather than simply installing another sensor.
Q
Should I use Teflon tape on an oil pressure sensor?
Do not automatically use Teflon tape. The correct sealing method depends on the sensor and engine design, and some applications require a sealing washer, O-ring, specified thread sealant, or a particular electrically conductive connection.
Use the manufacturer’s service procedure or the sensor manufacturer’s instructions. Adding an inappropriate sealant can create sealing or electrical problems.
Q
What happens if I install the wrong oil pressure sensor?
The wrong sensor may have an incompatible thread, connector, electrical output, pressure range, or physical shape. The result can be an incorrect gauge reading, persistent warning light, diagnostic trouble code, oil leak, or installation damage.
Match the replacement using the exact vehicle, engine, and application information rather than relying only on the sensor’s appearance.
Q
How tight should an oil pressure sensor be?
The sensor should be tightened to the vehicle manufacturer’s specified torque, not by feel alone. The correct value depends on the sensor, thread type, sealing method, and engine design.
Overtightening can damage threads or housings, while insufficient tightening can cause leaks. Check the exact service specification before installation.
✦ Wrapping Up
Conclusion
Learning how to change oil pressure sensor components is useful for many vehicle owners because the physical replacement can be straightforward when the part is accessible. The more important step is diagnosis. An oil pressure warning can result from a failed sensor, wiring problem, low oil level, or genuinely low engine oil pressure.
Use the correct replacement for the exact vehicle and engine, follow the specified sealing and torque procedure, and inspect the connector while the sensor is accessible. After installation, check the oil level, look for leaks, and verify that the warning light or gauge operates normally. If the warning remains on or the engine develops abnormal noise, stop driving and have the actual oil pressure checked.
💡 Key Takeaway
Before replacing an oil pressure sensor, confirm the oil level and inspect the electrical circuit; after installation, verify oil pressure system operation and check carefully for leaks.
Ethan Brooks is an automotive writer at Auto News 7, covering car news, vehicle maintenance, new model updates, recalls, and practical buying guides. He focuses on clear, useful information that helps drivers understand their vehicles and make better ownership decisions.
Learn how to test camshaft position sensor wiring with a multimeter. Follow a safe step-by-step process to check power, ground, signal circuits, and common wiring faults.
Learn how to test an oil pressure sensor with a multimeter and mechanical gauge, identify wiring faults, and separate sensor problems from real low oil pressure.
Learn whether knock sensors are universal, how compatibility works, and how to choose the correct knock sensor for your vehicle to avoid engine performance problems.
Learn what to do after replacing a knock sensor, including checking installation, clearing codes, testing the engine, completing a drive cycle, and handling recurring faults.