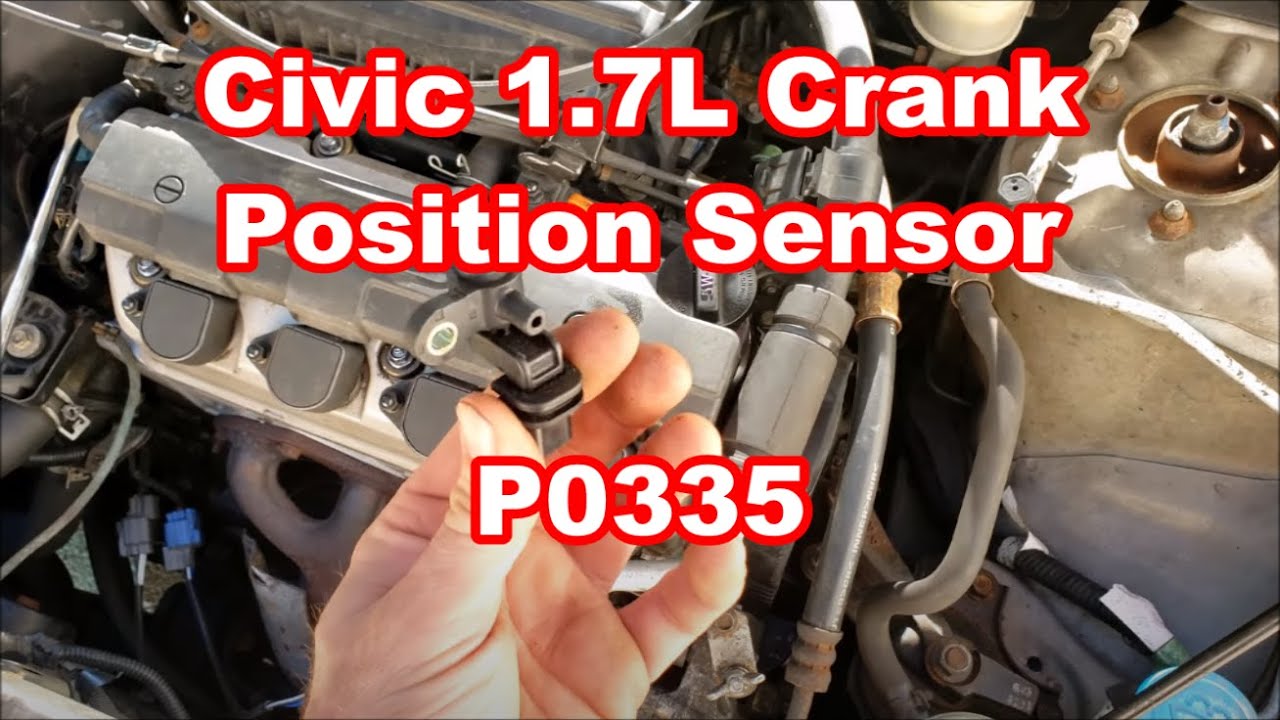
Test a Honda Civic crankshaft position sensor by checking its power, reference voltage, ground circuit, wiring, and signal.
If you are diagnosing a Honda Civic in the United States, a crankshaft position sensor problem can cause hard starting, stalling, a no-start condition, or a check engine light. The exact test procedure depends on the Civic year, engine, and sensor design, so do not assume that one voltage specification applies to every Civic.
For many Honda Civic models from the early 2000s, Honda service information uses a three-pin CKP sensor circuit and checks for battery voltage, approximately 5 volts on the reference circuit, and proper circuit continuity before condemning the sensor. A diagnostic code such as P0335 can point toward a CKP signal problem, but the code alone does not prove that the sensor itself has failed.
Source: samarins.com
What Does the Crankshaft Position Sensor Do?
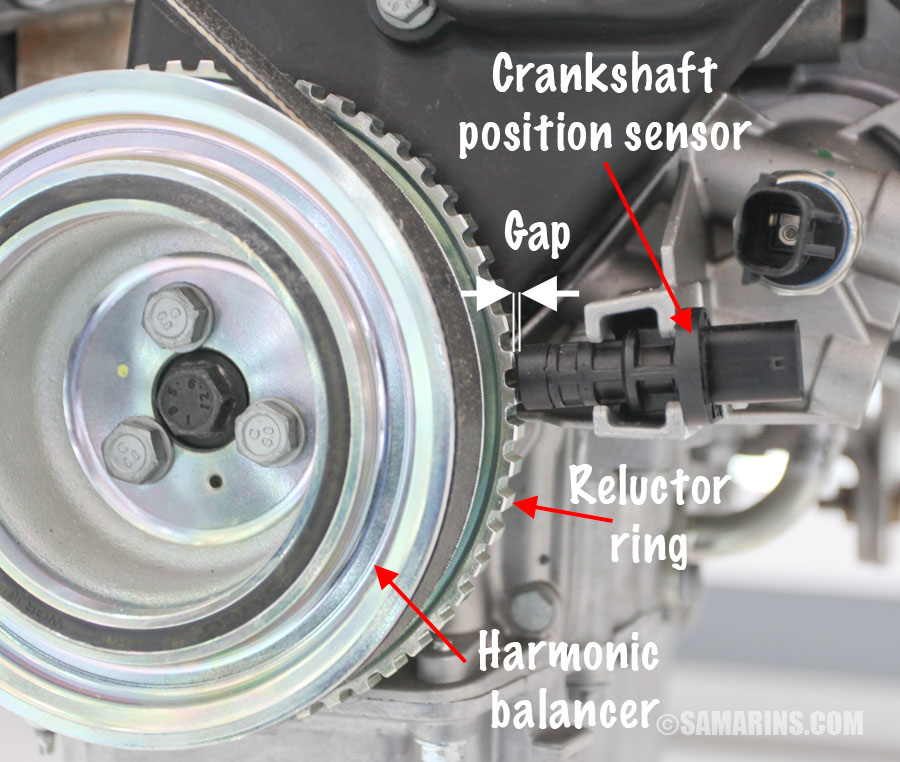
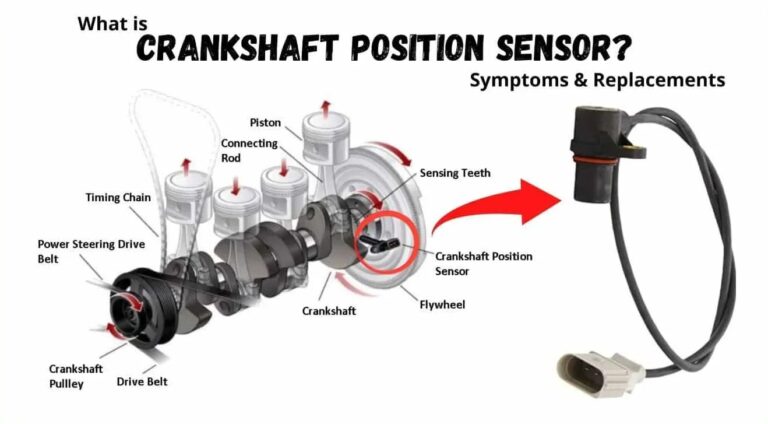
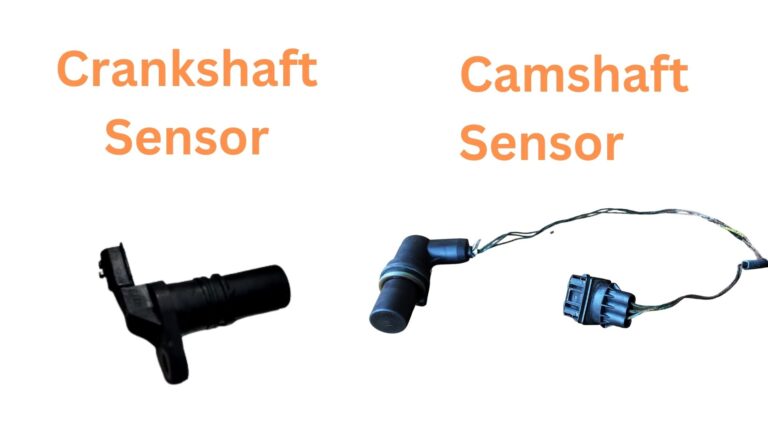
The crankshaft position sensor, commonly called the CKP sensor, tells the engine control module or powertrain control module where the crankshaft is and how fast it is turning. The computer uses this information to control engine timing and other functions needed for proper operation.
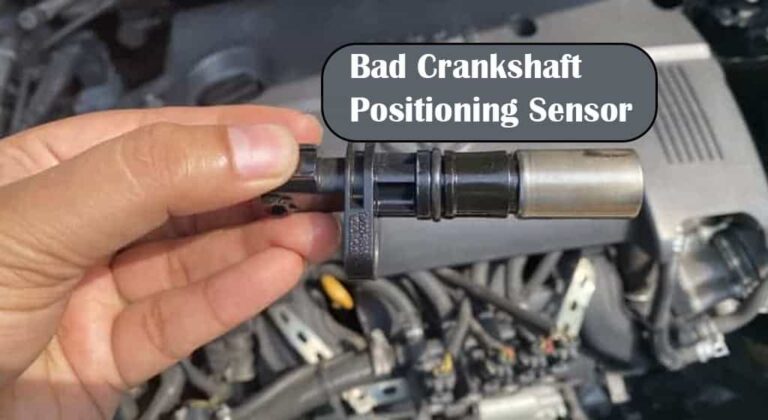
A failed or interrupted CKP signal can prevent the computer from correctly determining engine position. Depending on the Civic, the result can include an extended crank, a no-start condition, stalling, rough running, or a malfunction indicator lamp.
Honda service procedures identify P0335 as a CKP sensor no-signal fault on several Civic applications. Other CKP-related codes can indicate intermittent or performance problems. These codes should be treated as starting points for diagnosis rather than proof that the sensor itself needs replacement.
Source: autotoride.com
CKP sensor
Detects crankshaft position and rotation and sends that information to the engine computer.
ECM or PCM
Processes the CKP signal along with other engine inputs to control engine operation.
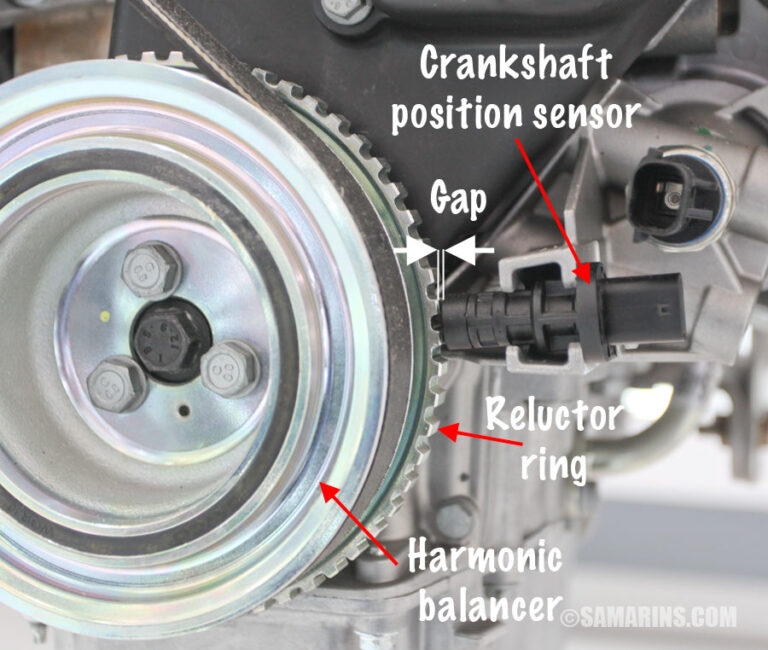
Reluctor or trigger pattern
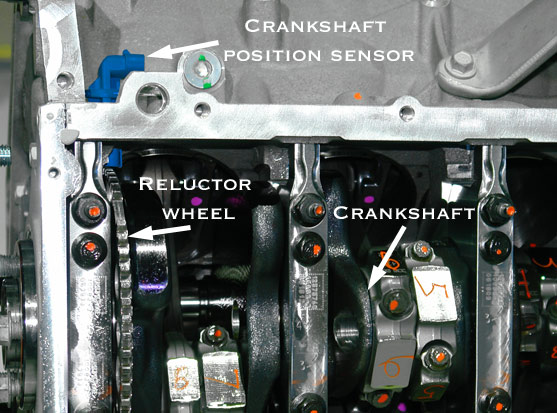
A rotating pattern associated with the crankshaft provides the changing signal that the sensor detects.
Common Symptoms of a CKP Sensor Problem
A Civic with a CKP circuit problem may crank without starting, stall unexpectedly, or develop an illuminated check engine light. Some faults are intermittent, which means the vehicle may start normally at one moment and fail later.
These symptoms overlap with fuel, ignition, timing, battery, starter, wiring, and other sensor problems. Testing is therefore more useful than replacing the sensor based only on symptoms.
No-start condition
The engine may crank normally but fail to start when the computer does not receive a usable crankshaft signal.
Intermittent stalling
An unstable electrical connection or failing sensor can interrupt the signal during operation.
Check engine light
The ECM or PCM may store a CKP-related diagnostic trouble code when it detects an abnormal signal.
What You Need Before Testing a Honda Civic CKP Sensor
You can perform basic CKP circuit checks with a digital multimeter, but the correct procedure requires the wiring information for your specific Civic. A scan tool is also useful because it can show stored diagnostic trouble codes and, on supported vehicles, engine data while the engine is cranking.
Before touching the sensor connector, park the Civic on a stable surface, set the parking brake, and allow hot engine components to cool. Keep loose clothing, hair, and tools away from belts, pulleys, fans, and other moving parts.
If you need to back-probe a connector, use suitable automotive test leads. Avoid forcing probes into terminals because damaged terminals can create a new intermittent fault.
Source: mail.troubleshootmyvehicle.com
Digital multimeter
Use a meter capable of measuring DC voltage and electrical continuity or resistance when the applicable service procedure calls for it.
OBD-II scan tool
Use a compatible scan tool to check for stored and pending diagnostic trouble codes and available engine data.
Vehicle-specific wiring information
Confirm the connector pin numbers, wire functions, test conditions, and specifications for your Civic year and engine.
Basic safety equipment
Use eye protection and keep the vehicle secure before working around the engine or underneath the car.
Why the Civic Year Matters
Honda Civic CKP systems are not identical across every generation. For example, Honda service information for a 2005 1.7-liter Civic specifies a three-pin CKP connector and checks for battery voltage on one circuit and approximately 5 volts on another. A 2006 1.8-liter Civic also uses a three-pin CKP connector, but its complete diagnostic and relearn procedures are specific to that vehicle.
Older Civic generations can use different sensor arrangements and distributor-related sensor systems. Always identify the engine before applying a test value or connector pinout.
Confirm the engine
Two Civics from the same model year can require different procedures if they have different engines or performance configurations.
Confirm the connector
Count the terminals and compare the connector with the service information before connecting test equipment.
How to Test Crankshaft Position Sensor Honda Civic
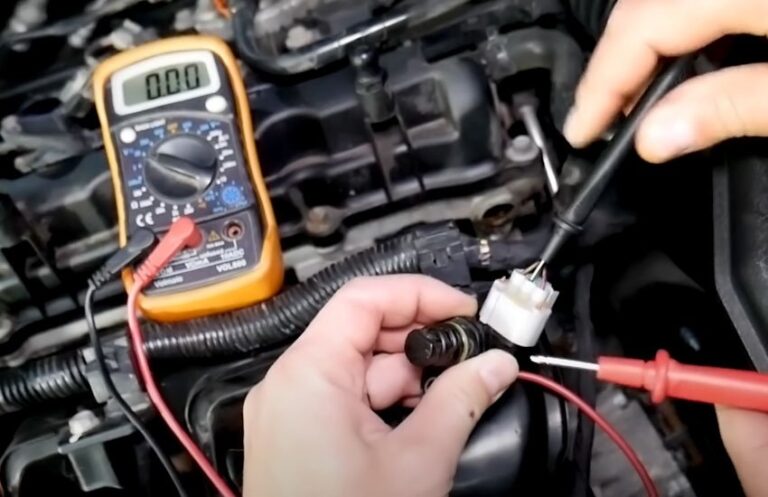
The most useful approach is to diagnose the entire CKP circuit rather than testing the sensor in isolation. Start with the stored code and visual inspection, then verify power, reference voltage, ground, wiring, and the sensor signal according to the factory procedure for your Civic.
The sequence below reflects the type of electrical checks documented in Honda service information for several early-2000s Civic applications. The exact terminal numbers and specifications must be confirmed for the specific vehicle being repaired.
Source: thecarhow.com
Step 1: Scan for diagnostic trouble codes
Connect the scan tool and record stored, pending, and related codes before clearing anything. P0335 can indicate that the PCM detected a CKP sensor no-signal condition.
Step 2: Inspect the CKP connector
Turn the ignition off and inspect the connector, terminals, wiring, and sensor area for corrosion, loose terminals, damaged insulation, oil contamination, or signs of physical damage.
Step 3: Disconnect the sensor when required
Follow the vehicle-specific procedure before disconnecting the CKP sensor. Honda diagnostic procedures commonly call for the CKP three-pin connector to be disconnected before certain voltage checks.
Step 4: Check the power supply
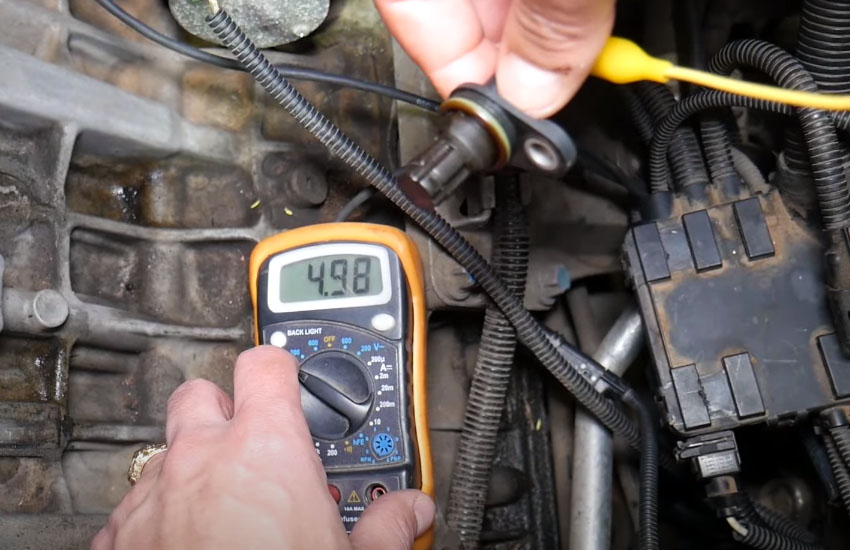
With the ignition in the specified position and the sensor disconnected, measure the designated power terminal against body ground. On applicable Honda procedures, one CKP circuit should have battery voltage.
Step 5: Check the reference voltage
Measure the specified reference terminal against body ground. On applicable early-2000s Civic procedures, Honda specifies approximately 5 volts on the reference circuit.
Step 6: Check the ground circuit
Test the designated ground circuit according to the wiring diagram and factory procedure. A poor ground can make a good sensor appear defective.
Step 7: Check wiring continuity
If the expected voltages are missing, inspect the wiring between the CKP sensor, power supply, ground point, and ECM or PCM. Look for an open circuit, short circuit, damaged terminal, or poor connection.
Step 8: Evaluate the CKP signal
If power, reference voltage, ground, and wiring are correct, test the sensor signal using the method specified for the Civic. A scope can provide more information about signal shape than a simple voltage reading.
Step 9: Replace the sensor only when testing supports it
If the circuit checks correctly but the sensor does not produce the required signal, replacement may be appropriate. Use the exact sensor specification and installation procedure for the Civic.
Step 10: Verify the repair
Clear codes only after recording the original information, then start the engine and confirm that the fault does not return. Some Civic models require a CKP pattern clear or learning procedure after sensor replacement.
Checking for Battery Voltage
Honda’s diagnostic procedure for the 2005 Civic 1.7-liter application calls for checking the designated CKP connector terminal against body ground with the ignition switched on. The expected result is battery voltage on the specified power circuit.
If battery voltage is missing, do not immediately replace the sensor. The service procedure directs the technician toward the power supply and wiring because an open circuit can prevent a good sensor from operating.
Expected result
Battery voltage should be present on the correct power circuit when the test conditions specified by the service information are met.
If voltage is missing
Check the related fuse, relay, wiring, connector terminals, and power feed before condemning the CKP sensor.
Checking the 5-Volt Reference Circuit
On applicable Honda Civic CKP systems, the engine computer supplies a reference voltage to the sensor. Honda service information for several early-2000s Civic models specifies approximately 5 volts at the appropriate terminal.
A missing reference voltage can result from an open wire, a short to ground, a connector problem, or an ECM or PCM circuit problem. Test the wiring before deciding that the computer has failed.
Use the correct terminal
Connector numbering is vehicle-specific. Use the factory wiring diagram rather than assuming the pin order.
Interpret the result carefully
A low or missing reference voltage is a circuit problem to investigate, not automatic proof of a failed sensor.
Checking the CKP Signal
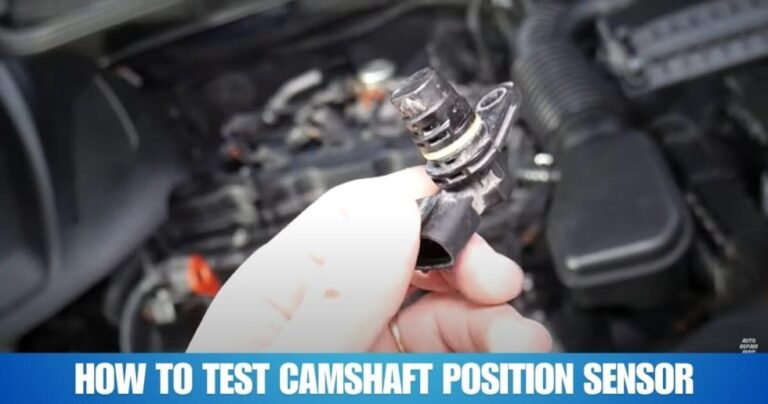
The signal test determines whether the sensor produces the expected electrical response as the crankshaft rotates. A basic multimeter can be useful for some sensor designs, but a lab oscilloscope can reveal signal dropouts, abnormal patterns, and intermittent faults that a simple static voltage check may miss.
Use the signal-testing method and expected waveform or voltage specification for the exact Civic engine. Do not apply a generic resistance or AC-voltage specification from another Honda model unless the service information confirms that it applies.
Cranking test
If the Civic will not start, observe the CKP signal or compatible scan-tool engine-speed data while the starter turns the engine.
Intermittent test
If the fault appears only after heat, vibration, or movement, inspect the connector and wiring while monitoring the signal using an appropriate diagnostic method.
How to Interpret Your Test Results
The test result should tell you which part of the CKP circuit needs further diagnosis. A missing voltage supply points toward the power side of the circuit, while a missing reference voltage points toward the reference circuit, wiring, or control-module side. Correct circuit voltages with an abnormal sensor signal make the sensor itself more suspect.
Do not use a single measurement as the final diagnosis. Honda’s documented P0335 procedures move through multiple checks before the sensor is replaced, which helps prevent unnecessary parts replacement.
Source: samarins.com
Battery voltage missing
Investigate the applicable power feed, fuse, relay, connector, and wiring before replacing the CKP sensor.
5-volt reference missing
Check the reference circuit for opens, shorts, connector problems, and related control-module faults.
Ground circuit faulty
Repair the ground or wiring problem before evaluating the sensor signal again.
Power, reference, and ground are correct
Continue with the sensor signal test and compare the result with the exact factory specification.
Sensor signal is incorrect
Inspect sensor installation and the trigger area, then consider sensor replacement if the complete diagnostic procedure supports it.
A P0335 Code Does Not Automatically Mean a Bad Sensor
P0335 identifies a CKP sensor circuit or signal problem, but the underlying cause can be outside the sensor. Honda’s diagnostic procedure checks the sensor’s electrical supply, reference circuit, wiring, and connections before replacement.
This distinction matters because replacing a sensor will not repair a broken wire, loose terminal, poor ground, or missing power supply. Diagnose the circuit first.
Sensor failure
Possible when the required circuit inputs are present but the sensor does not produce the specified output.
Wiring failure
Possible when voltage, ground, continuity, or signal tests show a circuit problem.
Connector problem
Loose, corroded, bent, or damaged terminals can interrupt an otherwise functional CKP circuit.
Control-module issue
A control-module fault should be considered only after the applicable sensor and wiring checks have been completed.
Where Is the Honda Civic Crankshaft Position Sensor?
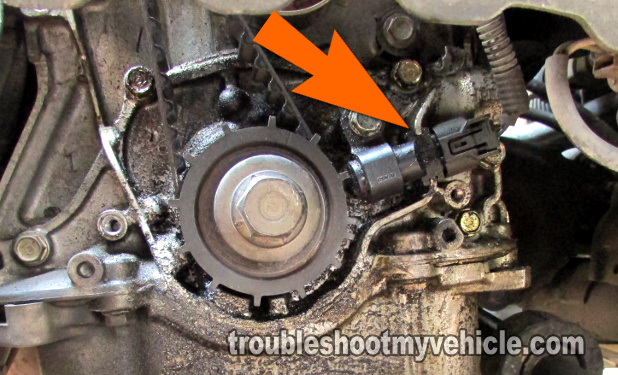
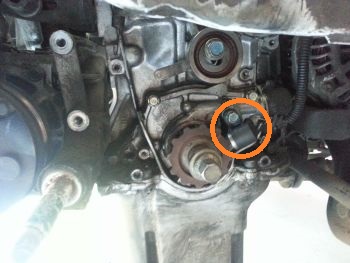
The CKP sensor location varies by Civic generation and engine. Some Honda Civic applications place the sensor near the crankshaft and lower engine area, while other designs use different mounting arrangements. Access can require removing a splash shield or other components.
For example, Honda service information for a 2006 Civic 1.8-liter instructs the technician to remove the splash shield before disconnecting and removing the CKP sensor. That procedure also specifies using a new O-ring during installation.
Because access differs by model, identify the exact Civic engine before lifting the vehicle or removing components. Use approved jack stands if the vehicle must be raised, and never rely on a hydraulic jack alone to support the car.
Source: hitchesguide.com
Look near the crankshaft
The CKP sensor is positioned so it can detect the crankshaft’s rotating trigger pattern, but the exact location differs by engine.
Check the connector first
Following the wiring harness from the CKP connector can help identify the sensor without removing unrelated components.
Use factory access instructions
The service procedure for the exact Civic tells you which shields or components must be removed and how the sensor should be installed.
Why Sensor Location Matters During Diagnosis
The CKP sensor sits in an area exposed to heat, vibration, road debris, and oil or other contaminants depending on the engine design. A visual inspection can therefore reveal damage that an electrical test alone may not show.
Inspect the harness for rubbing or contact with moving components. Also check whether the connector is fully seated and whether the terminals appear clean and properly retained.
Inspect the harness
Look for chafing, melted insulation, stretched wires, or evidence of contact with rotating components.
Inspect the connector
Check for corrosion, moisture, bent terminals, loose terminal tension, and incomplete engagement.
Common Mistakes When Testing a Civic CKP Sensor
The biggest diagnostic mistake is replacing the sensor because a CKP-related code is present. A code tells you what the control module detected; it does not necessarily identify the failed component.
Another common mistake is using a generic resistance specification from an unrelated vehicle. Modern sensor circuits can require power, a reference voltage, and a signal circuit, so resistance alone may not provide a meaningful diagnosis.
Avoid probing terminals in ways that loosen or spread them. A connector that no longer grips its mating terminal can create an intermittent fault after the original repair is finished.
Source: storage.googleapis.com
Replacing parts based only on P0335
Check power, reference voltage, ground, wiring, connector condition, and signal before replacing the sensor.
Using the wrong pinout
Terminal numbers and wire functions depend on the vehicle. Confirm them using the correct wiring information.
Testing with the wrong meter setting
Select the appropriate voltage, resistance, or continuity function for the test being performed.
Ignoring intermittent faults
A connector or wire can work during a stationary test and fail when exposed to vibration or heat.
Working around moving parts
Keep hands, leads, clothing, and tools away from belts, pulleys, fans, and other moving components during running-engine tests.
When You Should Stop Testing at Home
Stop and seek qualified automotive help if the diagnosis requires measurements you cannot safely perform, access underneath the vehicle without proper support, or electrical testing that could damage a control module or wiring.
Professional diagnosis is also sensible when the sensor tests correctly but the Civic continues to set a CKP fault. At that point, the problem may involve an intermittent harness fault, trigger-pattern problem, timing-related issue, or control-module circuit that requires more advanced equipment.
Unsafe access
Do not work beneath a vehicle that is supported only by a jack.
Unclear wiring
Do not guess at connector pins or apply voltage to an unknown terminal.
Repeated fault after repair
Use vehicle-specific diagnostic procedures or professional testing when the original fault returns.
What to Do After Replacing a Honda Civic CKP Sensor
After installing a replacement CKP sensor, reconnect the connector securely and inspect the wiring before starting the engine. Use the installation instructions for the exact Civic because some applications specify a new O-ring or other installation requirements.
Some Civic models also require a CKP pattern clear or learning procedure after replacement. Honda service information for the 2006 Civic 1.8-liter documents a CKP pattern learning procedure using the Honda Diagnostic System and also describes a procedure that can be completed without the HDS under specified conditions.
After the repair, confirm that the engine starts and runs normally and check for returning diagnostic trouble codes. A successful repair should be verified rather than assumed from the fact that the replacement part has been installed.
Source: my.prostreetonline.com
Reconnect everything
Make sure the CKP connector is fully seated and the harness is routed away from heat and moving components.
Perform required relearn
If the exact Civic requires CKP pattern learning, follow its documented procedure.
Check for returning codes
Scan the vehicle again after the repair and verify that the original CKP fault does not return.
Verify normal operation
Confirm starting, idle quality, and engine operation before considering the repair complete.
Why a CKP Relearn May Be Required
The engine computer can use the crankshaft signal pattern to monitor crankshaft position and variation. On supported Civic models, Honda provides a specific CKP pattern learning procedure after sensor replacement.
Do not perform a relearn procedure copied from another Honda model unless the procedure is confirmed for your Civic. Follow the exact instructions for the vehicle’s year, engine, transmission, and control system.
Use the correct procedure
A CKP relearn method is vehicle-specific and should come from the appropriate service information.
Verify afterward
Check the vehicle for returning diagnostic trouble codes and confirm normal engine operation.
Frequently Asked Questions
Q
How do I test a Honda Civic crankshaft position sensor with a multimeter?
Start by identifying the correct CKP connector terminals for your Civic. With the sensor disconnected and the ignition in the specified position, check the required power supply, reference voltage, and ground circuits, then test the sensor signal using the method specified for that engine.
For several early-2000s Civic applications, Honda service information calls for battery voltage on one circuit and approximately 5 volts on another. Confirm the exact specifications before testing because Civic CKP systems vary by year and engine.
Q
What voltage should a Honda Civic crankshaft position sensor have?
There is no single voltage value that applies to every Honda Civic CKP sensor. On several early-2000s Civic applications, the service procedure checks for battery voltage on one circuit and approximately 5 volts on the reference circuit.
The correct measurement depends on the specific Civic engine and connector. Use the factory wiring diagram and diagnostic procedure for the vehicle being tested.
Q
Can a Honda Civic crankshaft position sensor cause a no-start?
Yes. A missing or unusable crankshaft position signal can prevent the engine computer from determining crankshaft position and rotation correctly, which can contribute to a no-start condition.
A no-start does not prove the CKP sensor is bad. Battery voltage, wiring, connector condition, ground circuits, ignition, fuel, and other engine-control inputs can also cause a similar symptom.
Q
What does P0335 mean on a Honda Civic?
P0335 is used for a CKP sensor no-signal condition on several Honda Civic applications. It means the engine computer detected a problem with the expected crankshaft position signal.
The diagnostic process should continue through power, reference voltage, wiring, connector, and signal checks before the sensor is replaced.
Q
Can I test a crankshaft position sensor without replacing it?
Yes. Electrical and signal tests can help determine whether the sensor or its circuit is responsible for the fault. A multimeter can perform basic voltage and continuity checks, while an oscilloscope can provide a more detailed view of the CKP signal.
Testing is preferable to replacing the sensor based only on symptoms or a diagnostic code because the underlying problem may be wiring or a connector.
Q
Do I need to relearn the crankshaft position sensor after replacing it on a Honda Civic?
It depends on the Civic year and engine. Honda service information for some Civic models specifies a CKP pattern clear and learning procedure after sensor replacement.
Check the exact service procedure for your Civic before assuming that a relearn is either required or unnecessary.
✦ Wrapping Up
Conclusion
The most reliable way to test a Honda Civic crankshaft position sensor is to diagnose the complete CKP circuit. Begin with the diagnostic code and visual inspection, then verify the correct power supply, reference voltage, ground, wiring, and sensor signal for the exact Civic engine.
Do not condemn the sensor simply because P0335 or another CKP-related code appears. Honda’s diagnostic procedures demonstrate why circuit checks come first. If the basic tests do not identify the fault, use the vehicle-specific service information or advanced diagnostic equipment before replacing additional parts.
💡 Key Takeaway
Identify your Civic year and engine, obtain the correct CKP wiring diagram, check the connector and circuit voltages first, then test the sensor signal before replacing the sensor.
Ethan Brooks is an automotive writer at Auto News 7, covering car news, vehicle maintenance, new model updates, recalls, and practical buying guides. He focuses on clear, useful information that helps drivers understand their vehicles and make better ownership decisions.
Learn how to fix a crankshaft position sensor with step-by-step diagnostics, testing, wiring checks, replacement tips, common symptoms, and troubleshooting advice for U.S. vehicle owners.
Learn how many ohms a camshaft sensor should have, why resistance varies by sensor type, and how to test a camshaft position sensor accurately with a multimeter.
Learn whether camshaft and crankshaft sensors are the same, how they work, their differences, symptoms of failure, and when each sensor needs replacement.
Learn what are symptoms of a bad crankshaft position sensor, including hard starting, stalling, misfires, poor acceleration, and check engine light warnings.
Learn how to diagnose a bad crankshaft position sensor with symptoms, testing methods, scan tool checks, multimeter tests, and practical troubleshooting steps.