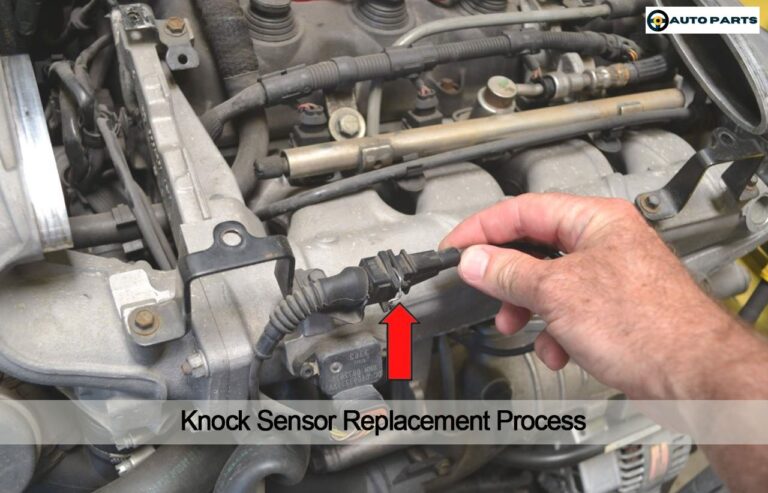
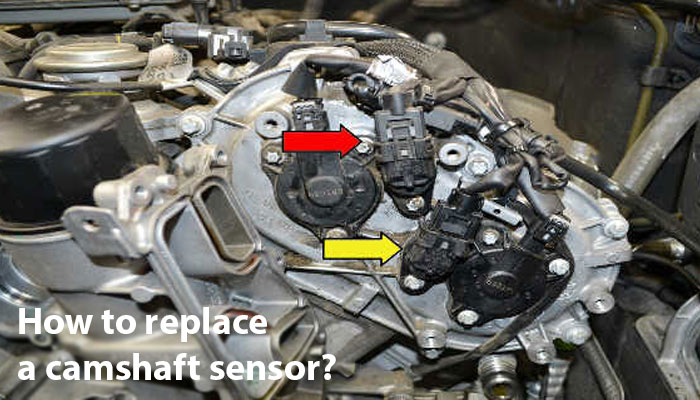
Bank 1 contains cylinder number 1, while Bank 2 is the opposite cylinder bank on engines that use two banks.
For drivers and technicians in the United States, the answer depends on the engine configuration, year, make, model, and engine size. On a V6 or V8 engine, Bank 1 is the cylinder bank containing cylinder number 1, and Bank 2 is the opposite bank. Knock sensors are normally mounted directly to the engine block or cylinder bank so they can detect vibration caused by combustion knock.
There is no universal driver-side or passenger-side rule for knock sensor bank 1 and bank 2. The physical location changes with engine design and vehicle packaging. Some sensors sit on the side of the engine block, while others are under the intake manifold or toward the rear of a cylinder bank. The vehicle-specific service information is the safest way to confirm the exact position before removing parts.
Source: i.ytimg.com
Where Is Knock Sensor Bank 1 and 2 Located?
On a two-bank engine, the Bank 1 knock sensor is associated with the cylinder bank containing cylinder number 1. The Bank 2 knock sensor is associated with the opposite cylinder bank. Depending on the engine, each sensor may be mounted directly against the engine block, beneath an intake manifold, or in another location designed to transmit engine vibration to the sensor.
The location is not standardized across all vehicles sold in the United States. A Chevrolet V6, Toyota V6, Ford V6, and European V6 can place their knock sensors in very different positions. Some engines use one sensor for each bank, while certain engines use multiple sensors or a different monitoring arrangement.
For example, documented engine layouts place knock sensors under the intake manifold on their respective cylinder banks. Other applications place the sensors on the rear or side of the engine block. This is why a general diagram can help identify the concept but cannot replace the service information for a specific vehicle.
Source: i.ytimg.com
Bank 1
The cylinder bank containing cylinder number 1. The knock sensor assigned to this bank is commonly called the Bank 1 knock sensor or Knock Sensor 1.
Bank 2
The opposite cylinder bank on an engine with two cylinder banks. Its knock sensor may be called the Bank 2 knock sensor or Knock Sensor 2.
Typical mounting area
Knock sensors are commonly installed on the engine block or another structurally connected engine location where combustion vibration can be detected.
Access
Some sensors are easy to reach from above or below, while others require removal of an intake manifold or other components.
Why the Exact Location Varies
Engine architecture determines much of the sensor placement. A V6 or V8 has two cylinder banks, but the banks may be oriented differently depending on the vehicle. Transverse-mounted engines can also place components in positions that differ substantially from longitudinal layouts.
Manufacturers also consider vibration characteristics, heat, wiring access, serviceability, and available space when selecting a knock sensor location. As a result, two engines with similar cylinder counts can use very different sensor mounting locations.
Engine configuration
V6, V8, flat, and other multi-bank designs can have different sensor arrangements.
Vehicle packaging
The position of the engine, transmission, firewall, intake system, and exhaust components can affect access.
Manufacturer design
The manufacturer determines the sensor location and circuit arrangement for each engine family.
How to Identify Bank 1 and Bank 2
The most reliable way to identify Bank 1 is to find cylinder number 1. Bank 1 is the cylinder bank containing that cylinder. Once Bank 1 is identified, the other cylinder bank on a two-bank engine is Bank 2.
Do not identify the banks simply by standing in front of the vehicle and calling one side left or right. Vehicle orientation, engine mounting direction, and manufacturer conventions can make that approach unreliable. The driver’s side is not universally Bank 1, and the passenger side is not universally Bank 2.
A service manual, factory repair information, engine diagram, or reliable vehicle-specific component locator can confirm the cylinder numbering and sensor positions. This is especially important before disconnecting wiring or removing a sensor.
Source: blogs.gomechanic.com
Step 1: Confirm the engine
Identify the vehicle year, make, model, engine size, and engine code when available.
Step 2: Find cylinder number 1
Use the vehicle’s cylinder numbering diagram or service information to determine which cylinder is number 1.
Step 3: Identify Bank 1
The cylinder bank containing cylinder number 1 is Bank 1.
Step 4: Identify Bank 2
On a two-bank engine, the remaining cylinder bank is Bank 2.
Step 5: Locate the sensors
Follow the vehicle-specific component location information to find the knock sensor mounted on each bank.
Is Bank 1 Always the Driver Side?
No. Bank 1 is not universally the driver’s side. Its designation comes from cylinder numbering, not from the driver’s seating position. Depending on the engine and vehicle, Bank 1 can be on the driver’s side, passenger side, or another orientation relative to the vehicle.
If a diagnostic code identifies Bank 1 or Bank 2, use the vehicle-specific cylinder numbering information rather than assuming a side of the vehicle.
Correct rule
Bank 1 contains cylinder number 1.
Incorrect shortcut
Do not assume Bank 1 is always the driver’s side or passenger side.
Where Are Bank 1 and Bank 2 Knock Sensors Usually Mounted?
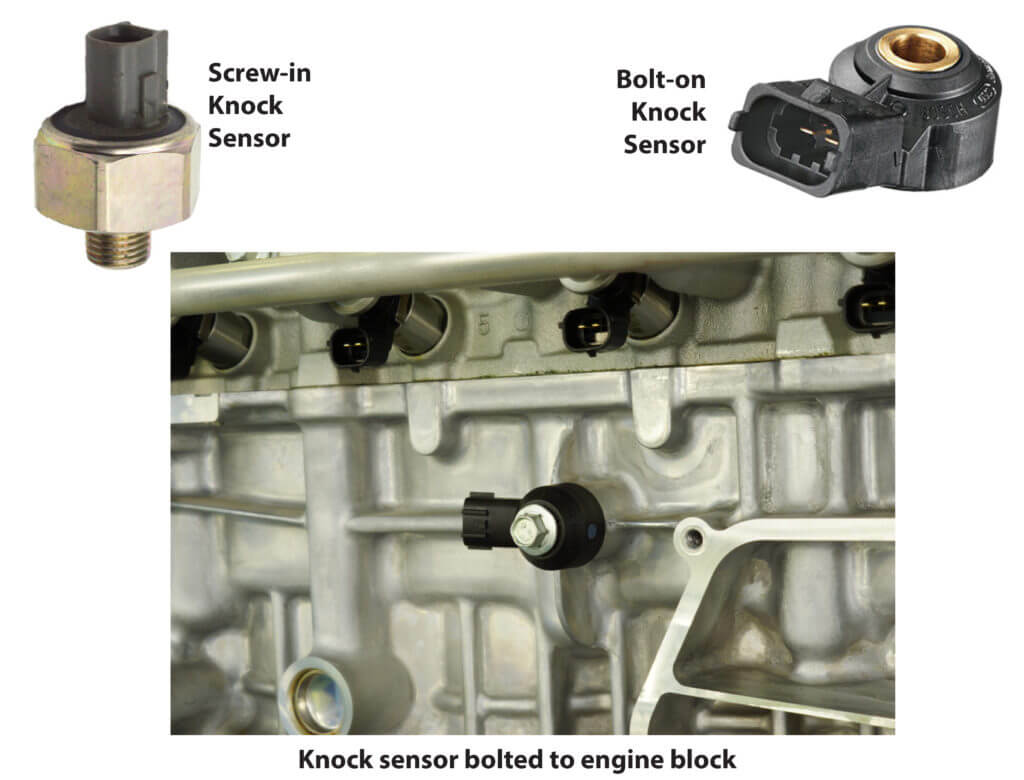
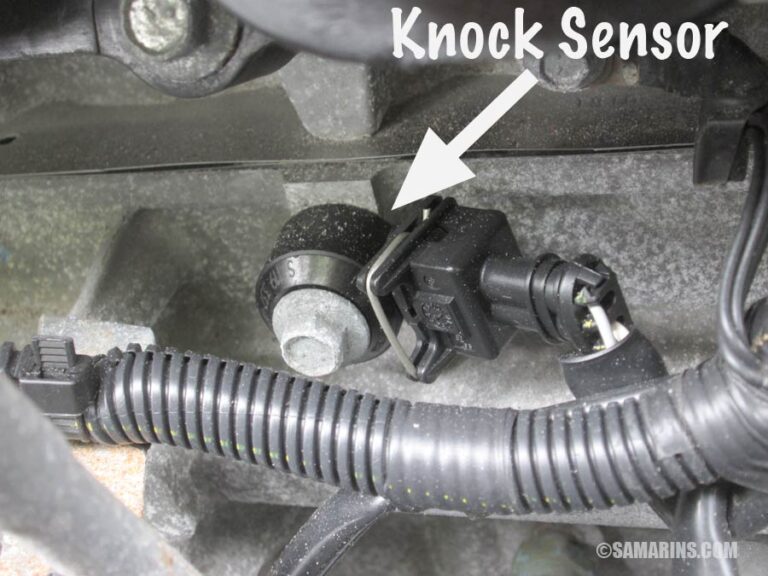
There is no single mounting position that applies to every engine. A knock sensor needs a mechanically suitable location where engine vibration can reach the sensing element, so manufacturers commonly mount it to the engine block or a closely related structural area.
On some V engines, the sensors are positioned low on the block or near the sides of the cylinder banks. On other engines, the sensors are installed beneath the intake manifold. A component locator for one 3.0-liter V6 application, for example, identifies separate knock sensors beneath the intake manifold on Bank 1 and Bank 2.
Because intake manifolds, brackets, wiring harnesses, and other components can hide the sensors, a sensor that appears to be missing may simply be difficult to see. Access should be determined from the repair procedure for the exact engine rather than from a generic picture.
Source: weldingtroop.com
Engine block
Many knock sensors are bolted directly to the engine block or a structurally suitable portion of the engine.
Under the intake manifold
Some engines place one or more knock sensors beneath the intake manifold, making removal of the manifold necessary for access.
Side or rear of the engine
Depending on engine design, a sensor may be positioned on a side or rear portion of the block or cylinder bank.
Difficult-access locations
A sensor may be physically visible only after other components are removed, so visual inspection from above may not be enough.
Why Knock Sensors Are Mounted on the Engine
A knock sensor detects vibration associated with abnormal combustion. The engine control module uses the sensor signal as part of its strategy for detecting and responding to knock. A secure mounting surface helps transfer engine vibration to the sensor.
The sensor itself is not normally placed in the exhaust stream like an oxygen sensor. This distinction matters when searching for a knock sensor because looking around the exhaust manifold can lead to the wrong component.
Knock detection
The sensor converts mechanical vibration into an electrical signal that the engine control system can evaluate.
Engine control
The engine computer can use knock information when managing ignition timing and combustion control.
What Is the Difference Between Knock Sensor 1 and Knock Sensor 2?
The terms Knock Sensor 1 and Knock Sensor 2 can refer to sensors associated with different engine banks, but the exact terminology depends on the manufacturer and diagnostic system. On a two-sensor system, Knock Sensor 1 commonly corresponds to Bank 1 and Knock Sensor 2 to Bank 2.
Do not confuse knock sensor numbering with oxygen sensor numbering. Oxygen sensor terminology such as Bank 1 Sensor 1 uses the sensor number to describe position within an exhaust bank. Knock sensor numbering is manufacturer-specific and can describe a circuit or sensor assigned to a particular engine bank.
The diagnostic trouble code can provide a useful clue, but it should be interpreted with the vehicle-specific service information. A code pointing to a knock sensor circuit does not automatically prove that the sensor itself is defective.
Source: ricksfreeautorepairadvice.com
Knock Sensor 1
Often associated with Bank 1 on systems using two separately identified knock sensors.
Knock Sensor 2
Often associated with Bank 2 on systems using two separately identified knock sensors.
Diagnostic circuit
A fault can originate from the sensor, connector, wiring, mounting, or another part of the circuit depending on the vehicle.
Do Inline Engines Have Bank 1 and Bank 2 Knock Sensors?
Most inline engines have only one cylinder bank because all cylinders are arranged in a single row. That means an inline four-cylinder or inline six-cylinder engine is generally referred to as having Bank 1 rather than separate Bank 1 and Bank 2 cylinder banks.
Some inline engines can still use more than one knock sensor, depending on the manufacturer’s design. Multiple sensors do not automatically mean the engine has Bank 1 and Bank 2 in the same sense as a V-type engine. The terminology and sensor assignment must be checked for the specific engine.
Source: i.ytimg.com
Inline-four
Normally has one cylinder bank, so separate Bank 1 and Bank 2 locations are generally not applicable.
Inline-six
Normally has one cylinder bank even though it has six cylinders.
V6 or V8
Uses two cylinder banks, making Bank 1 and Bank 2 designations relevant.
Multiple sensors
An engine can have multiple knock sensors without those sensors necessarily corresponding to two conventional cylinder banks.
How to Locate the Correct Knock Sensor on Your Vehicle
The quickest accurate method is to combine the vehicle identification information with the cylinder numbering and the factory component location. Generic diagrams can explain Bank 1 and Bank 2, but they cannot establish the exact sensor position for every engine.
Before working on the engine, allow hot components to cool and make sure the vehicle is securely supported if access requires working underneath it. Disconnecting electrical connectors should be done carefully because brittle locking tabs and damaged wiring can create a second fault.
Source: 2carpros.com
1. Record vehicle information
Use the year, make, model, engine size, and engine code when available.
2. Check cylinder numbering
Confirm which cylinder is number 1 before deciding which side is Bank 1.
3. Check the component locator
Use the vehicle-specific repair manual or service information to identify the knock sensor position.
4. Trace the wiring
Follow the knock sensor wiring from the harness toward the engine block without pulling on the wires.
5. Confirm before removal
Compare the connector, mounting point, sensor shape, and circuit identification with the service information.
What If the Knock Sensor Cannot Be Found?
If the sensor cannot be seen, do not assume the vehicle does not have one. It may be hidden under the intake manifold, behind another component, or on a portion of the engine that is difficult to view from above.
If the repair procedure requires substantial component removal, use the correct service information before proceeding. Removing an intake manifold or other major component without knowing the required gaskets, torque specifications, and reassembly procedure can create additional problems.
Check below the intake
Some applications locate the knock sensors beneath the intake manifold.
Inspect from multiple angles
The sensor may be easier to identify from underneath or from the side of the engine.
Verify the engine code
Different engines installed in the same vehicle model can use different sensor locations.
Common Mistakes When Finding Bank 1 and Bank 2
The most common mistake is assuming that Bank 1 always means the driver’s side. That shortcut can lead to the wrong sensor, incorrect wiring diagnosis, or unnecessary parts replacement. Bank identification must start with cylinder number 1.
Another mistake is treating a generic location diagram as if it were specific to every engine. Knock sensor placement can change significantly between engines, even within the same model line. A diagnostic code should also be treated as a starting point for testing rather than automatic proof that a sensor has failed.
Source: lh7-us.googleusercontent.com
Assuming driver side equals Bank 1
This is not a universal rule. Identify cylinder number 1 first.
Assuming passenger side equals Bank 2
Bank 2 is defined as the opposite cylinder bank, not by a universal vehicle-side designation.
Using the wrong engine diagram
A diagram for a different engine can place the sensor in the wrong location.
Replacing the sensor without testing
A knock sensor fault can involve wiring, connectors, mounting, or the control circuit rather than the sensor itself.
Ignoring access requirements
Some sensors require removal of surrounding components, so the repair procedure should be reviewed before disassembly.
When Should You Get Professional Help?
Professional help is appropriate when the sensor is difficult to access, the repair requires significant intake or engine component removal, or diagnostic testing points to a wiring or control-circuit problem. A technician can also verify the correct bank and sensor location using vehicle-specific service information.
Do not work underneath a vehicle supported only by a jack. If the repair requires lifting the vehicle, use properly rated jack stands or an appropriate lift. Also avoid working around a hot exhaust system or engine until temperatures have dropped to a safe level.
If a check-engine light is present, diagnose the underlying fault before replacing parts. A knock sensor diagnostic code can identify a circuit or performance problem without proving that the sensor itself is defective.
Source: i.ytimg.com
Complex access
Get professional assistance when major components must be removed to reach the sensor.
Electrical diagnosis
Professional testing can help distinguish a failed sensor from an open, shorted, damaged, or corroded circuit.
Safety concerns
Use proper lifting equipment and allow hot engine and exhaust components to cool before inspection.
Frequently Asked Questions
Q
Where is Bank 1 knock sensor located?
The Bank 1 knock sensor is associated with the cylinder bank containing cylinder number 1. Its physical position varies by engine and may be on the engine block, cylinder bank, or beneath the intake manifold.
Use the vehicle-specific service information to determine the exact mounting location.
Q
Where is Bank 2 knock sensor located?
The Bank 2 knock sensor is associated with the cylinder bank opposite Bank 1 on an engine with two cylinder banks. Its exact position depends on the engine design.
Some engines place Bank 2 sensors on the opposite side of the block, while others place them beneath the intake manifold or in another manufacturer-selected location.
Q
Is Bank 1 always the driver’s side?
No. Bank 1 is not universally the driver’s side. Bank 1 is the bank containing cylinder number 1.
The driver’s-side or passenger-side position changes with engine design and vehicle orientation.
Q
Does every car have a Bank 1 and Bank 2 knock sensor?
No. Inline engines normally have one cylinder bank, so they generally do not have separate Bank 1 and Bank 2 cylinder banks. Some engines can still use multiple knock sensors, but their numbering depends on the manufacturer’s design.
Two-bank engines such as many V6 and V8 applications commonly use Bank 1 and Bank 2 terminology.
Q
Are knock sensors located on the engine block?
Many knock sensors are mounted directly on the engine block or a structurally connected engine location. However, some are positioned beneath the intake manifold or in another location selected by the manufacturer.
The mounting point must allow the sensor to detect relevant engine vibration.
Q
Can I identify Bank 1 from a check-engine code?
A diagnostic trouble code can indicate which knock sensor or bank has a detected problem, but the code alone does not establish the exact physical location on every vehicle.
Use the code together with the vehicle-specific service information and wiring diagram to identify the correct component and circuit.
✦ Wrapping Up
Conclusion
The answer to where is knock sensor bank 1 and 2 located starts with cylinder numbering. Bank 1 contains cylinder number 1, while Bank 2 is the opposite cylinder bank on an engine that uses two banks. The knock sensors themselves are commonly mounted on or near the engine block, but their exact positions vary widely by engine and vehicle.
Do not rely on a universal driver’s-side or passenger-side rule. Confirm the engine, identify cylinder number 1, and then use the correct service information to locate each knock sensor before disconnecting wiring or removing components.
💡 Key Takeaway
For an exact knock sensor location, identify your vehicle year, make, model, engine size, and engine code, then confirm cylinder number 1 and the manufacturer-specific sensor location before starting the repair.
Ethan Brooks is an automotive writer at Auto News 7, covering car news, vehicle maintenance, new model updates, recalls, and practical buying guides. He focuses on clear, useful information that helps drivers understand their vehicles and make better ownership decisions.
Learn whether a knock sensor code can fail an emissions test, how inspection programs work, common OBD-II rules, and what to do before testing your vehicle.
Learn whether a knock sensor code is serious, what causes it, the risks of ignoring it, common symptoms, repair costs, and when immediate diagnosis is necessary.
Learn how to test camshaft position sensor wiring with a multimeter. Follow a safe step-by-step process to check power, ground, signal circuits, and common wiring faults.
Learn whether camshaft sensors are interchangeable, how to identify compatible sensors, common mistakes to avoid, and how to choose the correct replacement for your vehicle.