Yes, you can clean the exterior and electrical connector of an oil pressure sensor, but cleaning the sensor internally is usually not recommended. If the sensor is faulty, contaminated internally, or damaged, replacement is often the more reliable solution.
In the United States, an oil pressure sensor helps monitor engine lubrication and communicate oil pressure information to the dashboard or engine control system. Depending on the vehicle, it may operate as a variable pressure sensor or a simple oil pressure switch. When the oil pressure warning light comes on, dirt, oil residue, a loose connector, damaged wiring, a failing sensor, or genuinely low engine oil pressure could be responsible.
Cleaning can remove grime from the sensor housing and help restore a clean electrical connection when contamination is the problem. However, it cannot reliably repair worn internal components, damaged electronics, or a failed pressure-sensitive element. Before removing or cleaning the sensor, check the engine oil level and investigate any warning light or unusual engine noise. A red oil pressure warning while the engine is running requires immediate attention because continuing to drive with insufficient oil pressure can cause severe engine damage.
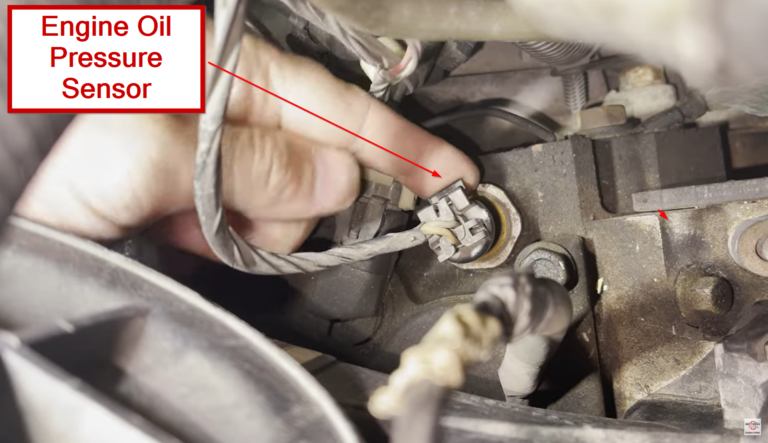
Source: safetywish.com
What Parts of an Oil Pressure Sensor Can You Clean?
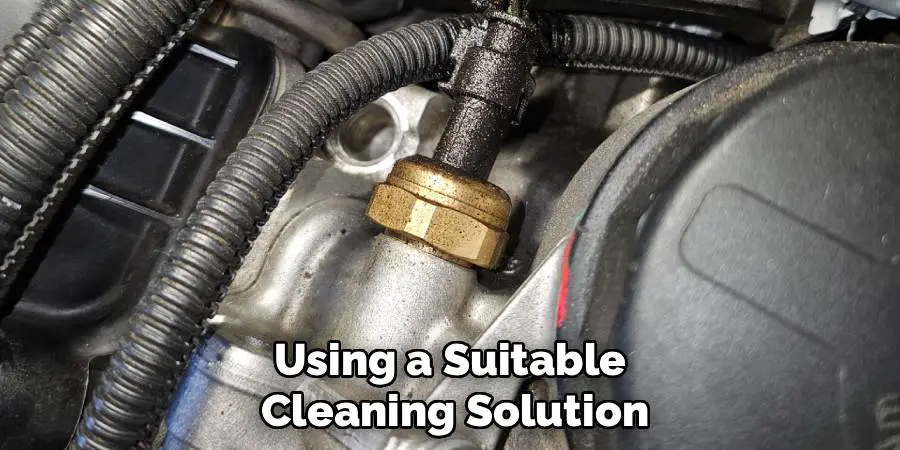
You can usually clean the sensor’s exterior and electrical connector, provided the component is removed or accessed safely and the cleaning product is compatible with its materials. Cleaning the internal sensing mechanism is different because the pressure-sensitive element and its electronics may be delicate or sealed.
The correct approach depends on the sensor design. Some vehicles use an oil pressure switch that opens or closes an electrical circuit at a specified pressure. Others use a pressure transducer that sends a changing electrical signal to the vehicle’s control module. Neither type should be assumed to be serviceable internally.
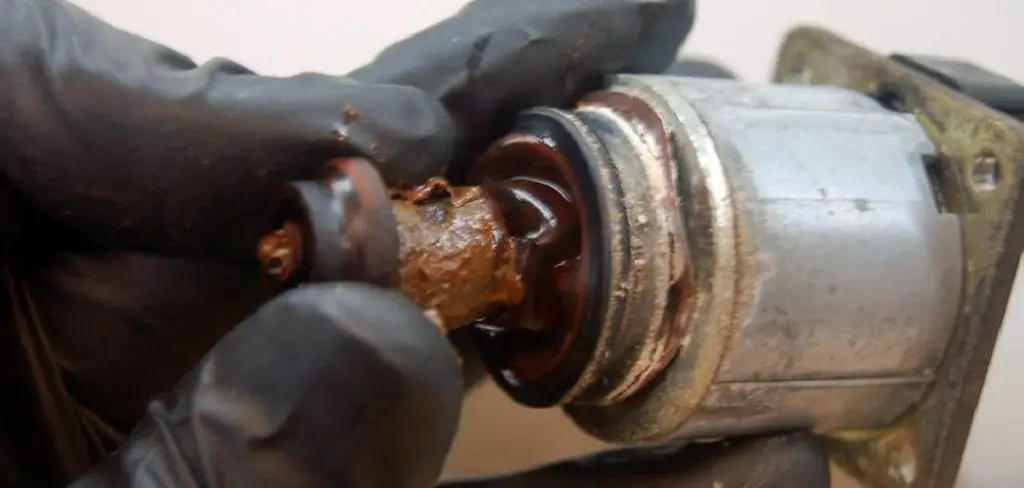
A thin layer of oil or dirt on the outside does not necessarily mean the sensor is defective. If oil has entered the electrical connector, inspect the connector seals and wiring as well as the sensor. The contamination may indicate a failed seal or an internal leak that cleaning alone will not fix.
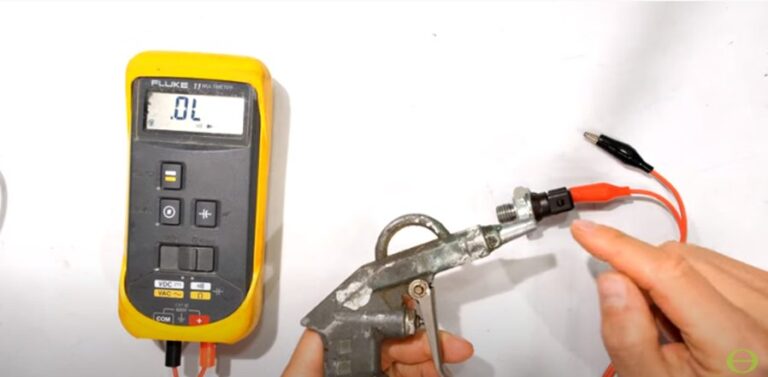
Source: cityofclovis.org
Sensor exterior
Wipe away accessible dirt, grease, and oil residue using a compatible cleaner and a lint-free cloth. Avoid damaging the threads or housing.
Electrical connector
If the connector is contaminated, use an electrical contact cleaner specifically suitable for automotive connectors. Allow it to dry fully before reconnecting.
Pressure port
Inspect the opening for visible deposits, but do not push wire, needles, brushes, or other tools into it. Internal cleaning should only be attempted if the vehicle or sensor manufacturer provides an approved procedure.
Internal sensing element
Do not soak, disassemble, or flush the sensor unless the manufacturer explicitly permits that procedure. Many sensors are sealed units and are not designed for internal repair.
Can Oil Buildup Make a Sensor Give Incorrect Readings?
Contamination can interfere with a pressure port or electrical connection in some circumstances, but oil buildup alone does not establish that the sensor is malfunctioning. Deposits may also reflect dirty engine oil, sludge, a leak, or another maintenance problem.
If the sensor signal appears incorrect, verify the actual engine oil pressure with a suitable mechanical pressure gauge using the vehicle manufacturer’s test procedure. This helps distinguish a sensor or wiring problem from a genuine lubrication issue.
External contamination
May be addressed with careful exterior cleaning and leak inspection.
Blocked oil passage
Requires diagnosis of the passage and oil contamination; spraying cleaner into the sensor may not resolve the underlying problem.
Electrical or internal failure
Usually requires electrical testing or sensor replacement rather than cleaning.
How to Clean an Oil Pressure Sensor Safely
Clean an oil pressure sensor only after confirming that the engine is safe to work on and that cleaning is appropriate for the contamination. The following procedure focuses on exterior surfaces and electrical connections, not on flushing the internal sensing mechanism.
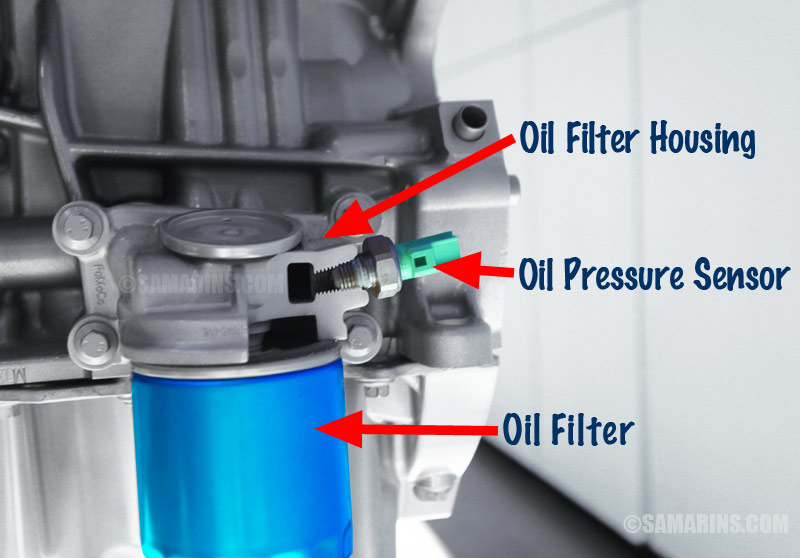
Before starting, consult the owner’s manual or vehicle service information for the sensor location, removal instructions, connector precautions, and any model-specific requirements. Oil pressure sensors may be installed in difficult-to-reach areas, including near hot exhaust components or oil filter housings.
Source: safetywish.com
1. Park and cool the vehicle
Park on level ground, switch off the engine, remove the key or disable the vehicle as directed by its service information, and allow hot components to cool. Set the parking brake.
2. Check the engine oil
Use the owner’s manual procedure to check the oil level. If the oil pressure warning remains on while the engine is running, shut the engine off and do not restart it simply to test the sensor.
3. Locate and inspect the sensor
Identify the correct component using vehicle-specific service information. Look for external oil leaks, damaged insulation, loose wiring, corrosion, cracked housing, and a deteriorated connector seal.
4. Disconnect the electrical connector
With the ignition off, release the connector lock and pull on the connector body rather than the wires. Follow any manufacturer instructions for battery disconnection or electrical system isolation.
5. Clean the exterior
Apply a compatible cleaner to a lint-free cloth and gently wipe the accessible housing. Keep liquid away from openings and sealed electrical areas unless the manufacturer permits direct application.
6. Clean the connector if needed
Use an automotive electrical contact cleaner approved for the connector materials. Do not scrape terminals with metal tools or apply grease, oil, or other coatings unless specified by the manufacturer.
7. Let the parts dry and inspect again
Allow all cleaned surfaces to dry completely according to the product instructions. Check for damaged seals, bent terminals, corrosion, and any remaining leak before reconnecting.
8. Reinstall and verify
If the sensor was removed, install it using the specified sealing method and torque. Reconnect the wiring, check for leaks when it is safe to run the engine, and verify oil pressure using the proper diagnostic procedure.
What Does a Successful Cleaning Look Like?
A successful exterior cleaning removes accessible grime without damaging the housing, connector, seals, or wiring. The connector should be dry, properly seated, and free of obvious contamination.
If the original warning or fault remains, do not repeatedly spray the sensor or assume the cleaning failed because the sensor needs more solvent. Read the diagnostic trouble codes, inspect the circuit, and verify actual oil pressure when appropriate. A clean sensor can still be defective.
Positive sign
The connector is clean and secure, the external leak has been addressed if its source was identified, and diagnostic checks show normal operation.
Warning sign
The oil pressure light stays on, the sensor signal remains implausible, oil continues to leak, or engine noise suggests inadequate lubrication.
Which Cleaner Should You Use on an Oil Pressure Sensor?
Use a cleaner that is compatible with the exact surface being cleaned. For the outside of the sensor, a compatible automotive degreaser applied to a cloth may remove grease. For electrical terminals, choose an electrical contact cleaner whose label specifies suitability for the connector materials and electronics involved.
A product marketed as an engine cleaner is not automatically suitable for a sensor’s electrical components. Likewise, a cleaner that is safe for metal may damage plastic housings, rubber seals, coatings, or internal components. Follow both the cleaner manufacturer’s instructions and the vehicle manufacturer’s service guidance.
Source: takeuroil.com
Automotive electrical contact cleaner
Suitable for compatible electrical connectors when used according to the label. Confirm that it is appropriate for the specific plastic, seals, and terminals.
Compatible exterior degreaser
Can help remove oil and dirt from the external housing when applied carefully without flooding the connector or pressure port.
Lint-free cloth
Helps remove loosened residue without leaving fibers that could contaminate a connector or opening.
Manufacturer-approved products
Take priority whenever the vehicle or sensor documentation specifies a particular cleaner or prohibits chemical cleaning.
What Should You Avoid?
Avoid soaking the sensor in solvent, using abrasive brushes on terminals, blowing high-pressure air into the sensing port, or inserting sharp objects into small openings. These methods can damage components or push contamination farther inside.
Do not use brake cleaner, carburetor cleaner, gasoline, or an unverified household solvent on the sensor simply because it removes grease. Formulations vary, and compatibility with the sensor’s plastics, seals, and electronics is not guaranteed. Never mix cleaning chemicals or use flammable solvents near ignition sources.
No internal soaking
Immersion can damage sealed electronics or internal components and may not remove the cause of a faulty reading.
No improvised tools
Pins, needles, metal picks, and stiff wire can damage small openings or sensing elements.
No uncontrolled compressed air
High pressure may damage delicate parts or drive debris into the assembly.
No solvent experiments
Use only products confirmed to be compatible with the specific component and follow the product’s safety instructions.
Can Cleaning Fix a Bad Oil Pressure Sensor?
Cleaning may help when external contamination or a dirty electrical connector contributes to an intermittent connection. It is unlikely to repair a failed pressure-sensitive element, damaged internal electronics, worn contacts, a cracked housing, or a sensor that leaks through its body.
The most useful next step is to identify what the sensor is reporting and compare that information with actual engine oil pressure. A warning light or diagnostic code does not prove that the sensor itself has failed. Low oil level, a worn oil pump, excessive bearing clearance, a restricted oil pickup, incorrect oil viscosity, or wiring faults can produce related symptoms.
For a vehicle with a red oil pressure warning, treat low pressure as a possible real mechanical problem until testing establishes otherwise. Do not run the engine repeatedly to see whether cleaning makes the warning disappear.
Source: hitchesguide.com
Cleaning may help
The housing is dirty, an accessible connector has removable contamination, and testing indicates that the problem is related to the connection rather than actual oil pressure.
Replacement may be needed
The sensor has internal damage, a cracked body, a persistent internal leak, or an output that fails the manufacturer’s diagnostic specifications.
Further engine diagnosis is needed
A mechanical pressure gauge confirms pressure below the manufacturer’s specification or the engine makes abnormal knocking or other lubrication-related noises.
How to Distinguish a Sensor Fault from Low Oil Pressure
Start with the oil level and visible leaks, then inspect the connector and wiring. Retrieve diagnostic trouble codes with a compatible scan tool if the vehicle supports relevant data. Codes can narrow the investigation, but they do not by themselves prove which component has failed.
When the reading is still questionable, a qualified technician can measure oil pressure with a mechanical gauge at the specified test port and under the prescribed operating conditions. Compare the result with the exact vehicle manufacturer’s specifications rather than a universal pressure figure.
If measured pressure is normal but the dashboard indication or electronic reading is wrong, investigate the sensor and its circuit. If measured pressure is low, diagnose the lubrication system before replacing parts or returning the vehicle to service.
Normal measured pressure
Supports investigating the sensor, wiring, connector, and instrument or control-module signal.
Low measured pressure
Requires diagnosis of the oil supply and engine lubrication system; cleaning or replacing the sensor alone may not solve the problem.
Should You Clean the Oil Pressure Sensor Screen?
Some engines use a small screen or filter in an oil pressure sensing passage, while others do not have a separately serviceable screen at the sensor. Its presence, location, and serviceability depend on the engine design. Do not assume that every oil pressure sensor has a removable filter.
If the vehicle’s service information identifies a screen and provides a cleaning procedure, follow that procedure and use the specified replacement seals or parts. If the screen is inaccessible, integrated into another component, or not listed as serviceable, avoid attempting to remove it with improvised tools.
Sludge or debris in an oil passage may indicate a broader lubrication or maintenance problem. Cleaning a small screen without investigating the source can allow the restriction to return. Severe contamination may require professional inspection of the oil passages, pickup, and lubrication system.
Source: hitchesguide.com
Confirm the design
Use the engine-specific service manual or reliable manufacturer service information to establish whether a screen exists and can be serviced.
Avoid pushing debris inward
Do not force deposits into the engine passage or use sharp objects that could damage a screen or nearby component.
Inspect the cause
Repeated clogging or heavy sludge calls for investigation of oil condition, maintenance history, and possible lubrication-system restrictions.
Does a Dirty Screen Always Mean the Sensor Is Bad?
No. A dirty screen or restricted passage can affect the pressure information reaching a sensor without proving that the sensor’s electronics have failed. The restriction and the sensor should be evaluated separately.
If the manufacturer permits screen service, clean or replace the specified part as directed. If the warning persists, verify actual oil pressure and test the sensor circuit rather than repeating the same cleaning procedure.
Restriction identified
Address the passage or screen according to the correct service procedure and investigate why debris accumulated.
No serviceable screen
Do not dismantle the sensor to search for a filter; proceed with the manufacturer’s diagnostic procedure.
Common Mistakes When Cleaning an Oil Pressure Sensor
The most serious mistake is treating cleaning as a substitute for confirming engine oil pressure. A clean sensor cannot compensate for a failing oil pump, a low oil level, or internal engine wear. The goal is to diagnose the problem, not simply remove visible dirt.
Another frequent mistake is using the wrong sealing method during reinstallation. Some sensors use specified thread sealant, some use a sealing washer or O-ring, and some rely on a particular thread design. Adding sealant where it is prohibited can interfere with grounding or contaminate an oil passage. Excessive tightening can damage threads or crack the component.
Source: ersaelectronics.com
Cleaning without diagnosis
A warning light may indicate genuine low pressure, so check oil level and arrange pressure testing when necessary.
Using the wrong chemical
An incompatible solvent may damage plastics, seals, coatings, or electronics.
Forcing the connector
Pulling on wires or forcing a locking tab can cause electrical faults that resemble sensor failure.
Overtightening the sensor
Use the vehicle-specific torque specification and required sealing method rather than guessing.
Ignoring a recurring leak
A leak may come from the sensor, its seal, the threads, or an adjacent component. Identify the source before replacing parts.
Clearing codes without checking the cause
Resetting a warning or trouble code does not repair a fault. Verify the underlying problem and confirm that the system operates correctly.
When Should You Stop DIY Work?
Stop and seek professional help if the oil pressure warning remains on, the engine makes new knocking or rattling noises, oil is leaking heavily, the sensor is inaccessible without unsafe disassembly, or you cannot confirm the correct installation procedure.
If the engine may have low oil pressure, arrange towing rather than driving to a repair shop. A qualified technician can measure pressure, check the electrical circuit, and determine whether the problem is a sensor fault or a mechanical lubrication issue.
Immediate shutdown
A red oil pressure warning while the engine runs, especially with abnormal noise, requires stopping the engine as soon as it is safe.
Professional testing
Use a qualified technician when mechanical pressure testing, difficult access, or advanced electrical diagnosis is required.
Clean or Replace an Oil Pressure Sensor?
Choose cleaning when the problem is limited to removable external dirt or compatible connector contamination and the sensor otherwise passes the required checks. Choose replacement when the sensor fails the manufacturer’s tests, has physical damage, or leaks internally and the part is not serviceable.
Replacement is not automatically the right answer to every oil pressure warning. If actual engine oil pressure is below specification, installing a new sensor may leave the underlying problem untouched. Confirm the cause before spending money on parts.
Source: storage.googleapis.com
Choose cleaning
External grime or connector contamination is present, there is no evidence of internal damage, and cleaning is permitted for the affected surfaces.
Choose sensor replacement
Testing identifies a failed sensor, the housing or seal is damaged, or the sensor has a persistent leak that cannot be corrected by an approved service procedure.
Choose further diagnosis
Oil pressure remains questionable, the warning continues after cleaning, or a pressure test identifies a possible engine lubrication problem.
What Determines the Repair Cost?
The cost depends on the vehicle, sensor design, part availability, labor time, and accessibility. A sensor mounted in an exposed location may be relatively straightforward to replace, while one beneath an intake manifold or near other components may require additional labor.
Cleaning the exterior may cost little if you already have compatible supplies, but diagnosis can be more valuable than repeated cleaning attempts. Ask a repair shop whether its estimate includes pressure testing, electrical diagnosis, parts, labor, and any additional repairs identified.
Parts
The sensor price varies by make, model, engine, and whether the component is an original-equipment or compatible replacement part.
Labor
Access, removal difficulty, and the specified installation procedure affect labor time.
Diagnostic testing
Mechanical oil pressure testing or circuit diagnosis may be necessary to avoid replacing a sensor when the actual problem lies elsewhere.
Frequently Asked Questions
Q
Can you clean an oil pressure sensor without removing it?
Yes, you can often wipe dirt and oil residue from an accessible sensor exterior without removing it. You may also be able to clean an accessible electrical connector after switching off the ignition and following the vehicle’s electrical safety instructions. Avoid spraying liquid into the pressure port or flooding the connector, and do not mistake exterior cleaning for a repair of an internal fault.
Q
Can I use WD-40 to clean an oil pressure sensor?
Do not assume that a general-purpose WD-40 product is suitable for cleaning an oil pressure sensor or its electrical connector. Different formulations have different purposes, and a residue-forming lubricant is not interchangeable with an electrical contact cleaner. Use a product specifically labeled as compatible with the surface or connector you intend to clean.
Q
Can you spray brake cleaner on an oil pressure sensor?
Brake cleaner is not a universal sensor-cleaning product. Its formulation may be incompatible with plastics, rubber seals, coatings, or electronic components. Avoid spraying it into the sensor, connector, or pressure port unless the component manufacturer explicitly approves the exact product and procedure. A compatible exterior cleaner or automotive electrical contact cleaner is generally the more appropriate choice for the corresponding surface.
Q
Will cleaning an oil pressure sensor turn off the warning light?
It may help if removable contamination at the connector was causing an electrical connection problem, but it will not reliably fix a failed sensor or genuinely low oil pressure. If a red oil pressure warning appears while the engine is running, shut the engine off and check the oil level according to the owner’s manual. If the warning persists or the engine makes abnormal noises, do not continue driving; have the problem diagnosed.
Q
How do you know if an oil pressure sensor needs replacing?
Replacement may be necessary if the sensor fails the manufacturer’s electrical or pressure-related tests, has a cracked housing, or leaks through a failed internal seal. A persistent warning or diagnostic code alone is not conclusive. Inspect the wiring and connector, and compare the reported reading with actual oil pressure measured using the appropriate test procedure.
Q
Can a dirty oil pressure sensor cause low oil pressure?
A dirty sensor can contribute to an inaccurate reading in some designs, especially if contamination affects a pressure passage, but that does not necessarily mean actual engine oil pressure is low. Genuine low pressure can result from insufficient oil, a lubrication-system restriction, oil pump problems, or engine wear. A mechanical pressure test helps determine which situation applies.
Q
Can you clean the oil pressure sensor screen with compressed air?
Do not use high-pressure compressed air on a sensor screen unless the manufacturer specifically permits it and provides the required procedure. Air pressure can damage delicate components or push debris into an oil passage. First confirm that the engine has a serviceable screen, then follow the vehicle-specific instructions for cleaning or replacement.
✦ Wrapping Up
Conclusion
You can clean an oil pressure sensor’s exterior and, when necessary, its compatible electrical connector. However, cleaning is not a dependable way to repair internal sensor failure, physical damage, or a blocked passage that requires a specific service procedure. Use the correct cleaner, protect the electrical components, and follow the vehicle manufacturer’s removal and installation instructions.
If the oil pressure warning or an abnormal reading remains after inspection, diagnose the cause instead of repeatedly cleaning or automatically replacing the sensor. Check the oil level, inspect the wiring, and arrange a mechanical oil pressure test when indicated. Because genuine low oil pressure can quickly damage an engine, treat a red oil pressure warning as a serious problem until actual pressure has been verified.
💡 Key Takeaway
Start by checking the engine oil level and inspecting the sensor exterior and connector. Clean only compatible external surfaces, then verify operation. If the warning persists, the sensor leaks, or engine noise develops, stop running the engine when low oil pressure is suspected and arrange proper diagnosis.
Ethan Brooks is an automotive writer at Auto News 7, covering car news, vehicle maintenance, new model updates, recalls, and practical buying guides. He focuses on clear, useful information that helps drivers understand their vehicles and make better ownership decisions.
Learn when to replace a crankshaft position sensor, how to recognize failure symptoms, diagnose the problem, and avoid replacing a good sensor unnecessarily.
Learn how to test an oil pressure sensor with a multimeter and mechanical gauge, identify wiring faults, and separate sensor problems from real low oil pressure.
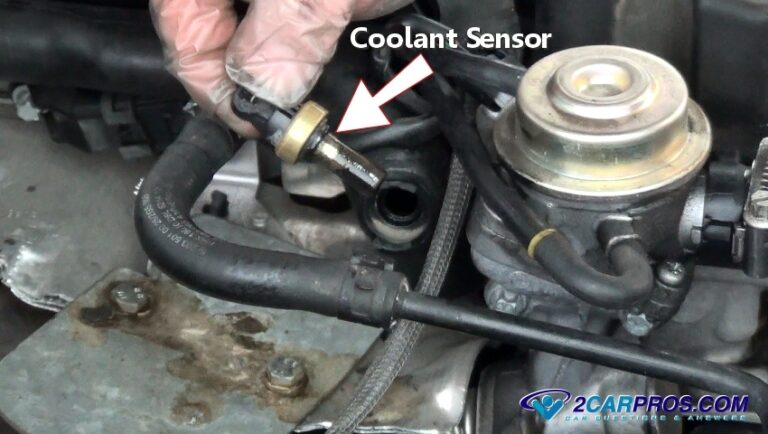
Is a coolant temperature sensor easy to replace? Learn how difficult the repair is, what tools you need, replacement steps, safety precautions, and when to call a mechanic.
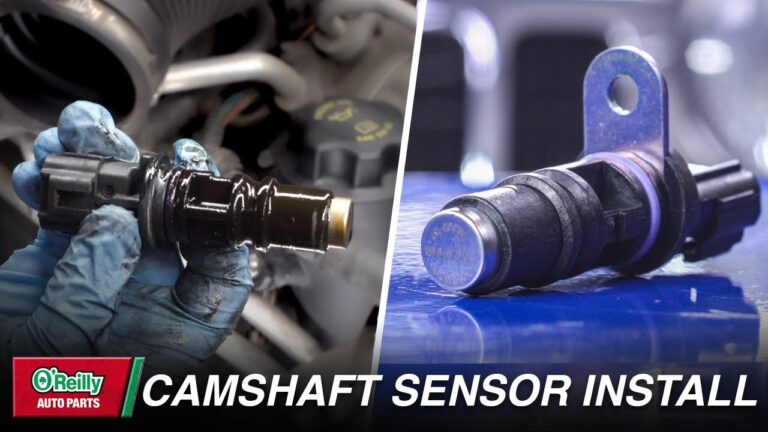
Learn how to replace camshaft position sensor components with a detailed step-by-step guide, tools list, troubleshooting tips, safety advice, and common mistakes to avoid.
Learn how to check camshaft position sensor operation, wiring, voltage, and signal output. Follow this practical step-by-step guide to diagnose common camshaft sensor problems.