To clean an oil pressure sensor screen, remove the sensor, carefully extract the screen if your vehicle uses one, flush it with a suitable cleaner, let it dry, and reinstall it correctly.
For drivers and DIY mechanics in the United States, an oil pressure warning deserves careful attention because low engine oil pressure can cause serious engine damage. A dirty sensor screen can sometimes restrict the oil reaching the pressure-sensing passage and create an inaccurate reading, but the screen design and removal procedure vary by engine.
Before cleaning anything, confirm that your vehicle actually has a separate oil pressure sensor screen. Some engines use a small filter screen beneath the pressure sensor, while others use a sensor that is serviced only as a complete unit. The vehicle-specific service information should determine whether the screen can be removed and cleaned.
Source: safetywish.com
What Is an Oil Pressure Sensor Screen?
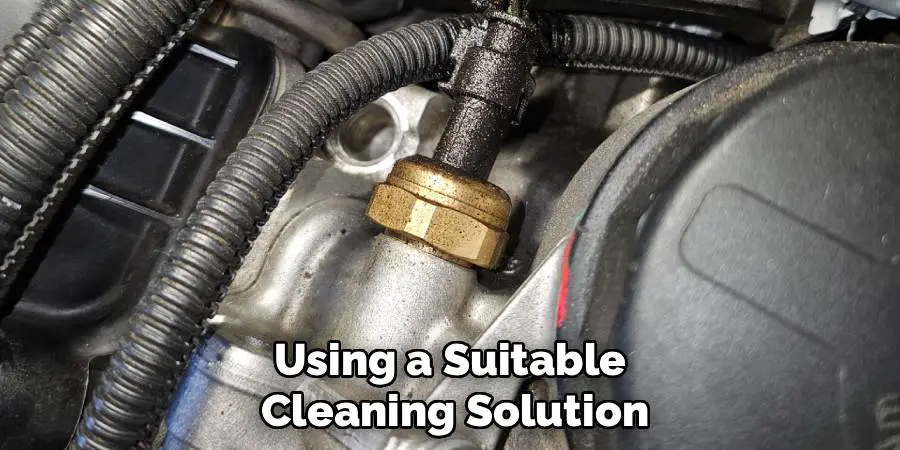
An oil pressure sensor screen is a small filter element used on some engines to keep debris away from the oil passage leading to the pressure sensor. It is commonly positioned near or beneath the oil pressure sensor, but the exact design depends on the engine.
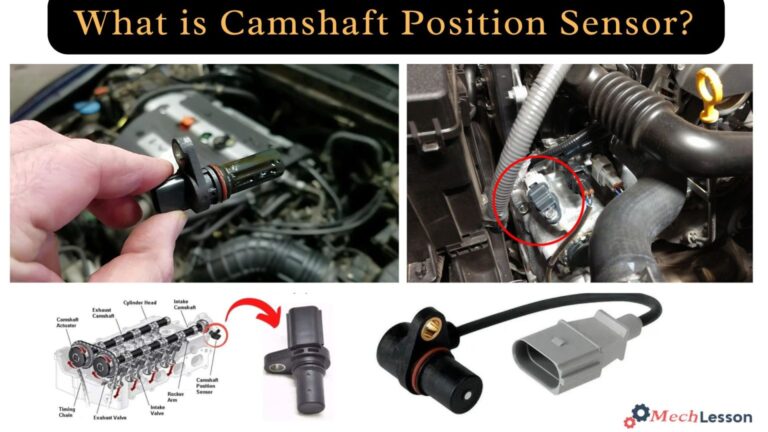
The screen is not the same thing as the electronic pressure sensor. The sensor measures oil pressure and sends an electrical signal to the engine control system or gauge. The screen only filters oil entering the sensing passage on engines that use this separate component.
Source: storage.googleapis.com
Screen
A small filter that can catch sludge or debris before it reaches the sensor passage.
Pressure sensor
An electrical component that detects oil pressure and communicates the reading to the vehicle.
Oil passage
The engine passage that supplies oil pressure to the sensor or switch.
Why Can the Screen Become Dirty?
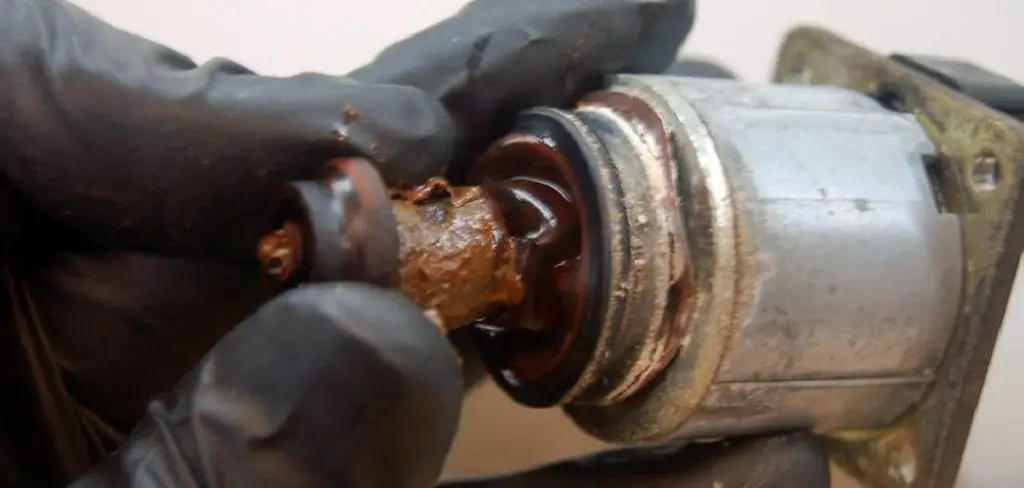
Engine oil carries small contaminants as it circulates. Old oil, sludge, sealant debris, and other material can accumulate in restricted passages over time. A small screen can become partially blocked when contamination reaches the sensing passage.
A dirty screen can contribute to an inaccurate or delayed pressure signal on engines where the screen is part of the sensing circuit. However, a low oil pressure warning should never be blamed on the screen without checking oil level, oil condition, sensor operation, and actual engine pressure.
Sludge
Heavy oil deposits can restrict a small filter opening.
Debris
Loose material in the oil system can collect on a fine screen.
Sealant material
Excess sealing compound can enter an oil passage and restrict a small opening.
Before You Clean the Oil Pressure Sensor Screen
Start by identifying the exact engine and confirming the manufacturer’s procedure. This matters because some oil pressure sensors are non-serviceable, while other engines use a removable screen or filter beneath the sensor. Do not assume that a screen exists simply because another vehicle uses one.
Park the vehicle on a stable surface, switch the engine off, allow hot components and oil to cool, and prevent accidental starting while you work. Clean the area around the sensor before removal so dirt does not fall into the oil passage.
Gather the correct sensor socket or wrench, a clean container or shop towel for oil that may escape, a suitable sensor-safe cleaner, compressed air if the service procedure permits it, and any required replacement seal or screen.
Source: safetywish.com
Verify the engine
Use the vehicle identification information and engine-specific service instructions to confirm whether the screen is removable.
Protect the oil passage
Clean the area around the sensor before removing it and keep loose dirt away from the opening.
Use the correct tool
A proper oil pressure sensor socket reduces the chance of damaging the sensor during removal.
Prepare for oil leakage
A small amount of oil may escape when the sensor is removed from an oil gallery.
Tools and Materials
The exact tools vary by vehicle. A typical job may require an oil pressure sensor socket, ratchet, small inspection light, clean shop towels, a suitable cleaner, and a replacement screen or seal if the original part is damaged.
Avoid choosing a solvent simply because it removes grease quickly. Some strong solvents can damage plastics, rubber components, coatings, or electronic sensor parts. Follow the cleaner manufacturer’s compatibility instructions and the vehicle service information.
Sensor socket
Use the correct size and type for the sensor installed on your engine.
Sensor-safe cleaner
Choose a cleaner intended for electrical or sensor components when cleaning the sensor or its sensitive parts.
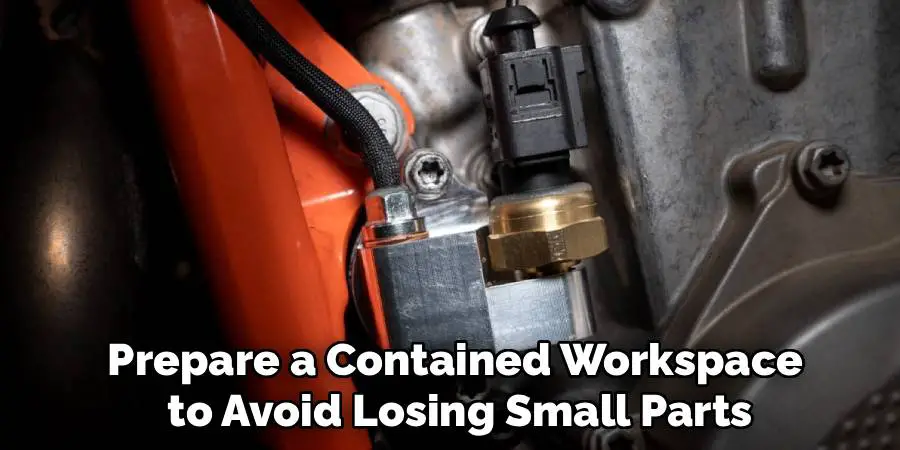
Clean container
Use a clean tray or container to prevent small parts from being lost.
How to Clean Oil Pressure Sensor Screen
The basic process is to remove the sensor, determine whether a separate screen is present, remove the screen using the approved method, clean it without damaging the mesh, and reinstall the components correctly. Do not force a screen that does not come out easily because the retaining design differs among engines.
If your vehicle’s service information says the screen is not separately serviceable, replace the appropriate component instead of improvising a removal method.
Source: safetywish.com
Step 1: Turn off the engine
Park safely, switch the ignition off, and allow the engine to cool enough for safe work.
Step 2: Locate the sensor
Find the oil pressure sensor using the vehicle-specific service information rather than relying on a generic location.
Step 3: Clean around the sensor
Remove loose dirt and oil from the surrounding area before disconnecting the electrical connector.
Step 4: Disconnect the connector
Release the connector lock carefully and pull on the connector body rather than the wires.
Step 5: Remove the sensor
Use the specified sensor socket or wrench and remove the sensor without twisting or pulling on the wiring.
Step 6: Inspect for a screen
Look for the separate filter screen only if the engine is designed to use one.
Step 7: Remove the screen carefully
Use the vehicle-specific removal method. Stop if the screen resists removal or the procedure is unclear.
Step 8: Clean the screen
Flush contamination from the screen with an appropriate cleaner and do not crush, stretch, or puncture the mesh.
Step 9: Let the parts dry
Allow cleaning fluid to evaporate completely before putting the screen or sensor back into service.
Step 10: Reinstall everything
Install the screen and sensor according to the manufacturer’s procedure, including any required sealant, gasket, or torque specification.
How to Clean the Screen Without Damaging It
The safest approach is gentle flushing rather than scraping. Spray a suitable cleaner through the screen to loosen and carry away contamination. Do not push a needle, pick, wire, or screwdriver through the mesh because a damaged screen may no longer filter correctly.
If compressed air is permitted by the component manufacturer, use it gently and from a safe direction. Excessive pressure can deform a fine mesh screen or drive contamination deeper into a passage.
Flush rather than scrape
Use cleaner to loosen deposits instead of forcing a sharp tool through the screen.
Inspect the mesh
Look for tears, deformation, separation, or permanent blockage after cleaning.
Replace damaged parts
A damaged or non-serviceable screen should be replaced when the manufacturer provides a replacement procedure.
Should You Clean the Sensor Too?
Only clean the sensor in the manner allowed by the sensor manufacturer or vehicle service information. Some pressure sensors are sealed electronic units and are intended to be replaced rather than opened or internally cleaned.
If the sensor’s oil inlet has visible contamination and the manufacturer permits cleaning, use an appropriate sensor-safe cleaner and avoid touching the sensing element. Never insert a sharp object into a pressure-sensing opening.
External contamination
Wipe dirt from the outside of the sensor without pushing debris into the oil inlet.
Internal contamination
Do not dismantle a sealed sensor unless the manufacturer specifically provides an approved service procedure.
What Cleaner Should You Use?
Use a cleaner that is compatible with the sensor, screen, and any plastic or rubber components involved. Electrical contact cleaner or a purpose-designed sensor cleaner may be appropriate for some components, but the vehicle or component manufacturer’s instructions take priority.
Do not assume that brake cleaner, carburetor cleaner, gasoline, or another aggressive solvent is safe for an oil pressure sensor or its screen. Strong solvents can affect materials used in automotive electrical components.
Source: safetywish.com
Preferred approach
Use a cleaner specifically identified as safe for the component or an equivalent product approved by the manufacturer.
Avoid unknown solvents
Do not use an aggressive solvent when material compatibility has not been established.
Allow complete drying
Any cleaning fluid should evaporate completely before the component returns to the engine.
How to Reinstall the Oil Pressure Sensor
Reinstall the sensor only after the screen and surrounding passage are clean and the components are completely dry. Start the sensor by hand so you do not cross-thread the fitting, then tighten it using the vehicle-specific torque specification.
Some engines require thread sealant, while others use a particular sealing method or prohibit sealant on the threads because the sensor relies on its threads or housing for an electrical ground. Never substitute a generic sealing method without checking the service procedure.
Reconnect the electrical connector securely and inspect the area for oil leakage after starting the engine. If the vehicle has a specified procedure for clearing diagnostic trouble codes or verifying oil pressure, complete that procedure.
Source: ceish.med.uchile.cl
Start by hand
Thread the sensor carefully by hand to reduce the risk of cross-threading the engine fitting.
Use the specified torque
Tighten the sensor to the exact specification for the engine rather than using a generic torque value.
Use the correct sealant
Apply sealant only when the manufacturer specifies it and keep it out of the oil passage.
Check for leaks
After installation, inspect the sensor and surrounding area while the engine is running.
How to Know if Cleaning Fixed the Problem
A successful repair should produce a stable oil pressure signal appropriate for the engine and operating conditions. The exact pressure varies substantially by engine, oil temperature, engine speed, oil viscosity, and mechanical condition, so there is no universal pressure number that confirms a repair.
If the warning light remains on, the gauge behaves abnormally, or a diagnostic code returns, do not assume that the screen is still dirty. Confirm the actual engine oil pressure with the manufacturer’s recommended test method when required.
Source: YouTube > Dean VanWormer Automotive Professor
Stable warning behavior
The oil pressure warning should operate normally after the repair when the engine and sensor are functioning correctly.
No oil leak
The sensor and its fitting should remain dry or show no leakage beyond what the manufacturer permits.
Normal diagnostic results
Any relevant diagnostic codes should be checked and addressed rather than simply erased.
Verified pressure when needed
A mechanical pressure test can help distinguish a sensor or screen problem from genuine low oil pressure when the service procedure calls for it.
When Cleaning the Screen Will Not Fix Low Oil Pressure
Cleaning the screen cannot repair a mechanical problem that is causing genuinely low oil pressure. If measured pressure is below the manufacturer’s specification, the engine needs further diagnosis rather than repeated sensor cleaning.
Possible causes include low engine oil level, incorrect oil viscosity, a restricted oil pickup, a failing oil pump, excessive bearing clearance, a clogged filter or passage, or another internal engine problem. The correct diagnosis depends on the engine and its symptoms.
Source: storage.googleapis.com
Low oil level
Check the engine oil level on a suitable surface and follow the owner’s manual procedure.
Wrong oil or degraded oil
Confirm that the oil grade and service condition match the manufacturer’s requirements.
Oil pump problem
A worn or damaged oil pump can cause genuinely low pressure that cleaning cannot correct.
Engine wear
Excessive internal clearance can reduce oil pressure even when the sensor and screen are clean.
Restricted pickup
Sludge or debris at the oil pickup can restrict oil flow and require more extensive service.
Stop Driving if the Oil Pressure Warning Stays On
If the oil pressure warning remains illuminated with the engine running, treat it as a potentially serious problem. Stop the engine when it is safe to do so and check the oil level according to the owner’s manual.
If the oil level is correct and the warning persists, avoid continuing to drive until the cause has been diagnosed. Operating an engine with genuinely low oil pressure can result in severe internal damage.
Do not ignore the warning
A persistent oil pressure warning should be investigated promptly.
Verify before assuming
Use the correct diagnostic procedure to determine whether the problem is electrical or mechanical.
Get professional help when needed
Seek qualified automotive service if the screen cannot be removed safely or actual oil pressure is abnormal.
Common Mistakes to Avoid
The most common mistake is treating every oil pressure sensor as if it has the same removable screen. Engine designs differ, and forcing a hidden filter can damage the oil passage or create additional repair work.
Another mistake is using a sharp object to scrape contamination from the screen or sensor opening. A fine mesh can tear easily, while the sensing element inside some sensors can be damaged by physical contact.
Source: safetywish.com
Do not force the screen
If the screen does not come out using the specified method, stop and verify the correct procedure.
Do not poke the sensing element
Sharp tools can permanently damage a pressure-sensing component.
Do not guess the torque
Use the specification for the exact engine and sensor.
Do not ignore real low pressure
A clean sensor screen does not prove that engine oil pressure is healthy.
Do not contaminate the oil passage
Keep dirt, lint, sealant fragments, and loose debris away from the open sensor port.
Frequently Asked Questions
Q
Can you clean an oil pressure sensor screen?
Yes, if the engine uses a separate removable screen and the manufacturer allows it to be serviced. Clean the screen gently with a compatible cleaner and replace it if the mesh is damaged or cannot be cleaned properly.
Q
Where is the oil pressure sensor screen located?
On engines that use one, the screen is commonly located beneath or near the oil pressure sensor in the engine’s oil passage. Its exact position and removal method vary by engine, so use the vehicle-specific service information.
Q
Can a dirty oil pressure sensor screen cause low oil pressure?
A restricted screen can interfere with the oil pressure signal on an engine that uses a screen in the sensing passage. However, it does not necessarily mean the engine’s actual oil pressure is low. A mechanical pressure test may be needed to separate a sensing problem from a genuine lubrication problem.
Q
What can I use to clean an oil pressure sensor screen?
Use a cleaner that is confirmed to be compatible with the screen and sensor materials. A suitable electrical contact or sensor cleaner may work for some applications, but the manufacturer’s instructions should take priority.
Q
Should I replace the oil pressure sensor instead of cleaning it?
Replacement is usually appropriate when the sensor itself is defective, damaged, or specified as non-serviceable. Cleaning a screen will not restore an electronic sensor that has failed internally.
Q
Why is my oil pressure warning still on after cleaning the screen?
The problem may be unrelated to the screen. Check the oil level and follow the vehicle’s diagnostic procedure for the sensor and oil pressure system. If actual oil pressure is low, possible causes include oil pump, pickup, bearing, oil viscosity, or other engine problems.
Q
Can I drive with the oil pressure warning light on?
You should not continue driving with a persistent oil pressure warning until the cause is understood. If the engine truly has low oil pressure, continued operation can cause severe internal damage.
✦ Wrapping Up
Conclusion
Learning how to clean oil pressure sensor screen components starts with identifying the exact engine design. If the vehicle uses a removable screen, gentle cleaning can remove contamination without damaging the filter or pressure-sensing system.
The key is not to treat screen cleaning as a guaranteed cure for an oil pressure problem. Verify the sensor, screen, oil level, electrical circuit, and actual engine pressure as needed. If the warning remains or measured pressure is low, diagnose the underlying lubrication problem before driving further.
💡 Key Takeaway
Verify the vehicle-specific procedure first, clean only a serviceable screen with a compatible cleaner, reinstall it to specification, and verify actual oil pressure if the warning persists.
Ethan Brooks is an automotive writer at Auto News 7, covering car news, vehicle maintenance, new model updates, recalls, and practical buying guides. He focuses on clear, useful information that helps drivers understand their vehicles and make better ownership decisions.
Learn whether bad gas can cause a knock sensor code, how poor fuel quality affects engine knock, common symptoms, diagnostic steps, and when the knock sensor is actually faulty.
Learn how much to replace a camshaft position sensor in the United States, including parts, labor, DIY costs, symptoms, and factors that affect repair pricing.
Learn how to clean a knock sensor safely, inspect its connector and mounting surface, diagnose common faults, and know when replacement is the better fix.