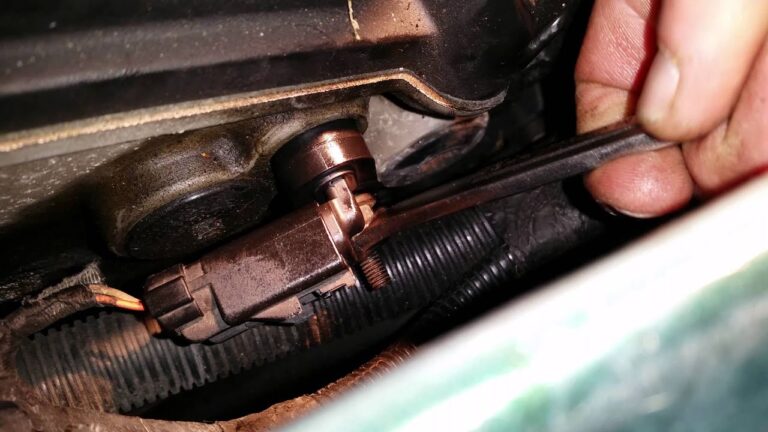
In the USA, replacing a crankshaft position sensor often takes about 30 minutes to 2 hours, depending on vehicle access and diagnosis.
If you are wondering how long to replace crankshaft position sensor on a car or truck in the United States, the actual replacement can be fairly quick on many vehicles. A technician may only need to disconnect the sensor, remove its retaining bolt, install the new sensor, reconnect the wiring, and verify operation. However, the total shop visit can take longer when diagnosis, difficult access, additional parts removal, or electrical testing is required.
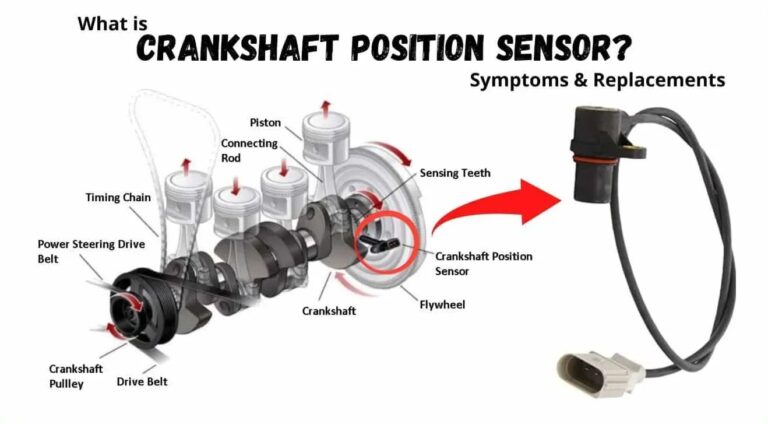
The crankshaft position sensor, often called the CKP sensor, tells the engine computer where the crankshaft is and how fast it is turning. That information helps the engine control system manage ignition and fuel delivery. Because sensor locations and engine layouts differ, replacement time should be based on the specific year, make, model, engine, and sensor location rather than a single universal labor time.
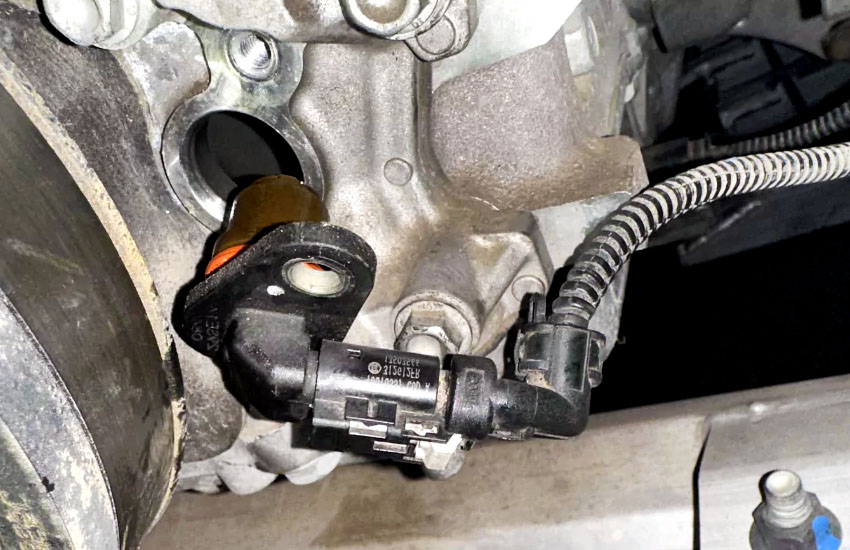
Source: autotoride.com
How Long Does It Take to Replace a Crankshaft Position Sensor?
For many vehicles, the physical replacement takes roughly 30 minutes to 2 hours. This is a practical estimate rather than a universal labor time because manufacturers place crankshaft position sensors in different locations and use different mounting arrangements.
A simple replacement may involve removing one retaining bolt and disconnecting one electrical connector. Other vehicles require the technician to remove covers, intake components, shields, pulleys, or other parts before the sensor can be reached. Some designs place the sensor in a location that requires much more disassembly.
The complete appointment can also take longer than the hands-on replacement. A shop may first diagnose the fault, inspect wiring, confirm the sensor signal, perform the repair, clear diagnostic trouble codes, and road-test or otherwise verify the repair.
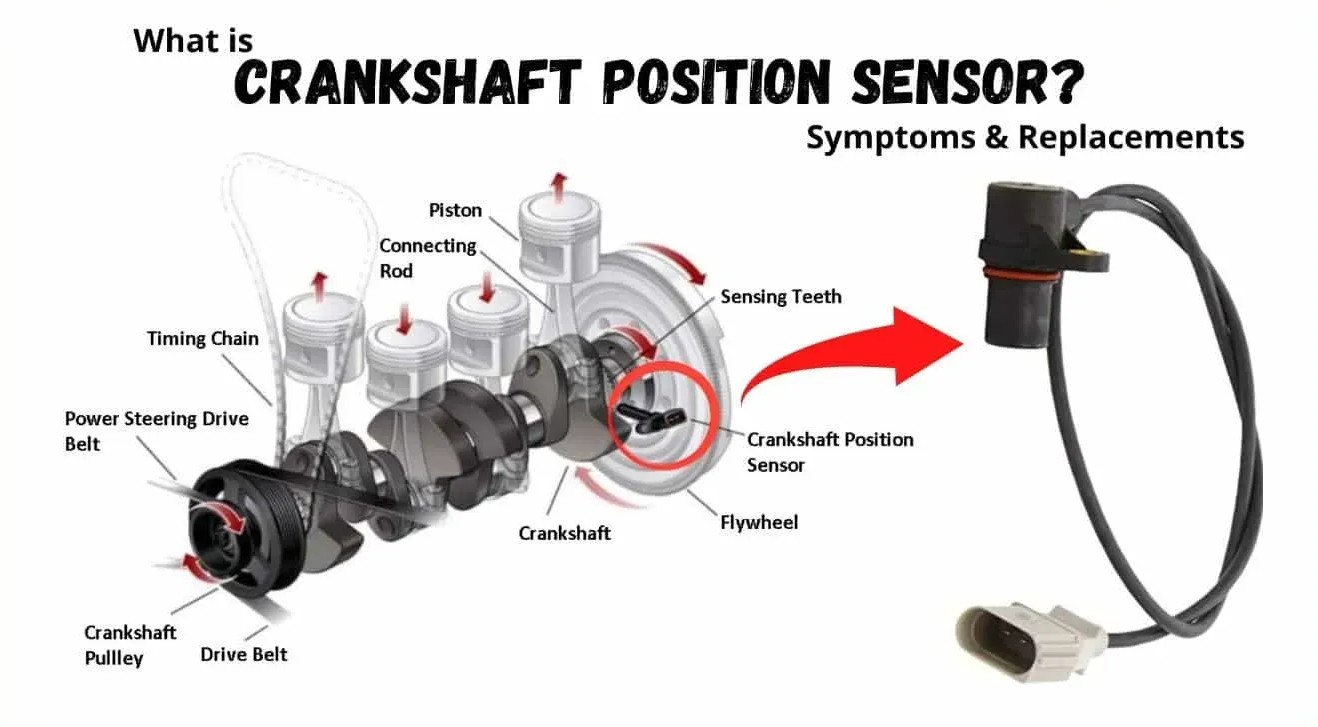
Source: obdtech.co.nz
Easy access
About 30 to 60 minutes may be enough for a sensor that is easy to reach and remove.
Moderate access
About 1 to 2 hours may be reasonable when covers or nearby components must be removed.
Difficult access
Some vehicles can require several hours when substantial disassembly is needed to reach the sensor.
Diagnosis included
The total shop time can exceed the physical replacement time because the technician may need to diagnose the fault and verify the repair.
Why There Is No Single Replacement Time
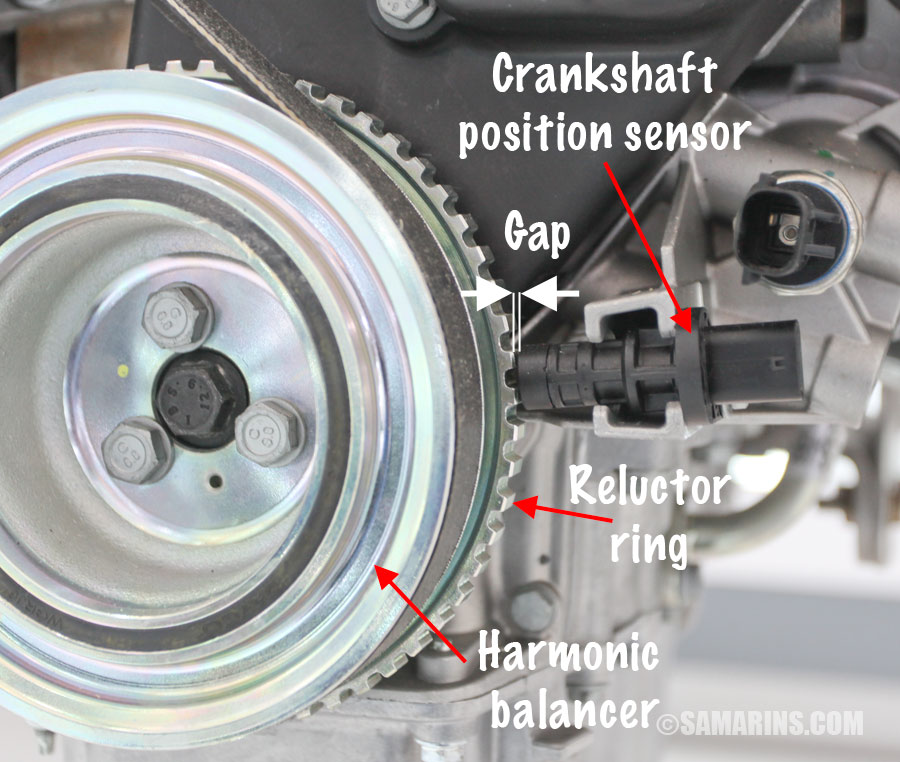
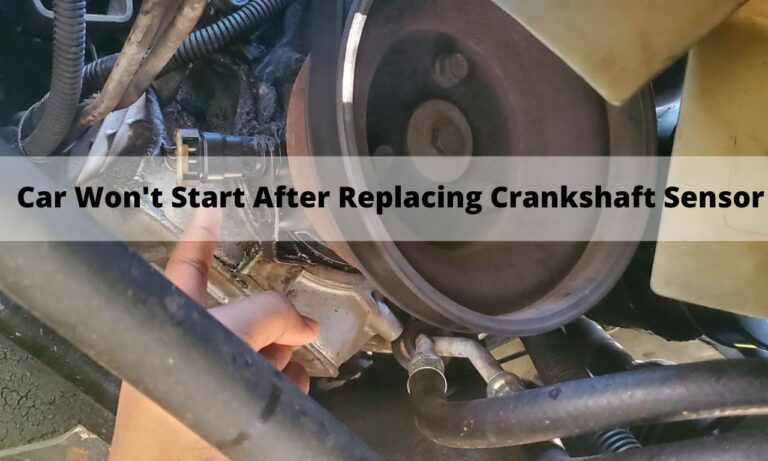
Vehicle design is the main reason replacement times vary. The crankshaft position sensor may be mounted near the crankshaft pulley, transmission bellhousing, engine block, or another location specified by the manufacturer. The technician must use the service procedure for the exact vehicle.
Labor time can also increase if the sensor is stuck, its electrical connector is damaged, oil contamination is present, or access is restricted. A replacement that looks simple from outside the vehicle can become more involved once the technician reaches the component.
Vehicle model
Different cars, trucks, and SUVs use different sensor locations and mounting systems.
Engine configuration
Engine size and layout can change how easily a technician can reach the sensor.
Condition of the old sensor
A seized sensor, damaged connector, or brittle wiring can add repair time.
What Does a Crankshaft Position Sensor Do?
The crankshaft position sensor monitors the position and rotational speed of the crankshaft and sends that information to the engine control system. The computer uses the signal as part of the process for controlling ignition timing and fuel delivery.
When the sensor signal becomes unreliable or disappears, the engine computer may not have the information it needs to control the engine correctly. Depending on the vehicle, the result can include hard starting, stalling, misfires, poor running, or a no-start condition.
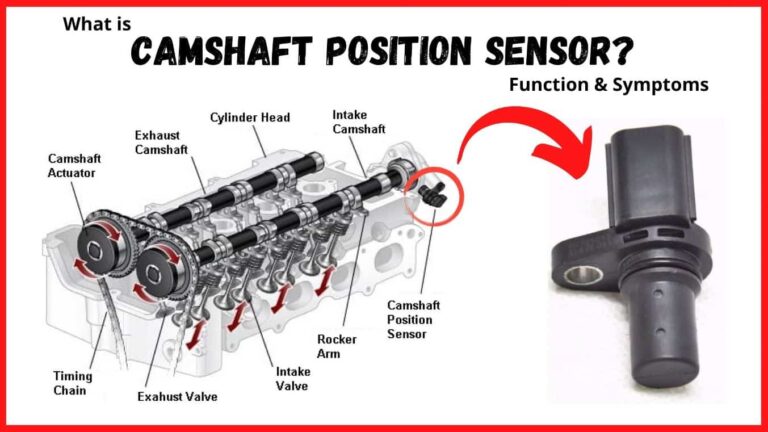
A crankshaft position sensor is different from a camshaft position sensor, although the two systems work together on many engines. A fault in either system can produce overlapping symptoms, which is one reason proper diagnosis matters before buying and installing a replacement sensor.
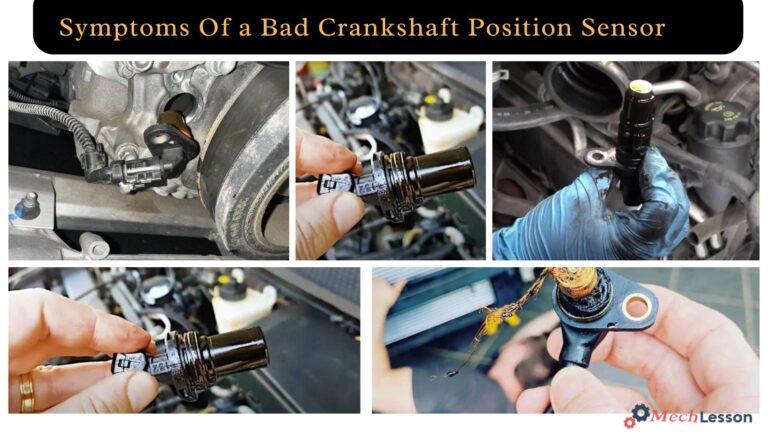
Source: mechlesson.com
Crankshaft position
The sensor provides information about where the crankshaft is during engine rotation.
Engine speed
The engine control system can use the crankshaft signal to determine rotational speed.
Ignition and fuel control
The signal contributes to the timing and sequencing decisions made by the engine management system.
Common Signs of a Crankshaft Sensor Problem
Common symptoms can include a Check Engine warning, difficult starting, engine stalling, misfires, or rough running. Some vehicles may have an intermittent problem in which the engine works normally at one moment and then loses the sensor signal later.
These symptoms are not proof that the crankshaft position sensor has failed. Ignition, fuel, wiring, connector, timing, and other sensor problems can create similar symptoms. Diagnostic testing should be used to identify the actual cause.
Hard starting
The engine may take longer to start or may intermittently fail to start.
Stalling
The engine can stall when the control system loses a reliable crankshaft signal.
Rough running
An unreliable signal can contribute to misfires or poor engine operation.
Check Engine Light
A sensor-related fault may cause the vehicle’s diagnostic system to store a trouble code and illuminate the warning light.
What Happens During Crankshaft Position Sensor Replacement?
A typical replacement starts with diagnosis and identification of the correct sensor. The technician may scan the vehicle for diagnostic trouble codes and inspect the sensor signal, wiring, and connector before deciding that replacement is necessary.
Once the fault is confirmed, the technician follows the service procedure for that specific vehicle. The general process is to make the vehicle safe, gain access to the sensor, disconnect its electrical connector, remove the retaining hardware, remove the old sensor, install the replacement, reconnect the wiring, and restore any components that were removed.
The technician should use the manufacturer’s specified tightening procedure and any required installation instructions. Some sensors use an O-ring or sealing surface, and the correct installation method can vary by vehicle.
Source: samarins.com
1. Diagnose the problem
Scan for diagnostic trouble codes and check the sensor circuit and related components.
2. Prepare the vehicle
Secure the vehicle and remove any covers or components that block access.
3. Disconnect the sensor
Release the electrical connector carefully to avoid damaging the wiring or connector.
4. Remove the old sensor
Remove the retaining hardware and carefully extract the sensor.
5. Install the replacement
Install the correct sensor using the required seal, mounting hardware, and torque specification.
6. Verify operation
Reconnect the wiring, clear applicable codes when appropriate, start the engine, and confirm that the repair resolved the problem.
Does Diagnosis Add to the Repair Time?
Yes. Diagnosis can add time because a crankshaft position sensor code does not automatically prove that the sensor itself has failed. A technician may need to inspect wiring, connectors, sensor signals, and related engine components.
This extra time is useful because replacing a sensor without confirming the fault can leave the original problem unresolved. A damaged wire or connector, for example, may produce symptoms that look like a failed sensor.
Code reading
A scan tool can identify stored diagnostic trouble codes that help guide the investigation.
Visual inspection
The sensor, connector, wiring, and surrounding area should be checked for visible damage or contamination.
Signal testing
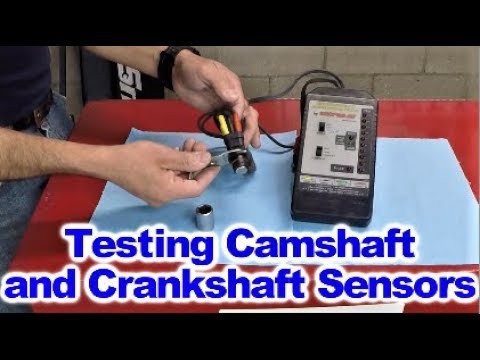
Depending on the vehicle, additional testing may be needed to determine whether the sensor is producing the expected signal.
What Can Make Crankshaft Sensor Replacement Take Longer?
The biggest time difference usually comes from access. A sensor mounted in an open and reachable location can be removed quickly, while one hidden behind other components may require substantial disassembly.
The condition of the surrounding parts also matters. A damaged connector, corroded wiring, oil leak, stuck sensor, or damaged mounting area can turn a simple sensor replacement into a broader repair.
A technician may also discover that the sensor is not the actual source of the problem. Timing components, wiring faults, battery or starting problems, ignition faults, and other engine management issues can produce similar symptoms. Correct diagnosis can therefore take longer than the physical part replacement.
Source: safetyfic.com
Restricted access
Nearby components may need to be removed before the sensor can be reached.
Damaged wiring
Broken, corroded, or shorted wiring can require electrical repairs in addition to sensor replacement.
Damaged connector
A broken connector may prevent a new sensor from communicating correctly with the engine control system.
Stuck sensor
A sensor that has seized in its mounting location may require additional care and removal time.
Another underlying fault
If the sensor is not the true cause, additional diagnostic work may be needed before the vehicle is repaired.
When a Simple Sensor Replacement Becomes a Larger Repair
A replacement can become more involved when the sensor is difficult to reach or when removing it exposes another problem. For example, a leaking engine seal can contaminate a sensor or its connector, while damaged wiring can prevent a replacement sensor from working correctly.
If the engine has a timing-related problem, replacing the crankshaft position sensor alone may not restore normal operation. The repair plan should follow the results of vehicle-specific testing rather than the sensor code alone.
Oil contamination
An oil leak may affect the sensor area and can require attention to the source of the leak.
Timing system concerns
Timing belt or chain problems can produce symptoms that overlap with sensor faults and may require separate diagnosis.
Electrical faults
The sensor circuit may need repair if the wiring or connector is defective.
How Much Does Crankshaft Position Sensor Replacement Cost?
Repair cost depends on the vehicle, labor rate, sensor price, and amount of access required. A recent U.S. RepairPal estimate puts the average crankshaft position sensor replacement at about $230 to $335, including estimated labor of $144 to $211 and parts of $86 to $124. These figures are national estimates and do not include taxes and fees or account for every vehicle-specific difference.
The labor portion is closely related to how long the job takes. A vehicle with an easily accessible sensor may have a lower labor charge, while a vehicle that requires extensive disassembly can cost more. Dealer, independent-shop, and mobile-mechanic pricing can also differ by location and vehicle.
The price should be evaluated together with the diagnosis. A low-cost sensor replacement that does not address a wiring fault or another underlying problem may not solve the vehicle’s symptoms.
Source: 1aauto.com
Parts
The replacement sensor price varies by vehicle and by the type and source of the part.
Labor
Labor depends on access, vehicle-specific procedure, local shop rates, and any additional work required.
Diagnosis
Diagnostic testing may be billed separately or included in the repair estimate, depending on the shop.
Additional repairs
Wiring, connectors, oil leaks, timing problems, or other faults can increase the final bill.
Can You Replace a Crankshaft Position Sensor Yourself?
A mechanically experienced owner may be able to replace the sensor at home when the component is accessible and the vehicle-specific procedure is straightforward. Basic requirements can include appropriate hand tools, safe vehicle support when needed, the correct replacement sensor, and access to the manufacturer’s service information.
The harder part is often diagnosis rather than physically removing the sensor. If the vehicle has a no-start, intermittent stall, or engine performance problem, confirming the cause before replacing parts is important.
Never work under a vehicle supported only by a jack. Follow the vehicle manufacturer’s safety instructions and use appropriate support equipment. If access requires extensive disassembly or you are unsure about the diagnosis, professional service is the safer option.
DIY may be reasonable
Consider it only when the sensor is accessible, you have the required tools, and you can follow the vehicle-specific service procedure safely.
Professional service is useful
A technician can diagnose the circuit, perform the replacement, and verify that the engine is operating correctly afterward.
How Do You Know the Replacement Worked?
After replacement, the engine should start and run according to the vehicle manufacturer’s normal operating behavior. The technician should also confirm that the sensor signal and related systems are functioning correctly.
A scan tool can be used to check diagnostic trouble codes and confirm whether the original fault remains. Depending on the vehicle, a road test or additional operating checks may be appropriate.
If the original symptoms continue after installing a new sensor, do not assume the replacement part is defective immediately. The vehicle may have a wiring problem, an incorrect sensor, a connector issue, a timing problem, or another fault that was not addressed.
Source: samarins.com
Normal starting
The engine should start normally if the crankshaft signal was the cause of the starting problem.
Stable operation
Stalling, misfires, or rough running caused by the sensor fault should improve when the sensor and its circuit are repaired correctly.
No unresolved fault
Relevant diagnostic codes should be evaluated after the repair rather than assuming the problem is fixed simply because the sensor was replaced.
What If the Car Still Has the Same Problem?
If the same symptoms remain, return to diagnosis instead of repeatedly replacing parts. The next checks should follow the vehicle’s service information and may include the sensor connector, wiring, power and ground circuits, sensor signal, related camshaft sensor information, and engine timing.
An unresolved no-start or stalling problem can have causes unrelated to the crankshaft position sensor. A professional technician can use scan data and electrical testing to narrow down the fault.
Recheck the connector
Make sure the connector is fully seated and that its terminals and wiring are not damaged.
Check the circuit
Verify the electrical circuit according to the vehicle-specific diagnostic procedure.
Reconsider the diagnosis
If the sensor and circuit test correctly, investigate other systems that could produce the same symptoms.
Frequently Asked Questions
Q
How long does it take a mechanic to change a crankshaft position sensor?
Many straightforward replacements take about 30 minutes to 2 hours of hands-on work. The exact time depends on the vehicle’s sensor location, access, engine design, and whether additional diagnosis or repairs are needed.
The total time at a repair shop can be longer because the technician may need to diagnose the fault, inspect the wiring, replace the sensor, clear relevant codes, and verify the repair.
Q
Can a crankshaft position sensor be replaced in 30 minutes?
Yes, some vehicles have an easily accessible sensor that can be replaced in around 30 minutes when no complications are present. That does not mean every vehicle can be repaired that quickly.
The technician still needs to allow time for safe access, diagnosis, installation, and verification.
Q
How much does it cost to replace a crankshaft position sensor in the USA?
A recent U.S. RepairPal estimate places the average replacement cost at about $230 to $335, including estimated labor and parts. Actual prices vary substantially by vehicle, location, labor rate, sensor price, and additional repairs.
A vehicle-specific estimate is more useful than a national average because access and labor requirements can differ significantly between models.
Q
Can I drive with a bad crankshaft position sensor?
Driving with a suspected failing crankshaft position sensor can be risky because the engine may run poorly, stall, or fail to restart. A sudden stall can create a safety problem, especially in traffic.
If the vehicle is stalling, repeatedly losing power, or having severe starting problems, arrange diagnosis and repair rather than relying on continued driving.
Q
Does replacing a crankshaft position sensor fix a no-start problem?
It can fix a no-start problem when the crankshaft position sensor or its circuit is actually the cause. A no-start condition can also come from fuel, ignition, battery, starter, wiring, timing, immobilizer, or other engine-control problems.
Proper diagnosis is therefore important before replacing the sensor.
Q
Why does crankshaft position sensor replacement take longer on some cars?
The main reason is access. Some sensors are mounted in easy-to-reach locations, while others sit behind covers or components that must be removed first.
Corrosion, a stuck sensor, damaged wiring, a damaged connector, or another underlying engine problem can add more time.
✦ Wrapping Up
Conclusion
If you are asking how long to replace crankshaft position sensor, a practical expectation for many U.S. vehicles is about 30 minutes to 2 hours for the physical replacement. Some vehicles take longer because the sensor is difficult to access or because diagnosis and related repairs are required.
The most useful way to estimate your actual repair time is to identify the exact vehicle, engine, sensor location, and required service procedure. Before replacing the part, make sure the symptoms and diagnostic results support a crankshaft position sensor fault rather than assuming the sensor is the cause.
💡 Key Takeaway
Check the exact year, make, model, and engine, then ask the repair shop for the vehicle-specific labor time and confirm whether diagnosis, wiring inspection, and post-repair testing are included.
Ethan Brooks is an automotive writer at Auto News 7, covering car news, vehicle maintenance, new model updates, recalls, and practical buying guides. He focuses on clear, useful information that helps drivers understand their vehicles and make better ownership decisions.
Learn when to replace a crankshaft position sensor, how to recognize failure symptoms, diagnose the problem, and avoid replacing a good sensor unnecessarily.
Can a car start without a crankshaft sensor? Learn whether the engine can start, what happens when the sensor fails, symptoms to check, and safe troubleshooting steps.
Learn whether a camshaft sensor needs to be programmed after replacement, when relearn procedures are required, common symptoms, troubleshooting steps, and what to expect during installation.
Learn how to remove a broken camshaft sensor safely and correctly. Follow this step-by-step guide to extract a stuck or broken camshaft position sensor without damaging the engine.