Use a correctly sized pressure-rated threaded plug with the sealant specified for your engine, then verify that the port does not leak.
For vehicles in the United States, an open oil pressure sensor port should not be left exposed while the engine is operating. If an oil pressure sensor has been removed, the opening may need a suitable plug when the vehicle manufacturer permits that repair. The correct plug depends on the port’s thread type, diameter, sealing method, and location on the engine.
Do not assume that every oil pressure sensor hole uses the same pipe thread or sealant. Some applications use tapered pipe threads and sealant, while others use a sealing washer, O-ring, or a specific fitting. Service information for several vehicles specifies thread sealant on oil pressure sender threads, while other designs use a separate gasket or sealing arrangement. Always follow the service information for the exact engine before installing a plug.
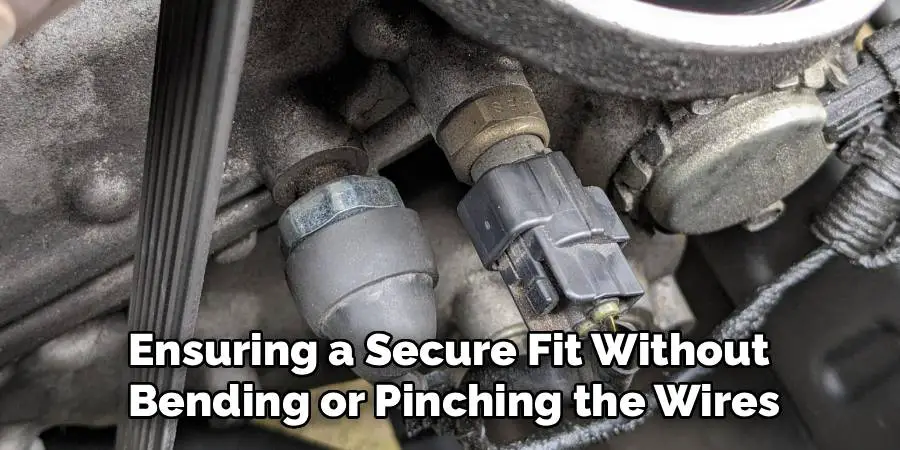
Source: storage.googleapis.com
What Does It Mean to Plug an Oil Pressure Sensor Hole?
Plugging an oil pressure sensor hole means sealing the threaded opening left after an oil pressure sensor, sender, switch, or related fitting has been removed. The opening normally communicates with an engine oil passage, so an unsuitable plug can cause an oil leak or interfere with the lubrication system.
The correct repair is not simply finding a bolt that appears to fit. The replacement must match the port’s thread and sealing arrangement. Some service procedures also specify a particular thread sealant and installation torque.
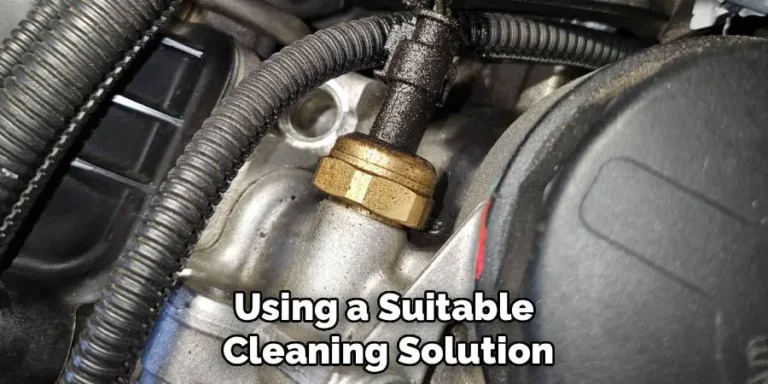
Source: toolsweek.com
Threaded pressure port
Many oil pressure sensors screw into a threaded engine passage or fitting. These ports require a compatible plug or fitting.
Sealing surface
Some designs seal on tapered threads, while others rely on a washer, O-ring, or another specified sealing surface.
Oil passage
The opening can connect directly to an oil gallery, so loose debris or excessive sealant should not be allowed to enter the passage.
Before You Plug the Oil Pressure Sensor Hole
Identify the vehicle’s exact engine and determine how the original sensor seals. The same vehicle model can use different engines, and the correct plug or installation method can vary between engines. Use the factory service manual or reliable service information for the specific application.
Let the engine cool before working around the sensor port. Clean the area around the sensor before removal so dirt does not fall into the opening. Have a suitable drain pan available because some oil may escape when the sensor is removed.
If the sensor was removed because of an oil pressure warning, do not treat plugging the hole as a substitute for diagnosing the warning. A low oil pressure condition can indicate inadequate oil level, a faulty sensor, a wiring problem, a restricted pickup, a worn oil pump, or internal engine wear.
Source: rsxtrix.com
Confirm the thread
Identify the thread specification from the service information or the original fitting. Do not determine thread size by forcing a candidate plug into the port.
Confirm the seal
Determine whether the original component uses thread sealant, an O-ring, a sealing washer, or another method.
Confirm the installation specification
Use the vehicle-specific torque or installation procedure rather than a generic torque value.
Protect the oil passage
Keep dirt, metal chips, pieces of old sealant, and excessive thread compound away from the opening.
Tools and Materials
The basic equipment normally includes the correct pressure-rated threaded plug or fitting, the manufacturer-specified sealant if one is required, a suitable wrench or socket, cleaning supplies, and a drain pan. A torque wrench is useful when the service procedure provides a torque specification.
Do not select a plug solely because its outside diameter looks correct. Thread pitch, thread form, sealing method, material, and engagement length all matter.
Correct plug
Use a plug specifically compatible with the port’s thread and sealing arrangement.
Specified sealant
Use the sealant identified by the manufacturer when the application calls for one.
Cleaning supplies
Use clean materials to remove oil and debris from the outside of the port and plug.
Torque wrench
Use one when the service information provides a torque specification.
How to Plug an Oil Pressure Sensor Hole
The safest general method is to remove the sensor, identify the correct replacement plug, clean the port, apply only the specified sealing material, install the plug without cross-threading it, and inspect the finished repair. The exact plug type and torque must come from the vehicle-specific service information.
Some service manuals explicitly instruct technicians to plug an oil pressure sender opening when the sender will remain removed. Other engines use a special fitting or a sealing washer instead. That difference is why the original sensor and its sealing arrangement should be identified before purchasing a replacement plug.
Source: safetywish.com
1. Park and cool the vehicle
Park on a stable surface, switch the engine off, allow hot components to cool, and follow the vehicle’s safety procedure before accessing the sensor.
2. Clean the sensor area
Remove dirt and loose debris from around the sensor and port before disconnecting the sensor.
3. Disconnect the electrical connector
Release the connector using its locking mechanism instead of pulling on the wiring.
4. Remove the sensor
Use the correct sensor socket or wrench and remove the sensor carefully. Expect some oil to escape from the opening.
5. Inspect the port
Check the threads and sealing surface for damage, contamination, or remaining sealant. Stop if the port is cracked or the threads are damaged.
6. Prepare the plug
Confirm that the plug matches the port. Apply only the manufacturer-approved sealant and keep it away from the opening of the oil passage.
7. Install the plug by hand
Start the plug by hand to confirm that the threads engage smoothly. If it binds immediately, remove it and recheck the thread specification.
8. Tighten to specification
Use the specified torque or installation procedure. Do not add extra tightening simply to stop a leak.
9. Clean the area
Remove spilled oil from around the completed repair so a later leak can be identified accurately.
10. Check for leaks
Start or operate the engine only when the applicable service procedure allows it, then inspect the plug and surrounding area for fresh oil.
Apply Thread Sealant Carefully
Thread sealant is application-specific. Manufacturer procedures show that some oil pressure sender threads require pipe sealant with PTFE or another specified compound. Other applications use a sealing washer or gasket. Using the wrong sealant, too much sealant, or sealant in the oil passage can create a new problem.
Apply only the amount and type specified for the plug or fitting. Do not coat the end of the plug that could project into an oil passage unless the manufacturer specifically requires that method.
Avoid excess sealant
Excess material can be displaced during installation and may enter an oil passage.
Do not assume PTFE tape is correct
A vehicle manufacturer may specify liquid pipe sealant or another sealing method instead.
Respect cure requirements
If the specified sealant requires a curing period before oil exposure or engine operation, follow that requirement.
Install Without Damaging the Port
Start the plug by hand and make sure it turns smoothly. Cross-threading an engine block or an aluminum fitting can cause expensive damage. If the plug does not engage correctly, stop rather than using a wrench to force it into position.
Do not substitute a longer plug without confirming the required depth. A plug that extends too far can interfere with an internal component or oil passage.
Check alignment
Keep the plug square with the port while starting the threads.
Avoid over-tightening
Excess torque can strip threads, crack a fitting, or damage an engine component.
Use the specified tool
Use the correct wrench, socket, or fitting tool described by the service procedure.
How to Know the Plug Is Installed Correctly
A successful repair leaves the plug fully seated according to the specified procedure, with no damaged threads, no visible oil leak, and no interference with nearby components. The surrounding area should remain clean after the engine has been operated under the conditions permitted by the service information.
A dry plug does not prove that the engine has normal oil pressure. If the original sensor was removed because of an oil pressure warning, the oil pressure problem still needs to be diagnosed separately.
Source: rsxtrix.com
No fresh oil
There should be no fresh oil appearing around the plug after the appropriate leak check.
Stable installation
The plug should remain securely installed without signs of movement or thread damage.
No abnormal oil-pressure symptoms
If an oil pressure warning remains or the engine shows signs of low oil pressure, stop operating the vehicle and investigate the underlying cause.
Common Mistakes When Plugging an Oil Pressure Sensor Hole
Most failures come from using the wrong plug, applying an unsuitable sealant, or tightening the plug without knowing the correct specification. These mistakes are avoidable when the port and sealing method are identified first.
A temporary plug should also not be treated as a permanent repair unless the vehicle manufacturer or the applicable repair procedure supports that configuration. If the sensor provides a required warning or engine-management signal, removing it can eliminate an important protection or diagnostic function.
Source: safetywish.com
Using a random bolt
A bolt may have the wrong thread, length, material, or sealing surface and may not safely seal an engine oil passage.
Forcing a mismatched plug
Resistance during hand installation can indicate incorrect threads or damaged threads. Forcing the plug can make the damage worse.
Using too much sealant
Excess sealant can enter the oil passage or interfere with the intended sealing surface.
Guessing the torque
Oil pressure fittings vary by engine and design. A generic torque number can be inappropriate.
Ignoring the original oil pressure problem
Plugging the port only seals the opening. It does not repair low oil pressure, a lubrication fault, or a damaged engine.
Running without a required sensor
If the sensor is needed for the vehicle’s warning system or engine control, permanently removing it can create a safety or drivability problem.
When You Should Stop and Get Professional Help
Stop the repair if the engine block threads are stripped, the port is cracked, the correct thread specification cannot be confirmed, or the replacement plug does not seat correctly. An oil gallery repair can require specialized tools or engine disassembly.
Professional diagnosis is also appropriate when an oil pressure warning remains, the engine produces abnormal mechanical noise, or oil pressure has not been verified with the correct test equipment. Sealing the sensor opening should never be used to conceal a possible lubrication-system failure.
Damaged threads
Do not continue tightening a plug into visibly damaged threads.
Cracked housing
A cracked fitting or engine component can continue leaking even with a properly selected plug.
Unknown specification
Obtain the exact service information before proceeding when the thread, sealant, or torque is uncertain.
What to Do If the Plug Still Leaks
If oil appears around the plug, shut the engine down when safe and identify the source before tightening anything further. A leak can come from damaged threads, an incorrect plug, the wrong sealing method, a damaged washer or O-ring, or an adjacent component.
Remove and inspect the plug only after the engine has cooled and the applicable service procedure permits removal. Clean the threads and sealing surface, then compare the parts and procedure with the exact engine specification. Do not repeatedly tighten the plug in an attempt to stop a leak.
If the threads are damaged, simply adding more sealant is not a reliable repair. The port may require thread restoration, a replacement fitting, or another manufacturer-approved repair.
Source: fridayparts.com
Leak from the threads
Verify the thread type and specified sealant, then inspect the threads for damage.
Leak from a washer or O-ring
Inspect the sealing component and replace it when the service procedure requires a new seal.
Leak from cracked metal
Do not rely on sealant to repair a cracked pressure port or fitting.
Oil pressure warning remains
Treat the warning as a separate diagnostic issue rather than assuming the plug caused or solved it.
Frequently Asked Questions
Q
Can I plug an oil pressure sensor hole with a bolt?
Only if the bolt is specifically suitable for the port and its sealing method. A random bolt can have the wrong thread, length, material, or sealing arrangement and may damage the engine or leak oil.
Q
What should I use to seal an oil pressure sensor plug?
Use the sealant specified for the exact engine and fitting. Some service procedures call for pipe sealant with PTFE, while other designs use a washer or O-ring instead. Do not assume that thread tape or liquid sealant is universally correct.
Q
Can I drive with the oil pressure sensor hole plugged?
Only when the vehicle manufacturer permits operation without the sensor and the port has been correctly sealed. If the sensor is required for the oil pressure warning system or engine management, driving without it can remove an important warning or control function.
Q
How tight should an oil pressure sensor hole plug be?
Use the vehicle-specific torque or installation procedure. There is no single safe torque value for every oil pressure port because thread sizes, materials, fittings, and sealing designs vary.
Q
What if the oil pressure sensor hole is stripped?
Do not force a replacement plug into stripped threads. The port may require a properly selected thread repair, replacement fitting, or another manufacturer-approved repair. Because the opening can connect to a pressurized oil passage, damaged threads deserve careful attention.
Q
Can I plug the hole temporarily while waiting for a new sensor?
A temporary plug can be appropriate when the service procedure permits the sensor to remain removed, but it must still be the correct pressure-rated plug and sealing arrangement. Replace the sensor promptly if the vehicle depends on it for an oil pressure warning or other required function.
✦ Wrapping Up
Conclusion
Learning how to plug an oil pressure sensor hole starts with identifying the exact port, thread, and sealing method. Use a properly matched plug, the specified sealant or gasket, and the manufacturer-approved installation procedure. Avoid generic bolts, excessive sealant, and guessed torque values.
After installation, inspect the repair for leaks and address any continuing oil pressure warning separately. If the port is damaged or the correct specification cannot be confirmed, professional repair is safer than forcing an uncertain plug into an engine oil passage.
💡 Key Takeaway
Before installing any plug, confirm the exact engine specification, thread type, sealing method, and torque procedure, then verify the finished repair for leaks.
Ethan Brooks is an automotive writer at Auto News 7, covering car news, vehicle maintenance, new model updates, recalls, and practical buying guides. He focuses on clear, useful information that helps drivers understand their vehicles and make better ownership decisions.
Learn how to unplug an oil pressure sensor safely, identify the electrical connector, release its locking tab, inspect the wiring, and avoid common mistakes.
Learn how to replace camshaft position sensor bank 1 with a clear step-by-step process, required tools, troubleshooting tips, and safety advice for DIY vehicle owners in the USA.
Learn how to check camshaft position sensor operation, wiring, voltage, and signal output. Follow this practical step-by-step guide to diagnose common camshaft sensor problems.
Learn how much to replace a camshaft position sensor in the United States, including parts, labor, DIY costs, symptoms, and factors that affect repair pricing.
Learn how to test a knock sensor Chevy vehicle using a scan tool, multimeter, and physical inspection. Follow this step-by-step guide to diagnose knock sensor problems accurately.