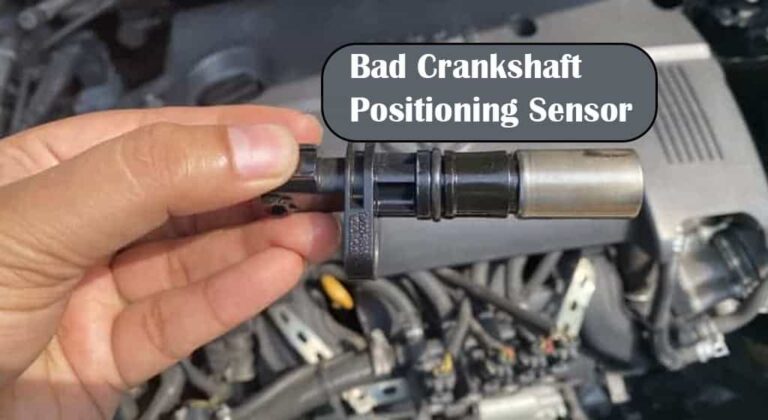
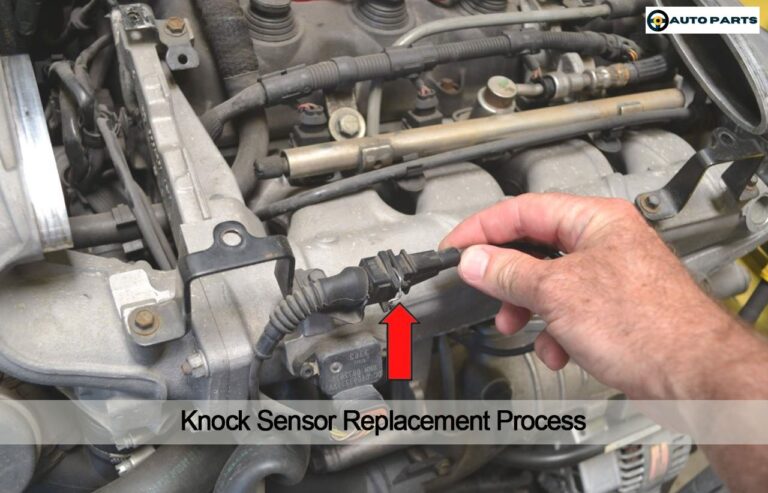
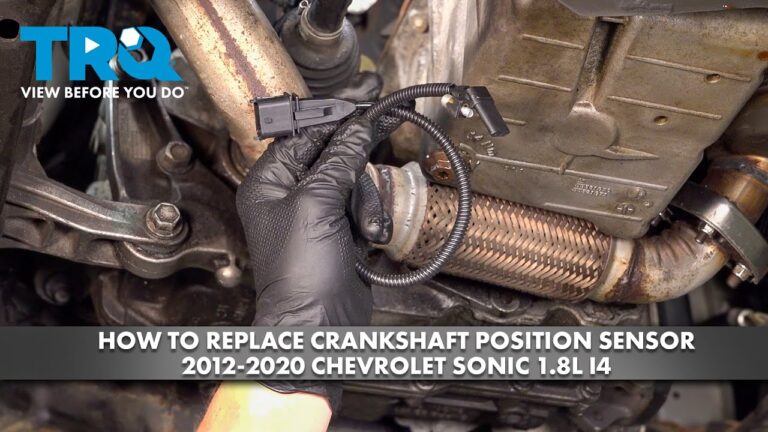
Turn the engine off, let it cool, locate the sensor connector, release its lock, and pull the connector straight off without pulling its wires.
For drivers and DIY mechanics in the United States, learning how to disconnect an oil pressure sensor starts with identifying the electrical connector rather than removing the sensor itself. Most oil pressure sensors and oil pressure switches use a wiring connector that can be disconnected for inspection, testing, or sensor replacement.
The exact connector design varies by vehicle, engine, and model year. Before working under the hood, park on a stable surface, switch the ignition off, allow hot engine components to cool, and follow the vehicle manufacturer’s service information when available. Never disconnect a sensor as a way to ignore a genuine low-oil-pressure warning.
Source: toolsweek.com
What Does Disconnecting an Oil Pressure Sensor Mean?
Disconnecting an oil pressure sensor normally means separating the electrical connector from the sensor. It does not mean unscrewing the sensor from the engine block, cylinder head, oil filter housing, or another mounting location.
The sensor measures or switches according to engine oil pressure and sends information to the vehicle’s control system, instrument cluster, or warning circuit. Removing its electrical connection interrupts that signal. The vehicle may then store a diagnostic trouble code, illuminate a warning light, or display another fault depending on the vehicle design.
Some vehicles use the term oil pressure switch rather than oil pressure sensor. The practical connector-removal process can be similar, but the component’s electrical function may differ.
Source: thecarhow.com
Electrical connector
This is the plug attached to the sensor. Disconnecting it separates the wiring harness from the sensor.
Oil pressure sensor or switch
This is the threaded or mounted component that detects or switches according to engine oil pressure.
Wiring harness
The harness carries electrical signals between the sensor and the vehicle’s electrical system. Pulling the wires can damage the terminals or harness.
Disconnecting the Connector Versus Removing the Sensor
If your goal is to inspect the wiring or replace the sensor, first disconnect the electrical connector. Sensor removal is a separate step that may allow engine oil to escape and may require the correct socket or wrench.
If you only need to disconnect the electrical connection, do not loosen the threaded sensor. Keeping these operations separate reduces the chance of unnecessary oil leakage or component damage.
What You Need Before Disconnecting the Sensor
You usually need only basic access and enough light to see the connector’s locking mechanism. Many oil pressure sensor connectors can be released by hand, but some are difficult to reach and may require a small suitable tool to move a secondary lock.
Check the vehicle-specific service information before starting. Connector designs vary, and forcing a locking tab can break a plastic connector that may be difficult to replace.
Source: storage.googleapis.com
Safety glasses
Wear eye protection when working around the engine compartment, especially if dirt or debris may fall from above.
Work light
Good lighting helps you identify the connector lock and prevents accidental pulling on nearby wires.
Vehicle service information
Use the correct component location and connector-release procedure for the specific year, make, model, and engine.
Small connector-release tool if required
Some connectors have secondary locks. Use only a suitable tool and avoid prying against fragile wiring or sensor terminals.
Safety Checks Before You Start
Park the vehicle securely, switch the ignition completely off, and keep the key or key fob away from the vehicle if the manufacturer’s procedure calls for it. Let the engine cool enough to avoid burns from the engine, exhaust components, or nearby metal surfaces.
If the connector is near a moving belt, fan, or other hazardous component, do not work in that area with the engine running. Never place your hands near moving engine components simply to locate or disconnect a sensor.
How to Disconnect an Oil Pressure Sensor Step by Step
The basic process is to locate the sensor, identify its electrical connector, release the connector lock, and pull the connector from the sensor body. Work slowly because the connector and wiring can be fragile, especially on an older vehicle.
Do not assume every connector releases in the same way. Some use a squeeze tab, while others have a sliding lock, secondary retainer, or another locking mechanism.
Source: YouTube > AutOdometer
1. Turn the vehicle off
Switch the ignition off and make sure the engine cannot start while your hands are in the engine compartment.
2. Allow the engine to cool
Give hot engine components enough time to cool before reaching around the oil pressure sensor.
3. Locate the oil pressure sensor
Use the vehicle’s service information to identify the correct sensor and avoid confusing it with another engine component.
4. Inspect the connector
Look for the connector’s release tab, secondary lock, or retaining mechanism before applying force.
5. Release the lock
Press, slide, or release the locking mechanism according to the connector design. Do not pry aggressively.
6. Pull the connector straight away
Grip the plastic connector body and gently pull it away from the sensor. Do not pull on the wires.
7. Inspect the connection
Check the connector and visible terminals for corrosion, oil contamination, broken plastic, bent contacts, or damaged wiring.
If the Connector Has a Locking Tab
A common connector design uses a plastic tab that must be depressed while the connector is pulled away from the sensor. Push the tab in the direction designed for release and use gentle pressure on the connector body.
If the connector does not move, stop rather than increasing force. Dirt, heat exposure, corrosion, or a secondary locking mechanism may be preventing release.
If the Connector Has a Secondary Lock
Some automotive connectors use a secondary retainer that prevents accidental disconnection. The retainer may need to slide or move to a service position before the main release tab works.
Do not remove a secondary lock completely unless the vehicle’s service procedure specifically requires it. A small plastic retainer can be easy to lose or break.
What to Do If the Oil Pressure Sensor Connector Will Not Disconnect
A connector that will not release usually needs closer inspection rather than more pulling force. First identify whether the connector has a squeeze tab, sliding lock, secondary retainer, or another release design.
If the connector is stuck because of dirt or age, clean around the outside of the connection without pushing debris into the terminals. Avoid damaging the wires or breaking the connector housing while trying to gain access.
Source: www.youtube.com > Auto Repair Guys
The tab will not move
Look for a secondary lock or confirm the direction in which the release tab is designed to move.
The connector is stuck to the sensor
Gently work the connector body while releasing the lock. Do not pull harder on the wiring.
The wiring moves instead of the connector
Stop immediately and change your grip to the connector housing. Pulling the harness can damage terminals or wiring.
The connector or terminals look damaged
Do not force the connection. Damaged terminals or a broken connector may require repair or replacement.
Signs You Should Stop
Stop if the plastic connector begins cracking, a terminal starts coming out with the connector, the wiring insulation stretches or tears, or you cannot determine how the locking mechanism works.
A broken connector can turn a simple inspection into an electrical repair. When the connector is inaccessible or badly damaged, a qualified technician can identify the connector design and repair the wiring correctly.
What Happens After You Disconnect the Oil Pressure Sensor?
Disconnecting the oil pressure sensor interrupts the electrical signal from the component. Depending on the vehicle, the instrument cluster may display an oil pressure warning, the check engine light may appear, or a diagnostic trouble code may be stored.
The result depends on the vehicle’s electrical design and the type of oil pressure device installed. Therefore, a disconnected connector should not be treated as a normal operating condition.
If you disconnected the sensor for replacement, reconnect the new or existing sensor according to the manufacturer’s procedure. If you disconnected it for diagnosis, complete the diagnostic test promptly and restore the connection when finished.
Source: namibian.com.na
Warning light appears
A warning after disconnection can be expected on some vehicles because the oil pressure circuit is no longer receiving its normal signal.
Diagnostic code is stored
Some vehicles detect an open or abnormal sensor circuit and record a diagnostic trouble code.
Engine behavior changes
Some vehicles may respond differently when a sensor signal is missing, while others may show only a warning or stored fault.
Oil pressure warning remains after reconnection
Do not assume the sensor is the only problem. Actual low oil pressure can be caused by lubrication, mechanical, electrical, or sensor-related faults.
Do Not Ignore a Genuine Low Oil Pressure Warning
An oil pressure warning can indicate a serious engine lubrication problem. If the warning remains illuminated with the engine running after the connector is correctly restored, follow the vehicle manufacturer’s instructions and avoid continuing to drive until the cause is identified.
A sensor problem and a real oil pressure problem can produce similar dashboard symptoms. Proper diagnosis may require checking oil level and condition, inspecting the wiring, scanning for diagnostic codes, and measuring actual oil pressure with appropriate equipment.
Common Mistakes When Disconnecting an Oil Pressure Sensor
Most problems occur when the connector is treated like a simple plug without first identifying its locking mechanism. Taking a few seconds to inspect the connector can prevent broken tabs, damaged terminals, and unnecessary wiring repairs.
The other major mistake is confusing electrical disconnection with sensor removal. If the task only requires disconnecting the wiring, there is no reason to loosen the threaded sensor.
Source: thecarhow.com
Pulling on the wires
Always grip the connector housing whenever possible. The wiring is not designed to serve as a handle.
Working on a hot engine
Hot engine and exhaust components can cause serious burns. Allow adequate cooling time before accessing the sensor.
Forcing the release tab
If a tab does not move as expected, identify the locking design instead of applying excessive force.
Removing the sensor unnecessarily
Disconnecting the connector does not require loosening the threaded sensor, so avoid creating an unnecessary oil leak.
Running the vehicle with the sensor disconnected
Do not leave the sensor disconnected during normal operation unless a vehicle-specific diagnostic procedure explicitly requires it.
When Professional Help Makes Sense
Professional assistance is appropriate when the connector is badly damaged, the sensor is difficult to access, wiring has been pulled from its terminal, or the oil pressure warning remains after the connection is restored.
A technician can also perform an electrical diagnosis or measure actual engine oil pressure when the dashboard warning does not match the expected sensor behavior.
Frequently Asked Questions
Q
Can I disconnect an oil pressure sensor with the engine running?
You should normally switch the engine and ignition off before disconnecting the oil pressure sensor connector. Working around a running engine introduces moving parts, hot components, and unnecessary electrical and mechanical risks.
If a manufacturer-specific diagnostic procedure requires the engine to run while testing the circuit, follow that procedure and keep hands, clothing, and tools away from moving components.
Q
Do I need to disconnect the battery before unplugging an oil pressure sensor?
Battery disconnection is not universally required just to unplug an oil pressure sensor connector, but the vehicle’s service procedure takes priority. Disconnecting the negative battery cable may be appropriate for some repairs, especially when there is a risk of shorting electrical terminals.
If you disconnect the battery, consider the vehicle’s requirements for radio settings, electronic modules, anti-theft systems, and relearn procedures before doing so.
Q
How do I know if I am pulling the correct connector?
Confirm the sensor location using the vehicle’s service information and trace the connector directly to the oil pressure sensor. Do not identify a component only by its appearance because several engine sensors can be located close together.
The connector should attach directly to the sensor or switch. If you are unsure, stop and verify the component before disconnecting anything.
Q
Why will my oil pressure sensor connector not come off?
The connector may have a locking tab, secondary retainer, dirt buildup, heat damage, or corrosion. Inspect the connector closely and determine how its locking mechanism releases before applying additional force.
Never use the wiring harness as leverage. If the connector housing begins to crack or the terminals start moving, stop and obtain the correct service procedure or professional assistance.
Q
Can disconnecting the oil pressure sensor damage the engine?
Simply unplugging the electrical connector with the vehicle off does not normally cause mechanical damage to the engine. However, operating the vehicle with the sensor disconnected can disable or alter oil pressure monitoring and may trigger warning lights or fault codes.
If the vehicle has a genuine low oil pressure condition, continuing to run the engine can cause serious damage. Treat an oil pressure warning as a diagnostic issue rather than simply disconnecting the sensor.
Q
Is disconnecting the sensor the same as removing it?
No. Disconnecting the sensor means unplugging its electrical connector. Removing the sensor means physically unscrewing or detaching the component from the engine or another mounting point.
If your task is only electrical diagnosis or connector inspection, you generally do not need to remove the sensor itself.
✦ Wrapping Up
Conclusion
Learning how to disconnect an oil pressure sensor is mainly a matter of identifying the correct component, understanding its connector lock, and separating the connector without damaging the wiring. Turn the vehicle off, allow hot components to cool, and use the correct vehicle-specific procedure before reaching into the engine compartment.
After disconnection, inspect the connector and wiring for damage or contamination. If you are replacing the sensor, reconnect the wiring correctly after installation. If an oil pressure warning remains, diagnose the underlying problem rather than leaving the sensor disconnected.
💡 Key Takeaway
For a safe disconnection, grip the connector housing, release its locking mechanism, and pull it straight from the oil pressure sensor without pulling the wires or loosening the sensor itself.
Ethan Brooks is an automotive writer at Auto News 7, covering car news, vehicle maintenance, new model updates, recalls, and practical buying guides. He focuses on clear, useful information that helps drivers understand their vehicles and make better ownership decisions.
Learn what causes a knock sensor to go bad, the most common failure reasons, warning signs, diagnostic tips, and how to prevent expensive engine problems.
Learn what are symptoms of a bad crankshaft position sensor, including hard starting, stalling, misfires, poor acceleration, and check engine light warnings.
Learn how long to replace a crankshaft position sensor, what affects repair time, the typical replacement steps, and when professional service is needed.
Can a crankshaft position sensor cause loss of power? Learn how a failing CKP sensor affects engine performance, common symptoms, diagnosis, and repair.