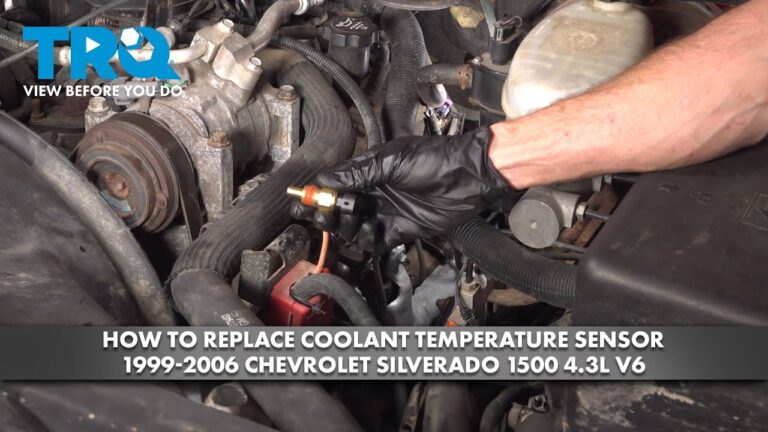
To replace the coolant temperature sensor on a Chevy Malibu, work only on a completely cool engine, relieve cooling-system pressure, disconnect the sensor connector, remove the old sensor from its mounting point, install the correct replacement with the required seal or sealing method, reconnect the wiring, restore the coolant level, and check for leaks and normal temperature readings.
For Chevrolet Malibu owners in the United States, coolant temperature sensor replacement is a practical repair when the engine temperature reading, cooling-fan operation, fuel control, or diagnostic system indicates an ECT sensor problem. The exact sensor location and removal method vary by Malibu model year and engine, so the vehicle’s engine configuration should be confirmed before starting.
GM service information for Malibu applications shows that the ECT sensor may be installed in or around the thermostat housing or coolant outlet, while some versions place it in a less accessible area of the engine. For example, service information for the 2008-2012 2.4L Malibu identifies the sensor near the rear of the engine, while 2013 Malibu configurations use different coolant-system layouts. This means a procedure copied from one Malibu year should not automatically be applied to another.
The safest approach is to diagnose the sensor and its wiring before replacing the part. A temperature-gauge problem, check-engine light, overheating complaint, or code such as P0117 or P0118 does not by itself prove that the sensor is defective. Wiring, connectors, coolant level, thermostat problems, or other cooling-system faults can produce similar symptoms.
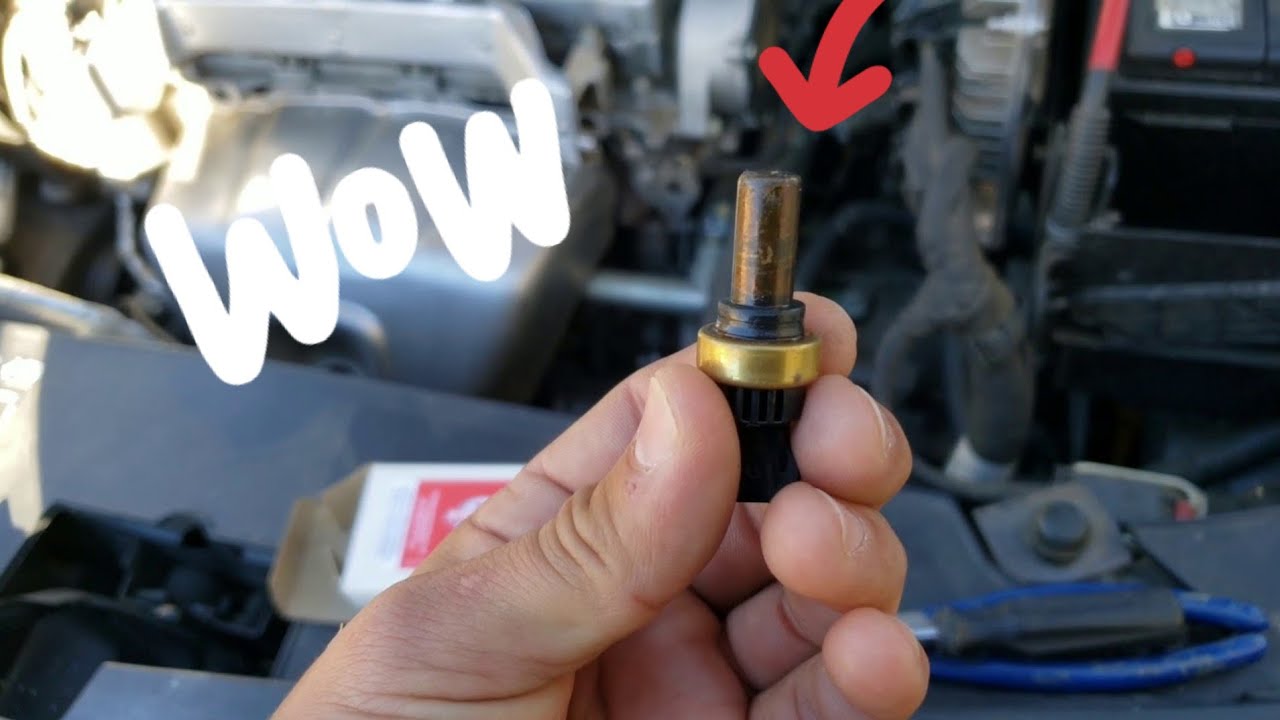
Source: www.youtube.com > Naveed CarFix
What Does the Coolant Temperature Sensor Do on a Chevy Malibu?
The engine coolant temperature sensor, commonly called the ECT sensor, measures coolant temperature and sends an electrical signal to the engine control system. That information helps the vehicle determine operating temperature and make decisions involving fuel control, ignition strategy, emissions operation, and cooling-system management.
A malfunctioning sensor can cause an inaccurate temperature reading or an incorrect temperature signal to the engine computer. Depending on the fault, the Malibu may set a diagnostic trouble code, operate the cooling fans differently, run poorly, consume more fuel, or display an abnormal temperature indication.
The sensor should not be confused with every temperature-related component on the vehicle. Some Malibu configurations have more than one coolant-temperature-related sensor or temperature sensing location, and the exact arrangement depends on the model year and engine.
Source: hitchesguide.com
ECT sensor
The primary engine coolant temperature sensor reports coolant temperature to the vehicle’s electronic control system.
Thermostat
The thermostat regulates coolant flow as the engine reaches operating temperature. A bad thermostat can create temperature symptoms that resemble a sensor problem.
Cooling fans
The cooling-fan system uses temperature and control-system information to help manage engine temperature. Fan problems can exist independently of the ECT sensor.
Symptoms of a Faulty ECT Sensor
Common clues include an inaccurate temperature reading, a check-engine light, difficult starting, abnormal engine operation, cooling-fan behavior that does not match engine temperature, or diagnostic trouble codes related to the ECT circuit. These symptoms are clues rather than proof of sensor failure.
P0117
This code generally indicates an engine coolant temperature sensor circuit low condition and should be diagnosed at the sensor, connector, wiring, and control-system level.
P0118
This code generally indicates an engine coolant temperature sensor circuit high condition. A sensor, wiring fault, connector problem, or related circuit issue can cause it.
Temperature gauge problem
A gauge that stays unusually cold or behaves abnormally can be associated with temperature-sensing faults, but the gauge symptom alone does not identify the failed component.
Before Replacing the Chevy Malibu Coolant Temperature Sensor
Verify the Malibu’s model year, engine size, and VIN-specific application before purchasing the sensor. Malibu engines and cooling-system layouts changed over the years, so the correct part and access procedure are not universal.
Park the vehicle on a level surface, switch the ignition off, and allow the engine and cooling system to cool completely. The cooling system can remain pressurized after driving, and opening it while hot can release scalding coolant and steam.
Gather the replacement sensor, the required socket or wrench, basic hand tools, a drain pan, suitable coolant for the vehicle, shop towels, and safety equipment. Depending on the Malibu configuration, access may require removal of an intake component, battery tray, reservoir, or other parts.
Source: storage.googleapis.com
Confirm the replacement part
Match the sensor to the exact Malibu year and engine. Connector design, sensor dimensions, sealing arrangement, and application can differ.
Work on a cold engine
Do not begin sensor removal while the engine or coolant is hot. The owner’s manual warns that the coolant surge-tank pressure cap should only be removed after the cooling system is no longer hot.
Protect against coolant loss
Place a drain pan beneath the work area and follow the vehicle-specific draining procedure. Some repairs require only partial draining, while other sensor locations may require more extensive coolant removal.
Tools and Supplies
The required tools vary by Malibu engine. A deep socket or suitable sensor socket may be needed for a threaded sensor, while another engine may use a retaining clip or a different mounting arrangement. Do not force a tool onto the sensor or connector because damaged components can turn a straightforward repair into a larger job.
Basic hand tools
Use the socket, ratchet, extensions, and screwdrivers appropriate for the specific engine and access components.
Drain pan
Catch coolant that escapes when the sensor or related coolant component is removed.
Replacement seal
Use a new O-ring, gasket, or sealing arrangement when required by the sensor design and service procedure.
Correct coolant
Use coolant that meets the specification for the particular Malibu rather than choosing coolant solely by color.
How to Replace the Coolant Temperature Sensor on a Chevy Malibu
The general replacement sequence is straightforward, but the access procedure depends on the Malibu’s year and engine. The following steps describe the safe workflow rather than assuming that every Malibu uses the same sensor location.
GM service information for several Malibu applications follows the same basic pattern: make the cooling system safe, disconnect the ECT electrical connector, remove the sensor, install the correct replacement, reconnect the connector, and refill or restore the cooling system as required.
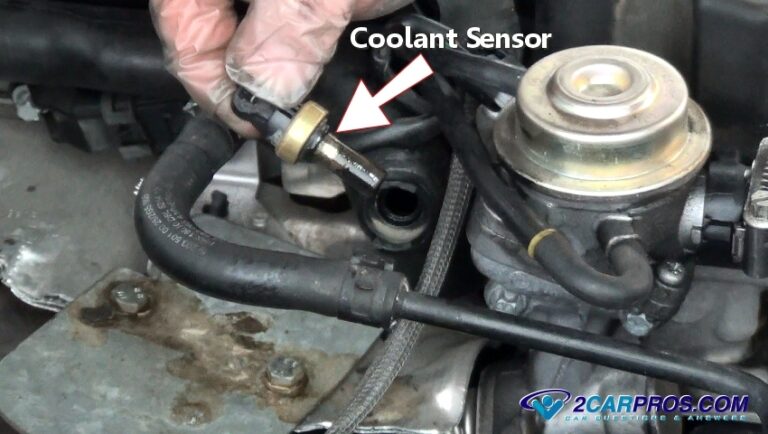
Source: 2CarPros
1. Let the engine cool completely
Wait until the engine and coolant are cold. Never remove a pressurized coolant component on a hot engine.
2. Relieve cooling-system pressure
With the engine fully cold, carefully remove the coolant surge-tank or radiator pressure cap as applicable. Stop if pressure or heat remains.
3. Identify the ECT sensor
Locate the sensor using the correct service information for the Malibu’s engine. On some 2008-2012 2.4L models, the sensor is located toward the rear of the engine; other generations use different locations.
4. Remove components blocking access
Move or remove only the components necessary to reach the sensor. Keep track of fasteners and connectors so everything can be restored correctly.
5. Disconnect the electrical connector
Release the connector lock and pull the connector from the sensor without pulling on the wires. Inspect the terminals for corrosion, looseness, coolant contamination, or damage.
6. Remove the old sensor
For a threaded sensor, use the correct socket or wrench and turn it out carefully. If the application uses a retaining clip or another mounting method, follow that vehicle-specific procedure instead.
7. Compare the replacement sensor
Before installation, compare the new sensor with the old one for connector shape, mounting method, sealing arrangement, and overall application.
8. Install the new sensor
Install the correct seal or O-ring where required. Threaded sensors should be tightened to the specification for that exact engine. Do not guess at torque or add sealant unless the service procedure specifies it.
9. Reconnect the electrical connector
Push the connector into place until it locks securely. Route the wiring as originally installed so it does not contact hot or moving components.
10. Restore the cooling system
Replace lost coolant with the correct mixture and follow the Malibu-specific bleeding or filling procedure. Some engines require a defined air-purging process.
11. Inspect for leaks
Before considering the repair complete, check the sensor area and nearby coolant connections for leakage.
12. Verify operation
Start the engine and monitor coolant temperature, warning indicators, coolant level, and the repaired area. Allow the engine to reach normal operating temperature while remaining alert for overheating or leaks.
Why the Procedure Varies by Malibu Engine
A major source of confusion in online Malibu repair guides is that the same model name covers multiple engine and cooling-system configurations. For example, service information for the 2012 2.4L Malibu places the ECT sensor at the thermostat housing, while 2013 Malibu 2.5L service information integrates the sensor with the thermostat-housing area and specifies a particular installation torque. A 2013 2.0L configuration uses a different water-outlet arrangement.
For that reason, do not use a 2011, 2012, or 2013 procedure simply because the vehicle is also called a Malibu. Confirm the engine before applying a location, torque value, coolant procedure, or access instruction.
2008-2012 2.4L example
Service information identifies the ECT sensor at the thermostat housing, and component-location information places it toward the left rear area of the engine.
2013 2.5L example
The ECT sensor is associated with the thermostat housing. GM-derived service information specifies 20 N·m, or 15 lb-ft, for the sensor on this configuration.
Other engines
V6, turbocharged, and other Malibu applications can use different sensor locations and access procedures. Treat the exact engine as the deciding factor.
How to Refill and Check the Cooling System After Sensor Replacement
Replacing the sensor can allow coolant to escape, so the cooling system must be restored correctly. An incorrect coolant level or trapped air can create new temperature problems even when the sensor replacement itself is correct.
Chevrolet’s 2013 Malibu owner’s manual instructs owners to remove the pressure cap only after the cooling system is no longer hot. The manual also describes filling the surge tank to the specified mark, running the engine until the upper radiator hose becomes hot, watching the coolant level, adding the proper coolant mixture as necessary, and securely reinstalling the cap. The exact filling procedure should be matched to the specific Malibu engine.
Source: hitchesguide.com
Check the coolant level cold
Use the appropriate cold-fill reference for the vehicle rather than filling based on guesswork.
Use the specified coolant
Follow the vehicle’s coolant specification and recommended mixture. Do not assume that every universal coolant is appropriate for every Malibu.
Purge air as specified
If the engine-specific procedure calls for air bleeding or a particular warm-up sequence, complete it before normal driving.
Recheck after cooling
After the engine cools again, inspect the level and the sensor area for signs of leakage.
Signs the Repair Was Successful
A successful repair should produce a stable, plausible coolant-temperature reading as the engine warms. The original ECT-related fault should not immediately return, and there should be no coolant leakage around the sensor. The cooling system should also maintain the correct coolant level after the vehicle has cooled completely.
Normal temperature response
The temperature reading should change logically as the cold engine warms rather than remaining fixed at an implausible value.
No coolant leak
The sensor, seal, housing, and nearby connections should remain dry after the system reaches operating temperature.
No immediate warning
The check-engine light or temperature warning should not return because of the same unresolved fault.
What to Do If the New Coolant Temperature Sensor Does Not Fix the Problem
If the same symptom or diagnostic code remains after sensor replacement, do not immediately install another sensor. The next step is to determine whether the problem is in the electrical circuit, connector, coolant system, thermostat, or another component.
An ECT trouble code identifies a circuit or temperature-signal condition; it does not automatically identify the sensor as the failed part. This distinction is particularly important when a replacement sensor produces exactly the same fault.
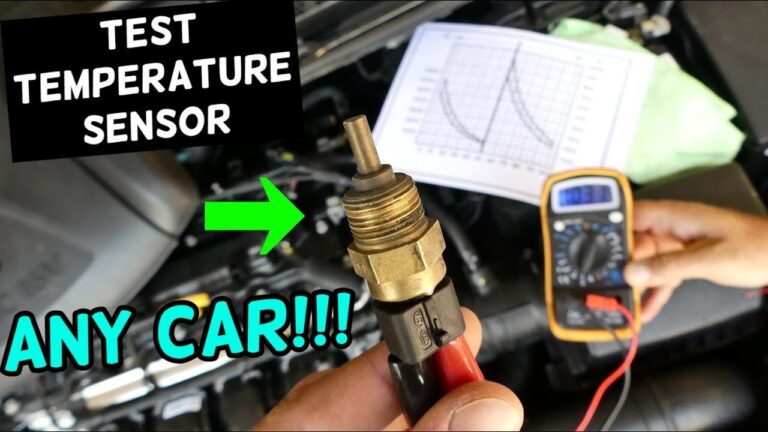
Source: YouTube > Michael Reuter
Inspect the connector
Look for bent, pushed-back, corroded, contaminated, or loose terminals. A poor connection can produce an intermittent or incorrect temperature signal.
Inspect the wiring
Check for broken insulation, damaged conductors, rubbing, heat damage, or wiring that has been stretched near the sensor.
Check the coolant level
A low coolant level can affect temperature behavior and may indicate a separate leak that needs attention.
Evaluate the thermostat
If the engine warms too slowly, runs too hot, or shows inconsistent temperature behavior, the thermostat and cooling system may need separate diagnosis.
Use scan-tool data
Live coolant-temperature data can help determine whether the engine computer is receiving a plausible temperature signal. Compare the reading with actual engine conditions rather than relying only on the stored code.
When You Should Stop and Get Professional Help
Stop the repair if the sensor is seized, the mounting threads are damaged, the connector is badly corroded, coolant is leaking from a housing, or the engine begins overheating. A broken sensor or damaged thermostat housing can require additional repairs that are safer to handle with vehicle-specific service information and appropriate equipment.
If the Malibu continues to overheat, do not keep driving it simply because a new sensor has been installed. An overheating engine can suffer serious damage even when the original temperature-sensor fault has been corrected.
Persistent overheating
Treat overheating as a cooling-system problem requiring diagnosis rather than assuming the sensor is responsible.
Damaged threads or housing
Avoid forcing the sensor into damaged threads or a cracked housing because the resulting coolant leak can become severe.
Electrical diagnosis beyond basic inspection
If the connector and wiring require circuit testing at the control module, use the wiring diagram and test specifications for the exact Malibu configuration or have a qualified technician perform the diagnosis.
Common Mistakes When Replacing a Chevy Malibu ECT Sensor
Most avoidable problems come from applying the wrong model-year procedure, working on a hot cooling system, using an incorrect sensor, or failing to inspect the electrical connector. Taking a few minutes to verify the application and procedure can prevent repeated repairs.
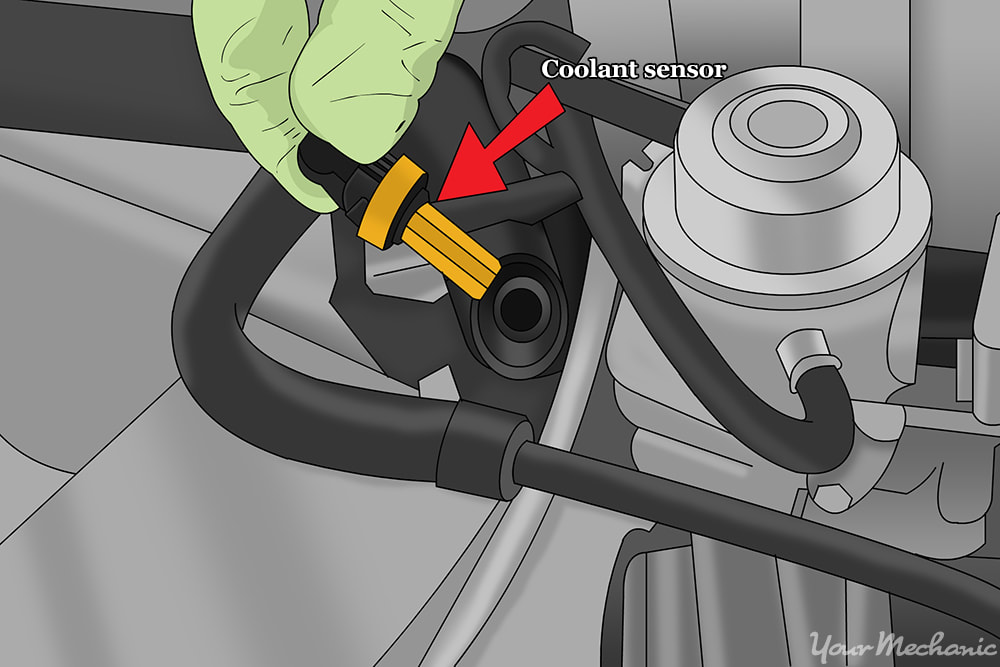
Source: YourMechanic
Replacing the sensor without confirming the engine
Different Malibu engines can use different locations, mounting arrangements, and service procedures.
Opening the cooling system while hot
Hot coolant can be under significant pressure and can cause severe burns. Always allow the system to cool completely.
Guessing the torque
Overtightening can damage a sensor, housing, or threads, while insufficient tightening can cause a coolant leak. Use the specification for the exact engine.
Adding unnecessary thread sealant
Some sensors are supplied with the required sealing treatment or use a separate O-ring. Additional sealant can interfere with installation when the service procedure does not call for it.
Ignoring the connector
A damaged connector or wiring fault can make a new sensor appear defective.
Skipping the coolant check
A sensor repair does not correct an underlying coolant leak, low coolant condition, thermostat fault, or cooling-fan problem.
A Simple Decision Check Before Buying Another Sensor
If the Malibu has an ECT-related fault, first confirm the exact code and engine. Then inspect coolant level, sensor wiring, connector condition, and sensor live data where available. Replace the sensor when the evidence points to the sensor itself rather than treating the diagnostic code as automatic proof of sensor failure.
Code plus damaged sensor
Sensor replacement is reasonable when the sensor is physically damaged or testing identifies the sensor as defective.
Code plus damaged wiring
Repair the wiring or connector before condemning the sensor.
Code returns immediately after replacement
Investigate the connector, wiring, reference or signal circuit, and control-system diagnosis rather than repeatedly replacing sensors.
Frequently Asked Questions
Q
Where is the coolant temperature sensor on a Chevy Malibu?
The location depends on the Malibu’s model year and engine. On several 2008-2012 2.4L applications, the ECT sensor is located toward the rear of the engine near the thermostat housing. Later Malibu engines can use different coolant outlets or thermostat-housing arrangements. Confirm the engine before following a location guide.
Q
Can I replace the Malibu coolant temperature sensor without draining all the coolant?
Sometimes only part of the coolant needs to be drained, depending on the sensor location and mounting design. GM service procedures for some Malibu applications call for draining the cooling system before sensor removal, while practical access may allow less coolant loss on other configurations. Follow the procedure for the exact engine rather than assuming a full or partial drain is always appropriate.
Q
How do I know if my Chevy Malibu coolant temperature sensor is bad?
Possible signs include an implausible temperature reading, check-engine codes such as P0117 or P0118, abnormal cooling-fan behavior, hard starting, or unusual engine operation. However, these symptoms can also result from wiring, connector, thermostat, coolant-level, or other cooling-system problems. Testing the circuit and comparing scan-tool temperature data with actual engine conditions provides stronger evidence than symptoms alone.
Q
Do I need to reset the computer after replacing the ECT sensor?
A separate manual reset is not necessarily required simply because the sensor was replaced. If a diagnostic trouble code remains stored, use an appropriate scan tool according to the vehicle’s diagnostic procedure. Clearing a code without correcting the underlying problem does not constitute a repair.
Q
What should I do if my Malibu overheats after replacing the sensor?
Stop driving the vehicle and allow it to cool safely. Check the coolant level and inspect for leaks only after the system is cool. If overheating continues, the problem may involve the thermostat, cooling fans, water pump, radiator, trapped air, low coolant, or another cooling-system fault. Do not assume the new temperature sensor is the only component involved.
✦ Wrapping Up
Conclusion
Replacing a coolant temperature sensor on a Chevy Malibu is generally a manageable repair when the correct model-year and engine-specific procedure is followed. The essential sequence is to work on a cold engine, safely relieve cooling-system pressure, access the correct ECT sensor, disconnect the wiring, install the correct replacement and seal, restore the coolant, and verify the system afterward.
The most important qualification is that Malibu cooling systems are not identical across all years and engines. Sensor locations, access requirements, mounting methods, torque specifications, coolant procedures, and related components can change. Use the exact vehicle configuration when confirming the part and service specifications.
If the original code or symptom returns after replacement, diagnose the connector, wiring, coolant system, thermostat, and related circuits before installing another sensor. A methodical diagnosis is more reliable than replacing parts based only on a trouble code.
💡 Key Takeaway
Before starting the repair, identify your Chevy Malibu model year and engine, confirm the exact ECT sensor application and service procedure, and only begin work after the engine and cooling system are completely cold.
Ethan Brooks is an automotive writer at Auto News 7, covering car news, vehicle maintenance, new model updates, recalls, and practical buying guides. He focuses on clear, useful information that helps drivers understand their vehicles and make better ownership decisions.
Learn how to test a Ford coolant temperature sensor with a multimeter and scan tool. Check resistance, voltage, wiring, sensor response, and common faults safely.
Learn how to test a coolant temperature sensor with a multimeter or scan tool. Follow safe steps to check resistance, voltage, wiring, and sensor accuracy.
Learn how to check a 2002 Toyota Camry coolant temperature sensor with a multimeter, including resistance specifications for the 2.4L 2AZ-FE and 3.0L 1MZ-FE engines.
Learn how to replace a coolant temperature sensor safely, including tools, sensor removal, installation, coolant refill, bleeding, testing, and common mistakes.
Learn how to reset a coolant temperature sensor on a Chevy Silverado, clear related trouble codes, verify sensor operation, and avoid common diagnostic mistakes.